Deploying a Centralized Logging System on a VPS: Fluent Bit, OpenSearch, and OpenSearch Dashboards
TL;DR
In this guide, we will set up a complete centralized log aggregation and analysis system based on the combination of Fluent Bit, OpenSearch, and OpenSearch Dashboards on your VPS. You will learn how to collect logs from various sources using Fluent Bit, store them centrally in a scalable OpenSearch cluster, and visualize and analyze data through the user-friendly OpenSearch Dashboards web interface, ensuring full control over events on your server and applications.
- Configuring Fluent Bit for log collection and forwarding.
- Deploying OpenSearch and OpenSearch Dashboards using Docker Compose.
- Ensuring secure access to Dashboards via HTTPS using Caddy.
- Configuration examples for collecting Nginx logs and system logs.
- Recommendations for backup and maintenance of the logging system.
- Step-by-step instructions for creating a reliable and high-performance monitoring platform.
What We Configure and Why
As the complexity of modern IT systems grows, the volume of generated logs increases exponentially. Every service, application, operating system, and network device produces its own event logs. Manually reviewing these logs across multiple servers becomes inefficient, and often impossible. A centralized logging system solves this problem by collecting all logs in one place for easy searching, analysis, and monitoring.
We will deploy a stack consisting of three key components:
- Fluent Bit: A lightweight and high-performance processor for logs, metrics, and traces. It will be installed on the server (or multiple servers) where logs are generated and will be responsible for their collection, filtering, transformation, and forwarding to a central repository. Fluent Bit is known for its low resource consumption, making it ideal for use on a VPS or in containerized environments.
- OpenSearch: A fork of Elasticsearch, representing a distributed, scalable search and analytics DBMS, optimized for working with large volumes of data, such as logs. OpenSearch provides fast indexing and searching, data aggregation, and storage of historical records.
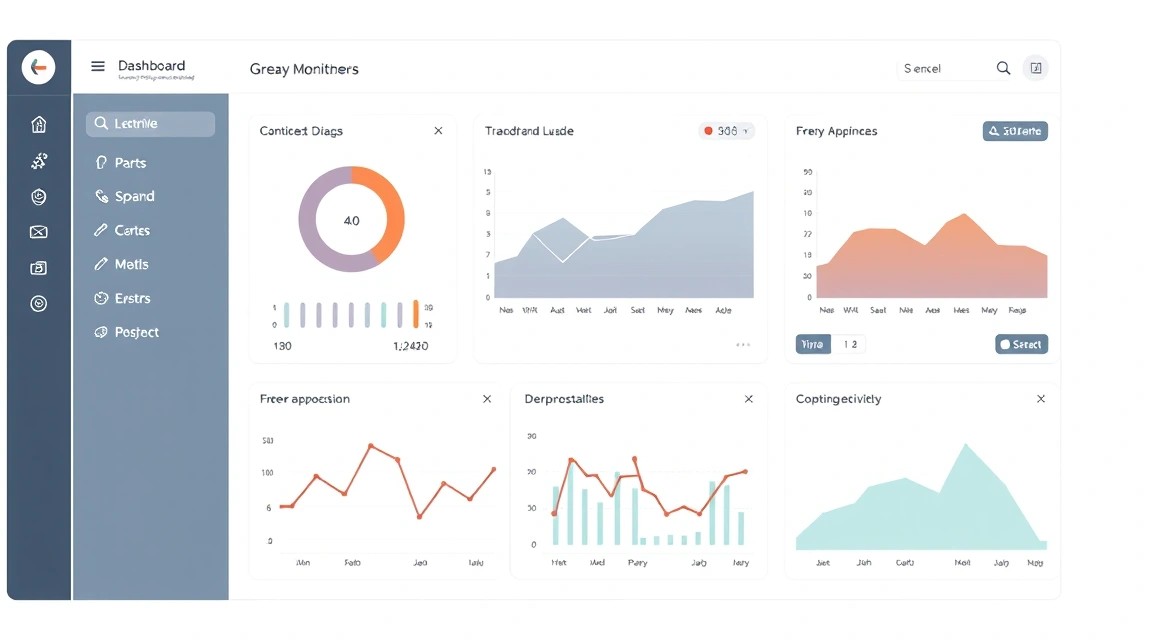
- OpenSearch Dashboards: A web interface for OpenSearch, allowing you to visualize data, create dashboards, perform interactive searches, and analyze logs without direct interaction with the OpenSearch API. This is the primary tool for operators and developers.
Ultimately, you will get a powerful, flexible, and cost-effective system for complete control over events in your infrastructure. You will be able to quickly find the causes of errors, monitor application performance, track unauthorized access attempts, and much more, having all data readily available in a convenient format.
Alternatives: Cloud-managed vs Self-hosted
There are two main approaches to implementing logging systems:
- Cloud-managed solutions: Services such as AWS CloudWatch, Google Cloud Logging, Azure Monitor, Datadog, Splunk Cloud, Logz.io, and others. They offer fully managed platforms, relieving you of the concerns of deploying, scaling, and maintaining the infrastructure. Advantages include ease of use, high availability, and powerful out-of-the-box features. Disadvantages include high cost, especially with large log volumes, and potential vendor lock-in to a specific cloud provider.
- Self-hosted solutions on a VPS/dedicated server: This is the approach we implement in this guide. You independently install and manage all components on your own or a rented server. Advantages include full control over data, significantly lower operating costs (especially for medium and large volumes), the ability to fine-tune for specific needs, and no vendor lock-in. Disadvantages include the need for technical knowledge for deployment and maintenance, as well as responsibility for ensuring the reliability and scalability of the system.
Choosing a self-hosted solution on a VPS is ideal for VPS/dedicated server owners, startups, developers, and companies looking to save on cloud expenses while maintaining flexibility and control. For log volumes up to several tens of gigabytes per day, this approach proves to be the most economically viable and allows for efficient use of server resources.
What VPS Configuration is Needed for This Task
VPS requirements for a centralized logging system heavily depend on the volume of generated logs, their ingestion frequency, and the data retention period. For initial deployment and moderate loads (up to 10-20 GB of logs per day), you can aim for the following parameters:
Minimum Requirements
- CPU: 2 cores. OpenSearch is quite CPU-intensive for indexing and query execution.
- RAM: 8 GB. OpenSearch actively uses RAM for caching indices and buffers. Less than 8 GB can lead to low performance and frequent crashes.
- Disk: 100-200 GB SSD. SSD is critically important for OpenSearch performance, as I/O operations (reading/writing logs) are very intensive. Disk space should be sufficient to store logs for the desired period. With 10 GB of logs per day, 200 GB will last for ~20 days.
- Network: 100 Mbps. For log transmission and Dashboards access.
Recommended VPS Plan for Initial Deployment
For more comfortable operation and future scalability, as well as for storing logs for a longer period, the following configuration is recommended:
- CPU: 4 cores.
- RAM: 16 GB.
- Disk: 500 GB NVMe SSD. NVMe will provide significantly higher read/write speeds compared to a regular SSD, which is critically important for OpenSearch.
- Network: 1 Gbps.
For renting a VPS with such characteristics, you can consider a VPS with the specified characteristics, offering flexible tariffs and high performance.
When a Dedicated Server is Needed, Not a VPS
A dedicated server becomes necessary when log volumes exceed the capabilities of a single powerful VPS, or when maximum performance and resource isolation are required. This is relevant for scenarios where:
- Log volume amounts to hundreds of gigabytes or terabytes per day.
- Long-term log storage (months, years) with fast access is required.
- An OpenSearch cluster with multiple nodes is needed to ensure high availability and load distribution.
- Specific hardware configurations are important (e.g., very fast NVMe RAID arrays, large amounts of RAM).
In such cases, renting a suitable dedicated server with customizable configuration options will be more justified.
Location: What It Affects
The choice of VPS or dedicated server location affects several factors:
- Latency: The closer the server is to the log sources (your applications) and OpenSearch Dashboards users, the lower the latency for data transmission and interface operation. For critically important systems, choose locations as close as possible to your main servers.
- Legislation: Different countries have different data retention laws. Ensure that the chosen location complies with privacy and regulatory requirements, if applicable to your data.
- Cost: Server prices may vary slightly across different regions.
The optimal approach is to place the logging system in the same data center or region where the main servers generating logs are located.
Server Preparation
Server Preparation
Before installing the main components, you need to perform basic security configuration and install the necessary utilities. We will use Ubuntu Server 24.04 LTS as the base.
1. SSH Connection and User Creation
Connect to your VPS as the root user (if this is the only access) and create a new user with sudo privileges. Replace youruser with your desired username.
ssh root@your_vps_ip # Connect to the server
adduser youruser # Create a new user
usermod -aG sudo youruser # Add user to sudo group
Exit the root session and log in as the new user:
exit # Exit root session
ssh youruser@your_vps_ip # Log in as the new user
2. System Update
Always start by updating the package database and installed packages.
sudo apt update # Update package list
sudo apt upgrade -y # Upgrade all installed packages
sudo apt autoremove -y # Remove unnecessary dependencies
3. SSH Key Configuration (Recommended)
For enhanced security, it is recommended to use SSH keys instead of passwords. If you are not already using them, generate a key pair on your local machine and copy the public key to your VPS.
# On your local machine
ssh-keygen -t rsa -b 4096 # Generate SSH keys (if they don't exist)
ssh-copy-id youruser@your_vps_ip # Copy public key to VPS
After this, disable password login for SSH (recommended, but be careful not to lock yourself out):
sudo nano /etc/ssh/sshd_config # Open SSH server configuration
Find and change the following lines:
PasswordAuthentication no
ChallengeResponseAuthentication no
UsePAM no # May need to be disabled if other authentication methods are used
Save the file and restart the SSH service:
sudo systemctl restart sshd # Restart SSH service
4. Firewall Configuration (UFW)
Allow only the necessary ports: SSH (22), HTTP (80), HTTPS (443). For OpenSearch Dashboards, we will use HTTPS.
sudo ufw allow 22/tcp # Allow SSH
sudo ufw allow 80/tcp # Allow HTTP (for Caddy/Certbot)
sudo ufw allow 443/tcp # Allow HTTPS (for Caddy/Dashboards)
sudo ufw enable # Enable firewall
sudo ufw status # Check status
5. Install Fail2Ban
Fail2Ban helps protect against brute-force attacks by blocking IP addresses from which numerous failed login attempts occur.
sudo apt install fail2ban -y # Install Fail2Ban
sudo systemctl enable fail2ban # Enable service autostart
sudo systemctl start fail2ban # Start service
Create a local configuration for Fail2Ban so it is not overwritten during updates:
sudo cp /etc/fail2ban/jail.conf /etc/fail2ban/jail.local # Copy base config
sudo nano /etc/fail2ban/jail.local # Edit local config
In the file jail.local, ensure that the [sshd] section is active (enabled = true) and configure parameters as desired (e.g., bantime, findtime, maxretry).
[sshd]
enabled = true
port = ssh
logpath = %(sshd_log)s
backend = %(sshd_backend)s
Save and restart Fail2Ban:
sudo systemctl restart fail2ban # Restart Fail2Ban to apply changes
6. Install Docker and Docker Compose
OpenSearch and OpenSearch Dashboards will be deployed in Docker containers for simplified management and isolation. Caddy will also run in Docker.
# Install dependencies for Docker
sudo apt install ca-certificates curl gnupg lsb-release -y

# Add Docker GPG key
sudo install -m 0755 -d /etc/apt/keyrings
curl -fsSL https://download.docker.com/linux/ubuntu/gpg | sudo gpg --dearmor -o /etc/apt/keyrings/docker.gpg
sudo chmod a+r /etc/apt/keyrings/docker.gpg

# Add Docker repository
echo \
  "deb [arch="$(dpkg --print-architecture)" signed-by=/etc/apt/keyrings/docker.gpg] https://download.docker.com/linux/ubuntu \
  "$(. /etc/os-release && echo "$VERSION_CODENAME")" stable" | \
  sudo tee /etc/apt/sources.list.d/docker.list > /dev/null

# Install Docker Engine
sudo apt update
sudo apt install docker-ce docker-ce-cli containerd.io docker-buildx-plugin docker-compose-plugin -y

# Add current user to docker group to work without sudo
sudo usermod -aG docker youruser
After adding the user to the docker group, log out and log back in for the changes to take effect:
exit
ssh youruser@your_vps_ip
Verify Docker installation:
docker run hello-world # Run test container
If you see a welcome message, Docker is installed correctly.
Software Installation — Step-by-Step
Now that the server is prepared, let's proceed with the installation of Fluent Bit, OpenSearch, and OpenSearch Dashboards. We will use Docker Compose for OpenSearch/Dashboards and a native installation for Fluent Bit.
1. Prepare Directories for OpenSearch and Caddy
Let's create the necessary directories for storing OpenSearch data and Caddy configuration. This will allow data to persist even when containers are recreated.
mkdir -p ~/opensearch/data # Directory for OpenSearch data
mkdir -p ~/opensearch/dashboards/config # Directory for OpenSearch Dashboards configs
mkdir -p ~/caddy/config # Directory for Caddy configs
mkdir -p ~/caddy/data # Directory for Caddy certificates
Set the correct permissions for the OpenSearch data directory, as the OpenSearch container runs as an unprivileged user.
sudo chown -R 1000:1000 ~/opensearch/data # Change owner to UID 1000
2. Create Docker Compose File for OpenSearch and OpenSearch Dashboards
Let's create a docker-compose.yml file in the home directory, which will define the OpenSearch and OpenSearch Dashboards services.
nano ~/docker-compose.yml
Paste the following content. The specified versions (OpenSearch 2.12.0, OpenSearch Dashboards 2.12.0) are current as of early 2026 and are stable.
# docker-compose.yml
version: '3.8'
services:
  opensearch:
    image: opensearchproject/opensearch:2.12.0 # Current OpenSearch version for 2026
    container_name: opensearch
    environment:
      - cluster.name=opensearch-cluster
      - node.name=opensearch-node1
      - discovery.type=single-node
      - bootstrap.memory_lock=true
      - OPENSEARCH_JAVA_OPTS=-Xms4g -Xmx4g # Allocate half of the server's RAM, but no more than 30 GB
      - DISABLE_SECURITY_PLUGIN=true # Disable security plugin for simplicity; for production, it needs to be configured
    ulimits:
      memlock:
        soft: -1
        hard: -1
    volumes:
      - ~/opensearch/data:/usr/share/opensearch/data # Persist OpenSearch data
    ports:
      - "9200:9200" # Port for OpenSearch API
      - "9600:9600" # Port for Transport Layer
    networks:
      - opensearch-net
    healthcheck:
      test: ["CMD-SHELL", "curl -f http://localhost:9200/_cat/health || exit 1"]
      interval: 30s
      timeout: 10s
      retries: 5

  opensearch-dashboards:
    image: opensearchproject/opensearch-dashboards:2.12.0 # Current OpenSearch Dashboards version
    container_name: opensearch-dashboards
    environment:
      - OPENSEARCH_HOSTS=["http://opensearch:9200"] # Connect to OpenSearch
    volumes:
      - ~/opensearch/dashboards/config/opensearch_dashboards.yml:/usr/share/opensearch-dashboards/config/opensearch_dashboards.yml # Dashboards config
    ports:
      - "5601:5601" # Port for OpenSearch Dashboards
    networks:
      - opensearch-net
    depends_on:
      opensearch:
        condition: service_healthy # Start Dashboards only after OpenSearch
    healthcheck:
      test: ["CMD-SHELL", "curl -f http://localhost:5601/api/status || exit 1"]
      interval: 30s
      timeout: 10s
      retries: 5

  caddy:
    image: caddy:2.7.6-alpine # Lightweight and current Caddy version for 2026
    container_name: caddy
    restart: unless-stopped
    ports:
      - "80:80" # For Let's Encrypt
      - "443:443" # For HTTPS
    volumes:
      - ~/caddy/Caddyfile:/etc/caddy/Caddyfile # Caddy configuration
      - ~/caddy/data:/data # Let's Encrypt certificates
      - ~/caddy/config:/config # Other Caddy data
    networks:
      - opensearch-net
    depends_on:
      opensearch-dashboards:
        condition: service_healthy # Caddy depends on Dashboards' health

networks:
  opensearch-net:
    driver: bridge
Important Security Note: In this example, we have disabled the OpenSearch security plugin (DISABLE_SECURITY_PLUGIN=true) for simplified deployment. In a production environment, it is highly recommended to enable and configure the security plugin, create users and roles, and use HTTPS for accessing the OpenSearch API. This will require a more complex configuration.
Memory for OpenSearch: Be sure to adjust the OPENSEARCH_JAVA_OPTS=-Xms4g -Xmx4g parameter according to your VPS's RAM. OpenSearch should use about 50% of available memory, but no more than 30-31 GB. If you have 8 GB of RAM, set -Xms4g -Xmx4g; if 16 GB, then -Xms8g -Xmx8g.
3. Create OpenSearch Dashboards Configuration File
Create the opensearch_dashboards.yml file in the ~/opensearch/dashboards/config/ directory:
nano ~/opensearch/dashboards/config/opensearch_dashboards.yml
Add the following content:
# opensearch_dashboards.yml
server.host: "0.0.0.0"
server.name: "opensearch-dashboards"
opensearch.hosts: ["http://opensearch:9200"]
opensearch.requestHeadersWhitelist: [ "authorization", "osd-xsrf" ] # For working with OpenSearch security
opensearch.ssl.verificationMode: "none" # Disable SSL verification between Dashboards and OpenSearch, as HTTP is used
4. Create Caddy Configuration File
Create the Caddyfile in the ~/caddy/ directory, replacing your_domain.com with your actual domain:
nano ~/caddy/Caddyfile
Add the following content:
# Caddyfile
your_domain.com { # Replace with your domain
  reverse_proxy opensearch-dashboards:5601 # Proxy requests to Dashboards
  handle_errors {
    respond "{err.status_code} {err.status_text}"
  }
  log {
    output file /var/log/caddy/access.log {
      roll_size 10mb
      roll_keep 5
    }
  }
}
Ensure that your domain (e.g., your_domain.com) points to your VPS's IP address in DNS records (A-record).
5. Start OpenSearch, OpenSearch Dashboards, and Caddy
Navigate to the directory where docker-compose.yml is located and start the services:
cd ~ # Go to home directory
docker compose up -d # Start all services in the background
The startup process may take several minutes, especially for OpenSearch during its initial initialization. You can check the container status with the command:
docker compose ps # Check container status
Ensure that all containers have a running status and their HEALTH is in a healthy state.
6. Install Fluent Bit
Fluent Bit will be installed on the same server as OpenSearch/Dashboards to collect system logs and Caddy logs. If you have other servers, you will also need to install Fluent Bit on them and configure it to send logs to your OpenSearch server.
Let's add the Fluent Bit repository (version 2.2.x is current for 2026; newer versions may be available):
# Add Fluent Bit GPG key
curl https://packages.fluentbit.io/fluentbit.key | gpg --dearmor | sudo tee /usr/share/keyrings/fluentbit-keyring.gpg > /dev/null

# Add Fluent Bit repository for Ubuntu 24.04 (Noble Numbat)
echo "deb [signed-by=/usr/share/keyrings/fluentbit-keyring.gpg] https://packages.fluentbit.io/ubuntu/noble noble main" | sudo tee /etc/apt/sources.list.d/fluent-bit.list

# Update package list and install Fluent Bit
sudo apt update
sudo apt install fluent-bit -y # Install Fluent Bit version 2.2.x
Check the service status:
sudo systemctl status fluent-bit # Check Fluent Bit status
The service should be running and active.
Configuration
Now that all components are installed, let's configure Fluent Bit to collect logs and send them to OpenSearch.
1. Fluent Bit Configuration
The main Fluent Bit configuration file is located at /etc/fluent-bit/fluent-bit.conf. However, for convenience, it's better to use separate files for inputs, filters, and outputs.
sudo nano /etc/fluent-bit/fluent-bit.conf
Ensure that the fluent-bit.conf file contains the following lines at the end to include external configurations:
# fluent-bit.conf
...
@INCLUDE /etc/fluent-bit/parsers.conf
@INCLUDE /etc/fluent-bit/conf.d/.conf
Let's create two configuration files in the /etc/fluent-bit/conf.d/ directory: one for inputs (system logs and Caddy logs), and another for outputs (OpenSearch).
1.1. Inputs (inputs.conf)
Create the file /etc/fluent-bit/conf.d/inputs.conf to collect system logs (/var/log/syslog) and Caddy logs (/var/log/caddy/access.log).
sudo nano /etc/fluent-bit/conf.d/inputs.conf
# /etc/fluent-bit/conf.d/inputs.conf

[INPUT]
    Name              tail
    Tag               syslog
    Path              /var/log/syslog
    Parser            syslog
    DB                /var/log/flb_syslog.db
    Mem_Buf_Limit     5MB
    Skip_Long_Lines   On
    Refresh_Interval  5

[INPUT]
    Name              tail
    Tag               auth.log
    Path              /var/log/auth.log
    Parser            syslog
    DB                /var/log/flb_auth.db
    Mem_Buf_Limit     5MB
    Skip_Long_Lines   On
    Refresh_Interval  5

[INPUT]
    Name              tail
    Tag               caddy.access
    Path              /var/log/caddy/access.log # Path to Caddy logs
    Parser            json # Caddy logs are JSON by default
    DB                /var/log/flb_caddy.db
    Mem_Buf_Limit     5MB
    Skip_Long_Lines   On
    Refresh_Interval  5
1.2. Outputs (output.conf)
Create the file /etc/fluent-bit/conf.d/output.conf to send logs to OpenSearch. Note that we use the service name opensearch from docker-compose.yml as the host.
sudo nano /etc/fluent-bit/conf.d/output.conf
# /etc/fluent-bit/conf.d/output.conf

[OUTPUT]
    Name            opensearch
    Match
    Host            opensearch # OpenSearch service name in Docker Compose
    Port            9200
    Index           fluent-bit-logs-%Y.%m.%d # Index with date
    Type            _doc
    Logstash_Format On
    Logstash_Prefix fluent-bit-logs
    Retry_Limit     False
    Suppress_Type_Name On # For OpenSearch 7+
1.3. Restart Fluent Bit
After changing the Fluent Bit configuration, you need to restart the service:
sudo systemctl restart fluent-bit # Restart Fluent Bit
sudo systemctl status fluent-bit # Check status
Ensure that the service is running without errors. You can view Fluent Bit logs for debugging:
sudo journalctl -u fluent-bit -f # View Fluent Bit logs in real time
2. Verify Functionality
2.1. Access OpenSearch Dashboards
Open your domain in a browser (e.g., https://your_domain.com), which you specified in the Caddyfile. You should see the OpenSearch Dashboards interface.
2.2. Create an Index Pattern in Dashboards
After your first login to Dashboards, you will need to create an "Index Pattern" to view logs.
- In the left navigation menu, go to Stack Management (gear icon).
- Select Index Patterns under the Kibana section.
- Click Create index pattern.
- In the Index pattern name field, enter
fluent-bit-logs-(or another prefix you specified influent-bit/conf.d/output.conf). Click Next step. - For Time field, select
@timestamp. Click Create index pattern.
After creating the Index Pattern, you can go to the Discover section (compass icon) in the left menu to see the incoming logs. If everything is configured correctly, you will see log streams with tags syslog, auth.log, and caddy.access.
2.3. Check OpenSearch API
You can also check the availability of the OpenSearch API directly from the server:
curl http://localhost:9200 # Check OpenSearch availability
curl http://localhost:9200/_cat/indices?v # View created indices
You should see cluster information and the Fluent Bit indices that have been created.