Deploying AppFlowy on a VPS: Your Own Notion Alternative with Docker and PostgreSQL
TL;DR
In this detailed guide, we will step-by-step set up AppFlowy — a powerful open-source alternative to Notion — on your own VPS. You will learn how to install and configure Docker, PostgreSQL, AppFlowy Server, and also ensure secure access via HTTPS using Caddy. Upon completing the tutorial, you will have a fully functional and secure tool for knowledge and project management that is under your complete control.
- Installing AppFlowy Server using Docker Compose for easy deployment.
- Setting up a dedicated PostgreSQL database for AppFlowy data storage.
- Ensuring secure access to AppFlowy via HTTPS with automatic SSL certificate management by Caddy.
- Basic VPS preparation: configuring security, firewall, and SSH access.
- Recommendations for data backup and system maintenance for long-term stability.
What we configure and why
In the modern world, effective information and project management is key to success for both individual specialists and teams. Notion has become a de facto standard for many due to its flexibility and versatility. However, one doesn't always want to entrust all their data to third-party cloud services. This is where AppFlowy comes to the rescue — a powerful, fully open-source alternative to Notion that can be deployed on your own server.
AppFlowy offers a similar user experience with blocks, databases, Kanban boards, and wiki pages, but provides full control over your data. It's an ideal solution for those who value privacy, want to customize the system to their unique needs, or simply prefer to own their infrastructure rather than rent it.
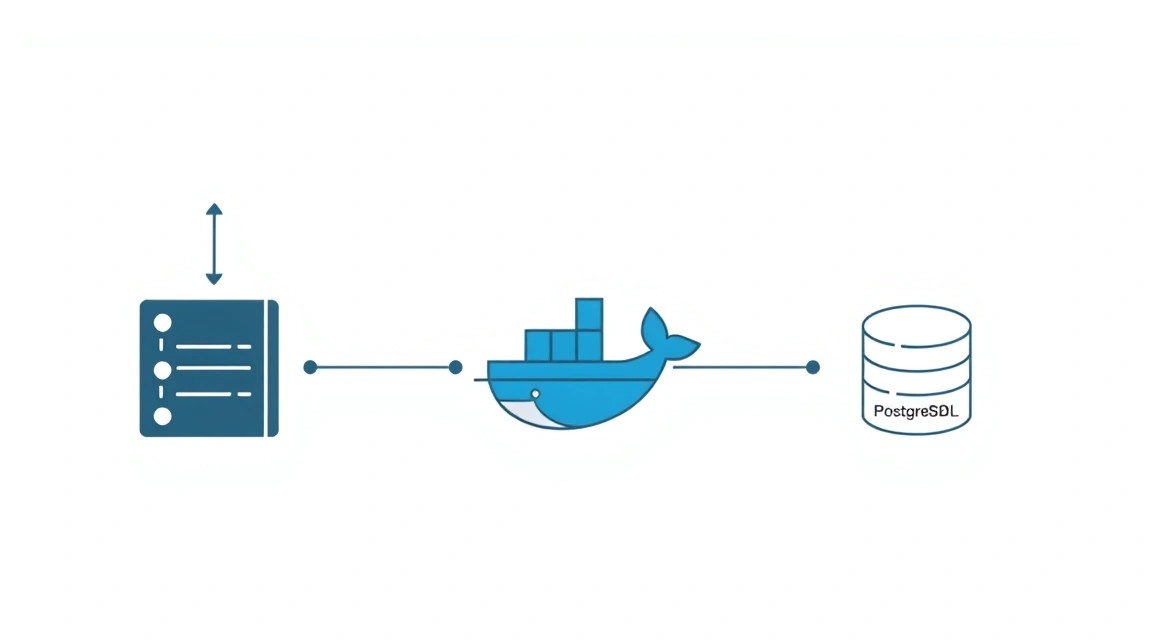
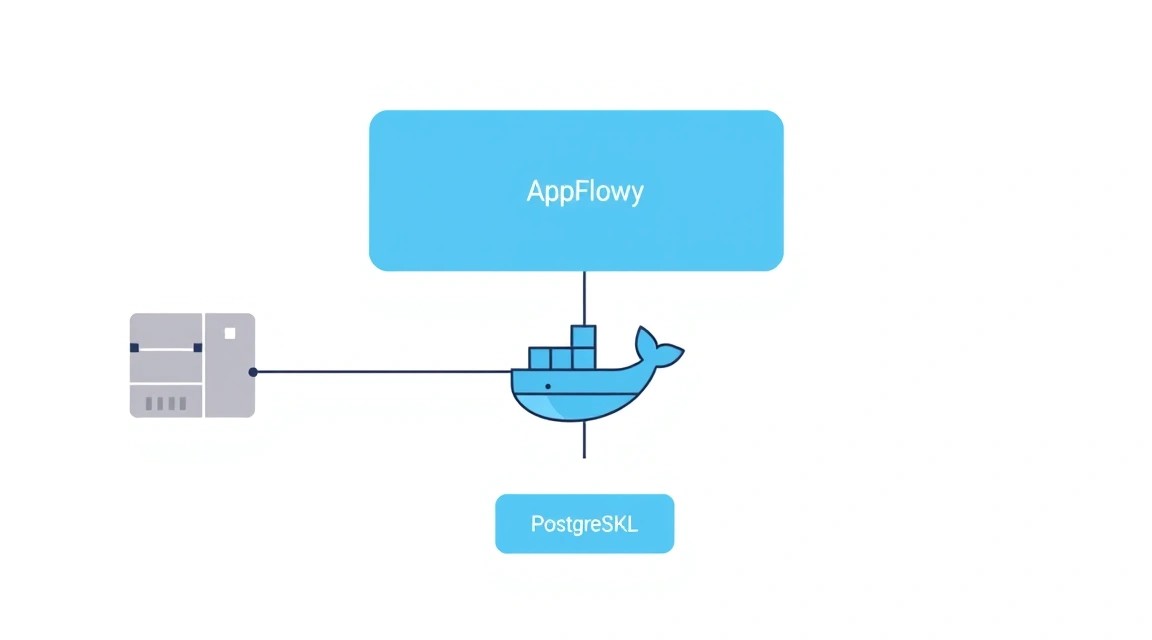
In this guide, we will deploy AppFlowy Server on a Virtual Private Server (VPS) using containerization with Docker and Docker Compose. PostgreSQL will be used as the database, ensuring reliable and scalable data storage. We will also configure automatic retrieval and renewal of SSL certificates using Caddy, so your AppFlowy is accessible via a secure HTTPS connection.
Ultimately, you will get a fully functional, secure, and self-controlled Notion alternative, accessible to your team or for personal use via a web browser. This will allow you to store confidential data on your own infrastructure, minimizing risks associated with reliance on third-party providers.
Alternatives: Cloud-managed vs. Self-hosted
Before diving into the setup, it's important to understand why a self-hosted solution, such as AppFlowy on a VPS, might be preferable to cloud alternatives:
- Cloud-managed services (e.g., Notion, Monday.com, ClickUp):
- Pros: Easy to start, no technical expertise required, automatic scaling and backups, provider support.
- Cons: High cost as the team grows, lack of full data control, reliance on provider's privacy policy, limited customization options.
- Self-hosted on VPS (e.g., AppFlowy, GitLab Community Edition, Mattermost):
- Pros: Full control over data and security, potentially lower long-term cost (especially for larger teams), high degree of customization, ability to integrate with your own infrastructure.
- Cons: Requires technical knowledge for installation and maintenance, responsibility for backups and updates lies with you, initial setup can be time-consuming.
Choosing self-hosted AppFlowy on a VPS is ideal for those willing to invest time in setup for complete independence and control, or for teams with sensitive data that cannot be hosted on third-party servers.
What VPS configuration is needed for this task
Choosing the right VPS configuration is critical for stable and fast AppFlowy operation. While AppFlowy itself is not an extremely resource-intensive application, working with Docker, PostgreSQL, and a web server requires a certain reserve of resources. The requirements below are current for 2026 and are designed for stable operation for a small team (up to 10-15 active users).
Minimum Requirements
- CPU: 2 cores. Modern VPS processors provide sufficient per-core performance.
- RAM: 4 GB. Of this, 2 GB will be used by Docker containers (AppFlowy Server, PostgreSQL, Caddy) and another 2 GB for the operating system, caching, and potential growth.
- Disk: 80 GB NVMe SSD. A fast SSD significantly improves database performance. 80 GB is sufficient for the OS, Docker images, AppFlowy data, and several weeks of backups. For long-term backup storage, external storage is recommended.
- Network: 100 Mbps or 1 Gbps port. For a web application like AppFlowy, stability is more important than peak bandwidth, unless you plan to transfer very large files.
Recommended VPS Plan
For comfortable operation and the possibility of minor scaling in the future, as well as to ensure stability during peak loads, the following characteristics are recommended:
- CPU: 4 cores.
- RAM: 8 GB.
- Disk: 160 GB NVMe SSD.
- Network: 1 Gbps port.
Such a configuration will ensure smooth AppFlowy operation even with several users working simultaneously, active database usage, and content indexing. You can consider a VPS with the specified characteristics for rent. Ensure that the provider offers reliable infrastructure and access to current operating system versions, such as Ubuntu Server 24.04 LTS.
When a Dedicated Server is Needed, Not a VPS
A dedicated server becomes necessary when:
- Large number of users: If you plan deployment for more than 50 active users or for corporate use with critically important data.
- High performance requirements: For very intensive workloads, such as processing large volumes of data, machine learning, or high-load databases, where even the most powerful VPS may be insufficient.
- Strict security and compliance requirements: Some regulatory requirements may mandate the use of physically isolated hardware.
- Hardware customization: The need for specific RAID configurations, GPUs, or unusual network cards.
For most AppFlowy deployments for personal use or a small/medium team, a well-configured VPS will be more than sufficient.
Location: What it affects
The choice of the geographical location of your VPS server affects several key aspects:
- Latency: The closer the server is to your users, the lower the latency and faster the application's response. For a team distributed across different regions, a central location should be chosen.
- Legislation: Data protection laws (e.g., GDPR in the EU) may impose restrictions on where data can be stored. Choose a location that complies with your legal requirements.
- Cost: VPS prices can vary significantly by region due to the cost of electricity, real estate, and network infrastructure.
- Availability: Some regions may have better connectivity to global internet backbones, providing a more stable connection.
For AppFlowy, it is generally sufficient to choose a server in the country where most of your users are located to minimize latency.
Server Preparation
Before proceeding with the AppFlowy installation, you need to perform basic setup and security hardening for your new VPS. We will use Ubuntu Server 24.04 LTS as the primary operating system, as it is one of the most popular and stable platforms for server deployments.
1. SSH Connection
First, connect to your VPS as the root user, using the IP address provided by your provider:
ssh root@YOUR_VPS_IP_ADDRESS
If this is your first connection, you may need to accept the server's key fingerprint. Enter the root password if prompted.
2. Creating a New User with Sudo Privileges
Working as the root user is insecure. Let's create a new user for everyday tasks and grant them sudo privileges.
# Replace 'appflowyuser' with your desired username
adduser appflowyuser
Follow the instructions: enter and confirm the password, then you can skip filling in additional information by simply pressing Enter.
Now, add the new user to the sudo group so they can execute commands with administrator privileges:
usermod -aG sudo appflowyuser
3. Setting up SSH Key Authentication (Recommended)
Using SSH keys significantly enhances security compared to password authentication. If you don't already have an SSH key pair, generate them on your local machine:
# On your LOCAL machine
ssh-keygen -t rsa -b 4096
Then, copy the public key to your VPS for the new user:
# On your LOCAL machine, replace 'appflowyuser' and 'YOUR_VPS_IP_ADDRESS'
ssh-copy-id appflowyuser@YOUR_VPS_IP_ADDRESS
After this, exit the root session and log in as the new user using the SSH key:
# On your LOCAL machine
exit
ssh appflowyuser@YOUR_VPS_IP_ADDRESS
If you can log in without a password, the keys are configured correctly. Now, let's disable password authentication for SSH and disallow root login.
# On the VPS, as 'appflowyuser'
sudo nano /etc/ssh/sshd_config
Find and modify the following lines (add them if they don't exist):
# ...
PermitRootLogin no
PasswordAuthentication no
ChallengeResponseAuthentication no
UsePAM yes
# ...
Save changes (Ctrl+O, Enter) and exit (Ctrl+X). Then restart the SSH service:
sudo systemctl restart sshd
IMPORTANT: Make sure you can log in as the new user with an SSH key BEFORE disabling password authentication and root login. Otherwise, you risk losing access to the server.
4. System Update
Always start by updating the package database and installed packages to their latest versions.
# Update package list
sudo apt update
# Upgrade all installed packages
sudo apt upgrade -y
# Remove old, unnecessary packages
sudo apt autoremove -y
5. Firewall Configuration (UFW)
UFW (Uncomplicated Firewall) is an easy-to-use interface for configuring iptables rules. Let's enable it and allow only the necessary ports.
# Allow SSH (port 22)
sudo ufw allow OpenSSH
# Allow HTTP (port 80)
sudo ufw allow http
# Allow HTTPS (port 443)
sudo ufw allow https
# Enable firewall
sudo ufw enable
# Check firewall status
sudo ufw status
Ensure that the status is active and ports 80, 443, 22 are allowed. Allowing OpenSSH before enabling UFW is critical to avoid losing access to the server.
6. Installing Fail2Ban
Fail2Ban helps protect the server from brute-force attacks by blocking IP addresses that exhibit multiple failed login attempts.
# Install Fail2Ban
sudo apt install fail2ban -y
# Start and enable autostart
sudo systemctl enable fail2ban
sudo systemctl start fail2ban
# Check status (optional)
sudo systemctl status fail2ban
Fail2Ban protects SSH by default. For additional services, you can configure rules in the /etc/fail2ban/jail.local file.
Your server is now ready for the installation of core software.
Software Installation — Step-by-Step
In this step, we will install all necessary software: Docker and Docker Compose for containerizing AppFlowy Server and PostgreSQL, as well as Caddy for the web server and automatic SSL certificate acquisition.
1. Installing Docker Engine
Docker is a platform for developing, delivering, and running applications in containers. We will use the official Docker repository to get the latest version, current for 2026 (assuming Docker Engine v25.x or v26.x).
# Update package list
sudo apt update
# Install necessary packages for working with HTTPS repositories
sudo apt install ca-certificates curl gnupg -y
# Create directory for GPG keys
sudo install -m 0755 -d /etc/apt/keyrings
# Download official Docker GPG key
curl -fsSL https://download.docker.com/linux/ubuntu/gpg | sudo gpg --dearmor -o /etc/apt/keyrings/docker.gpg
# Change file permissions for the key
sudo chmod a+r /etc/apt/keyrings/docker.gpg
# Add Docker repository to APT sources list
echo \
  "deb [arch="$(dpkg --print-architecture)" signed-by=/etc/apt/keyrings/docker.gpg] https://download.docker.com/linux/ubuntu \
  "$(. /etc/os-release && echo "$VERSION_CODENAME")" stable" | \
  sudo tee /etc/apt/sources.list.d/docker.list > /dev/null
# Update package list with the new Docker repository
sudo apt update
# Install Docker Engine, Docker CLI, and containerd
sudo apt install docker-ce docker-ce-cli containerd.io -y
Add your user to the docker group to execute Docker commands without sudo:
# Replace 'appflowyuser' with your username
sudo usermod -aG docker appflowyuser
# Log out and log back into the SSH session for changes to take effect
exit
ssh appflowyuser@YOUR_VPS_IP_ADDRESS
Verify that Docker is installed correctly:
# Check Docker version
docker --version
# Check Docker operation by running a test container
docker run hello-world
The hello-world output will confirm a successful installation.
2. Installing Docker Compose
Docker Compose allows you to define and run multi-container Docker applications. We will install it from the official repository, ensuring it's up-to-date for 2026 (assuming Docker Compose v2.25.x or newer).
# Install Docker Compose
sudo apt install docker-compose-plugin -y
Check the Docker Compose version:
# Check Docker Compose version
docker compose version
3. Installing Caddy
Caddy is a powerful, extensible web server with automatic HTTPS. It is easy to configure and ideal for providing secure access to AppFlowy.
# Install necessary packages
sudo apt install -y debian-keyring debian-archive-keyring apt-transport-https
# Download Caddy GPG key
curl -1sLf 'https://dl.cloudsmith.io/public/caddy/stable/gpg.key' | sudo gpg --dearmor -o /usr/share/keyrings/caddy-stable-archive-keyring.gpg
# Add Caddy repository
curl -1sLf 'https://dl.cloudsmith.io/public/caddy/stable/debian.deb.txt' | sudo tee /etc/apt/sources.list.d/caddy-stable.list
# Update package list
sudo apt update
# Install Caddy
sudo apt install caddy -y
Check Caddy's status:
# Check Caddy service status
sudo systemctl status caddy
It should be active and running. If not, start it: sudo systemctl start caddy.
4. Domain Name and DNS Configuration
For HTTPS to work with Caddy, you will need a domain name (e.g., appflowy.yourdomain.com) pointing to your VPS's IP address. Go to your domain registrar's or DNS provider's control panel and create an A record:
- Type: A
- Name/Host:
appflowy(or another subdomain you wish to use) - Value: Your_VPS_IP_Address
- TTL: 300 (or less for faster updates)
Wait a few minutes (up to several hours, depending on TTL) for DNS records to propagate. You can check this using the dig command (on your local machine):
# On your LOCAL machine
dig appflowy.yourdomain.com
The response should contain an ANSWER SECTION with your VPS's IP address.
Now all necessary components are installed and ready for further configuration.
Configuration

In this step, we will configure AppFlowy Server, PostgreSQL, and Caddy to work together. We will use Docker Compose to orchestrate all services.
1. Creating project directories
Let's create the root directory for our AppFlowy project and subdirectories to store PostgreSQL data and Caddy configuration.
# Create the main project directory
mkdir -p ~/appflowy-server
cd ~/appflowy-server
# Create directory for PostgreSQL data
mkdir -p ./data/postgresql
# Create directory for Caddy configuration
mkdir -p ./caddy/Caddyfile
mkdir -p ./caddy/data # Caddy will store certificates here
mkdir -p ./caddy/config # Caddy will store its configuration here
2. Creating the .env file for environment variables
To manage secrets and configuration parameters, such as database passwords, we will use an .env file. This is safer than hardcoding them in the docker-compose.yml file.
nano .env
Add the following content, changing the values of YOUR_DB_PASSWORD, YOUR_APPFLOWY_SECRET_KEY, and YOUR_APPFLOWY_JWT_SECRET to strong, randomly generated strings. Use a password generator for this.
# PostgreSQL Database Configuration
POSTGRES_DB=appflowy_db
POSTGRES_USER=appflowy_user
POSTGRES_PASSWORD=YOUR_DB_PASSWORD # Generate a strong password

# AppFlowy Server Configuration
APPFLOWY_SERVER_PORT=3060 # Default port for AppFlowy server
APPFLOWY_SERVER_HOST=0.0.0.0 # Listen on all interfaces
APPFLOWY_SERVER_SECRET_KEY=YOUR_APPFLOWY_SECRET_KEY # Generate a strong, random key
APPFLOWY_SERVER_JWT_SECRET=YOUR_APPFLOWY_JWT_SECRET # Generate a strong, random key for JWT
APPFLOWY_SERVER_DATABASE_URL=postgresql://appflowy_user:YOUR_DB_PASSWORD@db:5432/appflowy_db

# Optional: Set log level for AppFlowy server (e.g., info, debug, error)
# APPFLOWY_SERVER_LOG_LEVEL=info

# Caddy Configuration (for external access)
CADDY_DOMAIN=appflowy.yourdomain.com # Replace with your actual domain
Save the file (Ctrl+O, Enter) and exit (Ctrl+X).
3. Creating the docker-compose.yml file
This file will define three services: PostgreSQL, AppFlowy Server, and Caddy.
nano docker-compose.yml
Paste the following content. Make sure the image versions are up-to-date for 2026 (AppFlowy Server v0.4.0, PostgreSQL v16.x, Caddy v2.x).
version: '3.8'

services:
  db:
    image: postgres:16-alpine # Using the current PostgreSQL version for 2026
    restart: unless-stopped
    env_file:
      - .env
    environment:
      POSTGRES_DB: ${POSTGRES_DB}
      POSTGRES_USER: ${POSTGRES_USER}
      POSTGRES_PASSWORD: ${POSTGRES_PASSWORD}
    volumes:
      - ./data/postgresql:/var/lib/postgresql/data
    healthcheck:
      test: ["CMD-SHELL", "pg_isready -U ${POSTGRES_USER} -d ${POSTGRES_DB}"]
      interval: 10s
      timeout: 5s
      retries: 5

  appflowy:
    image: appflowy/appflowy-server:0.4.0 # Assumed current AppFlowy Server version for 2026
    restart: unless-stopped
    env_file:
      - .env
    environment:
      AF_SERVER_HOST: ${APPFLOWY_SERVER_HOST}
      AF_SERVER_PORT: ${APPFLOWY_SERVER_PORT}
      AF_SERVER_SECRET_KEY: ${APPFLOWY_SERVER_SECRET_KEY}
      AF_SERVER_JWT_SECRET: ${APPFLOWY_SERVER_JWT_SECRET}
      AF_SERVER_DATABASE_URL: ${APPFLOWY_SERVER_DATABASE_URL}
      # AF_SERVER_LOG_LEVEL: ${APPFLOWY_SERVER_LOG_LEVEL} # Uncomment to change logging level
    ports:
      - "127.0.0.1:${APPFLOWY_SERVER_PORT}:${APPFLOWY_SERVER_PORT}" # Open port only for localhost, Caddy will proxy
    depends_on:
      db:
        condition: service_healthy # AppFlowy starts only after DB is ready
    healthcheck:
      test: ["CMD", "curl", "-f", "http://localhost:${APPFLOWY_SERVER_PORT}/health"]
      interval: 30s
      timeout: 10s
      retries: 5

  caddy:
    image: caddy:2.7.6-alpine # Current Caddy version for 2026
    restart: unless-stopped
    ports:
      - "80:80"
      - "443:443"
    volumes:
      - ./caddy/Caddyfile:/etc/caddy/Caddyfile # Your Caddyfile
      - ./caddy/data:/data # For storing TLS certificates
      - ./caddy/config:/config # For storing Caddy's configuration
    environment:
      CADDY_DOMAIN: ${CADDY_DOMAIN} # Pass domain from .env
    depends_on:
      appflowy:
        condition: service_healthy # Caddy starts only after AppFlowy is ready
Save the file.
4. Configuring the Caddyfile
Now let's create a configuration file for Caddy that will proxy requests to the AppFlowy Server and automatically manage SSL certificates.
nano ./caddy/Caddyfile
Paste the following content. Make sure {$CADDY_DOMAIN} will be replaced with your domain name from the .env file.
{$CADDY_DOMAIN} {
    # Enable automatic HTTPS
    tls {
        dns cloudflare {env.CLOUDFLARE_API_TOKEN} # If using Cloudflare DNS, otherwise remove or use HTTP-01
    }

    # Proxy all requests to AppFlowy Server
    reverse_proxy appflowy:3060 {
        # Additional proxy settings if required
        header_up Host {host}
        header_up X-Real-IP {remote_ip}
        header_up X-Forwarded-For {remote_ip}
        header_up X-Forwarded-Proto {scheme}
    }

    # Enable data compression for faster loading
    encode gzip zstd

    # Logging
    log {
        output file /var/log/caddy/access.log
    }
}
Important note on TLS: The example above uses Cloudflare DNS provider to issue Let's Encrypt certificates (dns cloudflare). This is convenient if your DNS is managed through Cloudflare, and you don't need to open ports 80/443 on Caddy for ACME HTTP-01 challenge (although we have already opened them). If you are not using Cloudflare or prefer HTTP-01 verification (which works by default if 80/443 are open), simply remove the line dns cloudflare {env.CLOUDFLARE_API_TOKEN}. Caddy will automatically attempt to use HTTP-01. If you are using a DNS provider other than Cloudflare, Caddy supports many plugins for various DNS providers. You may need to build Caddy with the appropriate plugin or use HTTP-01.
If you decide to use the DNS challenge with Cloudflare, you will also need to add the CLOUDFLARE_API_TOKEN environment variable to your .env file. Create an API token in Cloudflare with permissions to edit DNS zones for your domain.
# ... (at the end of your .env file)
CLOUDFLARE_API_TOKEN=YOUR_CLOUDFLARE_API_TOKEN # Only if using DNS challenge with Cloudflare
Save the Caddyfile.
5. Starting AppFlowy with Docker Compose
Now that all configuration files are ready, you can start all services.
# Make sure you are in the ~/appflowy-server directory
cd ~/appflowy-server

# Start all services in the background
docker compose up -d
This will download the necessary Docker images (if not present), create containers, set up networks, and start AppFlowy Server, PostgreSQL, and Caddy.
6. Checking operability
Give the services a few minutes to start and initialize. You can monitor the logs:
# View logs of all services
docker compose logs -f
Look for messages indicating successful startup of AppFlowy Server and Caddy. If Caddy reports errors, check your Caddyfile and DNS settings for correctness.
After the logs show that all services are running without errors, check the container status:
docker compose ps
All containers should have a status of running (healthy).
Finally, open your web browser and navigate to your domain (e.g., https://appflowy.yourdomain.com). You should see the AppFlowy registration/login page. Register the first user, and you will gain access to your own AppFlowy Workspace.