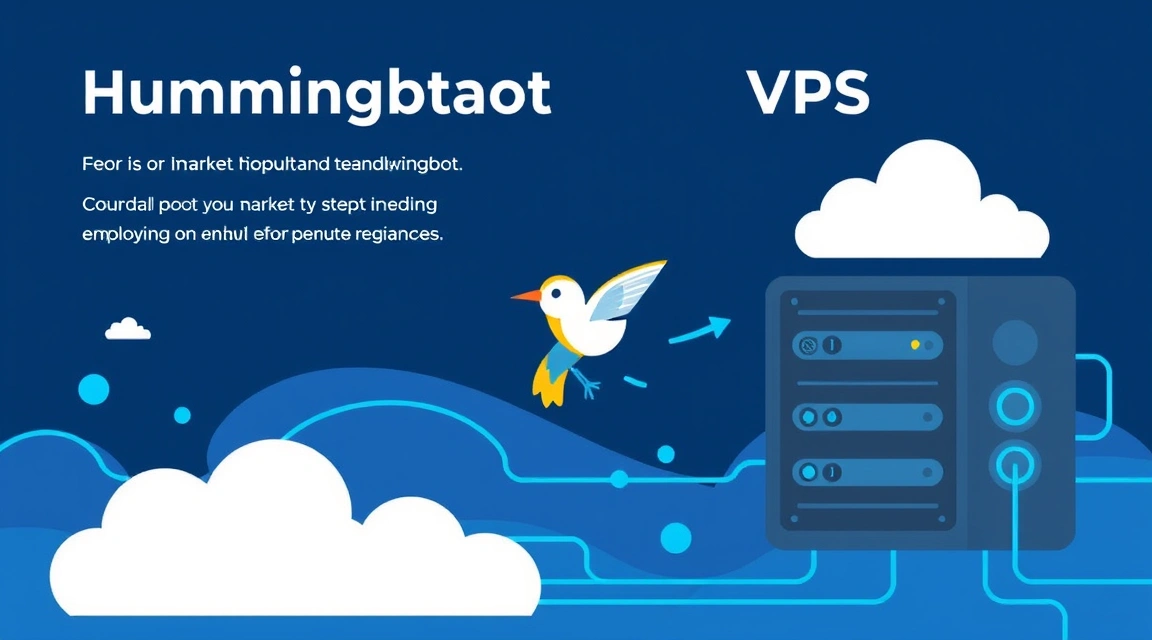
¿Qué es Hummingbot y por qué necesita un VPS?
La instalación de Hummingbot en un VPS para market making requiere elegir un VPS Ubuntu adecuado con un mínimo de 2 vCPU y 4 GB de RAM, instalar las dependencias, clonar el repositorio o usar Docker, y ejecutar el bot, lo que permite automatizar estrategias de trading en exchanges como Binance u OKX.
Hummingbot es un potente framework de código abierto para crear bots de trading de alta frecuencia, enfocados en el market making y el arbitraje en exchanges de criptomonedas. Permite a los traders automatizar estrategias como Pure Market Making (PMM), Cross-Exchange Market Making y Arbitrage, en diversas plataformas centralizadas (CEX) y descentralizadas (DEX). El uso de Hummingbot brinda la oportunidad de colocar órdenes de compra y venta continuamente, obteniendo ganancias del spread y proporcionando liquidez al mercado.
Ejecutar Hummingbot en un VPS (Virtual Private Server) fiable es crucial para lograr la máxima eficiencia y seguridad. A diferencia de un ordenador local, un VPS proporciona:
- Funcionamiento 24/7: El bot trabaja 24/7 sin interrupciones, sin depender de tu conexión a internet doméstica o de la alimentación eléctrica.
- Baja latencia (Low Latency): Los servidores de Valebyte, ubicados en modernos centros de datos con canales de alta velocidad, minimizan la latencia al enviar órdenes a los exchanges, lo cual es especialmente importante para las estrategias de market making. Sobre cómo esto afecta al trading, escribimos en detalle en el artículo VPS para Binance: configuración de un bot de trading con latencia mínima.
- Estabilidad y fiabilidad: Los proveedores profesionales de VPS garantizan un alto uptime y un funcionamiento estable sin interrupciones inesperadas.
- Seguridad: Un entorno VPS aislado con la posibilidad de configurar un firewall y acceso SSH proporciona una mejor protección para tus claves API y operaciones de trading.
- Escalabilidad: Puedes aumentar fácilmente los recursos del VPS a medida que crece tu capital de trading o si lanzas bots adicionales.
En esencia, el VPS se convierte en tu "espacio de trabajo" dedicado para el desarrollo de Python y el alojamiento ininterrumpido de bots de trading, proporcionando las condiciones ideales para un market making bot hosting eficiente.
¿Qué VPS elegir para Hummingbot: requisitos de recursos?
Elegir el VPS óptimo para Hummingbot es un paso clave para asegurar el funcionamiento estable y eficiente de tu bot de trading. Los requisitos mínimos para una instancia de Hummingbot, ejecutando una o dos estrategias, incluyen:
- CPU: 2 vCPU. Hummingbot utiliza activamente el procesador para cálculos, procesamiento de datos y gestión de órdenes.
- RAM: 4 GB. Este volumen es suficiente para ejecutar el bot, el sistema operativo (Ubuntu) y varias estrategias. Si planeas ejecutar varias instancias o usar estrategias más complejas, se recomiendan 8 GB de RAM.
- Disco: 40-80 GB NVMe SSD. La velocidad del disco es importante para una carga rápida y la escritura de logs, y NVMe asegura una latencia mínima.
- Sistema operativo: Ubuntu Server 20.04 LTS o 22.04 LTS. Es el SO más común y mejor soportado para estas tareas.
- Ancho de banda: Mínimo 100 Mbit/s, pero preferiblemente 1 Gbit/s. Para el market making, no solo es importante la baja latencia, sino también un ancho de banda estable. Un servidor dedicado con tráfico ilimitado (unmetered bandwidth) puede ser especialmente útil para el intercambio intensivo de datos.
Configuraciones de VPS recomendadas por Valebyte para Hummingbot
Para un grid bot vps fiable y escalable u otras estrategias, recomendamos los siguientes planes:
| Plan Valebyte | vCPU | RAM | NVMe SSD | Ancho de banda | Óptimo para |
|---|---|---|---|---|---|
| VPS-S | 2 cores | 4 GB | 80 GB | 1 Gbit/s | 1-2 instancias de Hummingbot, estrategias simples |
| VPS-M | 4 cores | 8 GB | 160 GB | 1 Gbit/s | 2-4 instancias de Hummingbot, varias estrategias, backtesting |
| VPS-L | 6 cores | 16 GB | 320 GB | 1 Gbit/s | Más de 4 instancias, estrategias complejas, ejecución simultánea de otras aplicaciones |
La elección de un plan específico depende de tus ambiciones. Para empezar con una estrategia en Hummingbot Binance, el VPS-S será suficiente. Si planeas escalar o usar varias estrategias, es mejor considerar directamente el VPS-M.
¿Buscas un servidor fiable para tus proyectos?
VPS desde $10/mes y servidores dedicados desde $9/mes con NVMe, protección DDoS y soporte 24/7.
Ver ofertas →Instalación paso a paso de Hummingbot en Ubuntu VPS
El proceso de configuración de Hummingbot en un VPS Ubuntu incluye varios pasos clave. Recomendamos usar Docker para simplificar la instalación y la gestión de dependencias.
Paso 1: Conexión al VPS y actualización del sistema
Después de obtener los datos de acceso a tu VPS, conéctate a él por SSH:
ssh root@TU_DIRECCIÓN_IPActualiza la lista de paquetes y los paquetes instalados:
sudo apt update
sudo apt upgrade -y
Paso 2: Instalación de Docker
Docker simplifica significativamente el despliegue de Hummingbot, aislándolo del sistema principal y gestionando todas las dependencias. Instala Docker Engine:
sudo apt install -y apt-transport-https ca-certificates curl software-properties-common
curl -fsSL https://download.docker.com/linux/ubuntu/gpg | sudo gpg --dearmor -o /usr/share/keyrings/docker-archive-keyring.gpg
echo "deb [arch=$(dpkg --print-architecture) signed-by=/usr/share/keyrings/docker-archive-keyring.gpg] https://download.docker.com/linux/ubuntu $(lsb_release -cs) stable" | sudo tee /etc/apt/sources.list.d/docker.list > /dev/null
sudo apt update
sudo apt install -y docker-ce docker-ce-cli containerd.io
Verifica que Docker esté instalado correctamente:
sudo docker run hello-worldPara mayor comodidad, añade tu usuario al grupo docker para no tener que usar sudo cada vez:
sudo usermod -aG docker $USER
newgrp docker
Paso 3: Ejecución del contenedor de Hummingbot
Ahora puedes ejecutar Hummingbot en un contenedor Docker. Esto se hace con un solo comando que descargará la imagen, creará el contenedor y mapeará los puertos y volúmenes necesarios para guardar los datos.
docker pull coinalpha/hummingbot:latest
docker run -it --name hummingbot_instance \
  -v $(pwd)/hummingbot_files:/home/hummingbot/conf/ \
  -v $(pwd)/hummingbot_logs:/home/hummingbot/logs/ \
  -v $(pwd)/hummingbot_data:/home/hummingbot/data/ \
  -v $(pwd)/hummingbot_scripts:/home/hummingbot/scripts/ \
  -p 8080:8080 \
  coinalpha/hummingbot:latest
Explicaciones del comando:
-it: Modo interactivo con pseudo-TTY.--name hummingbot_instance: Asigna un nombre al contenedor para facilitar su gestión.-v $(pwd)/hummingbot_files:/home/hummingbot/conf/y otros-v: Mapean carpetas locales en tu VPS (en el directorio actual donde ejecutas el comando) dentro del contenedor. Esto permite guardar configuraciones, logs y datos incluso después de eliminar o actualizar el contenedor.-p 8080:8080: Mapea el puerto 8080 del contenedor a tu VPS. Este puerto puede usarse para acceder a la interfaz web de Hummingbot (si la configuras).coinalpha/hummingbot:latest: Especifica la imagen Docker de Hummingbot.
Después de ejecutar este comando, Hummingbot se iniciará y verás su consola.
¿Buscas un servidor que simplemente funcione?
Valebyte VPS — NVMe, soporte 24/7, despliegue en 60 segundos.
Configuración de Hummingbot: conexión a exchanges y creación de estrategias
Después de iniciar Hummingbot con éxito en la consola, deberás configurarlo para que funcione con los exchanges y estrategias seleccionados.
Paso 1: Creación de contraseña y billetera
Al iniciar Hummingbot por primera vez, te pedirá que crees una contraseña. Esto es importante para cifrar tus claves API y otros datos confidenciales. Introduce una contraseña segura y guárdala en un lugar seguro.
>>> Enter new password:
>>> Confirm new password:
Luego, si planeas usar un DEX, Hummingbot te ofrecerá crear o importar una billetera. Para los CEX, esto no es necesario.
Paso 2: Conexión a exchanges (por ejemplo, Binance)
Para conectarte a exchanges centralizados, como Hummingbot Binance u OKX, necesitarás claves API y claves secretas, que debes generar en el exchange correspondiente. Asegúrate de que estas claves tengan permiso para operar, pero no para retirar fondos, para una máxima seguridad.
En la consola de Hummingbot, ejecuta el comando:
connect binanceEl bot te pedirá tu clave API y clave secreta. Introdúcelas con cuidado.
>>> Enter your binance API key:
>>> Enter your binance secret key:
Repite este procedimiento para todos los exchanges con los que planees trabajar.
Paso 3: Creación de una estrategia
Hummingbot soporta muchas estrategias. Para crear una nueva estrategia, usa el comando create:
createEl bot te pedirá que elijas un tipo de estrategia (por ejemplo, pure_market_making, cross_exchange_market_making, arbitrage). Luego te guiará a través de una serie de preguntas para configurar los parámetros: selección del exchange, par de trading, spread, tamaño de las órdenes, etc. Responde cuidadosamente a las preguntas, teniendo en cuenta tus objetivos de trading y riesgos.
Ejemplo de configuración de pure_market_making:
>>> What is your market making strategy? (pure_market_making, cross_exchange_market_making, arbitrage, etc.): pure_market_making
>>> Enter the exchange name you would like to use (e.g. binance, kucoin, etc.): binance
>>> Enter the trading pair you would like to trade on binance (e.g. ETH-USDT): BTC-USDT
>>> What is the amount of BTC per order? (e.g. 0.001): 0.001
>>> What is the spread % from the mid price? (e.g. 0.1): 0.1
... y así sucesivamente ...
Una vez completada la configuración, la estrategia se guardará en un archivo de configuración en la carpeta hummingbot_files/conf/strategies/ de tu VPS. Puedes editar este archivo manualmente o a través del comando config en Hummingbot.
Paso 4: Ejecución de la estrategia
Para ejecutar la estrategia creada, usa el comando start:
startSi tienes varias estrategias, puedes ejecutar una específica por su nombre:
start <nombre_de_la_estrategia>El bot comenzará a colocar órdenes según tu configuración. Puedes monitorear su funcionamiento con los comandos status e history.
Estrategias populares de Hummingbot: PMM, Cross-Exchange, Arb
Hummingbot ofrece un conjunto flexible de estrategias que permiten automatizar diferentes enfoques de trading. Veamos las más populares:
Pure Market Making (PMM)
La estrategia Pure Market Making (PMM) es la principal para Hummingbot. Su esencia radica en la colocación simultánea de órdenes límite de compra (bid) y venta (ask) alrededor del precio de mercado actual. El objetivo es obtener ganancias de la diferencia entre los precios de compra y venta (spread), proporcionando liquidez al mercado. El bot ajusta constantemente las órdenes, siguiendo el movimiento del precio, para que sigan siendo relevantes.
Principio de funcionamiento:
- El bot coloca una orden de compra por debajo del precio de mercado actual y una orden de venta por encima del precio de mercado actual.
- Cuando una de las órdenes se ejecuta, el bot coloca automáticamente una nueva orden en el lado opuesto del spread.
- Ante un cambio significativo en el precio de mercado, el bot cancela las órdenes antiguas y coloca nuevas para mantener el spread definido con respecto al nuevo precio medio.
PMM es la base para muchos traders que buscan obtener un ingreso pequeño pero estable al proporcionar liquidez. También puede ser la base para un grid bot vps, ya que, en esencia, PMM coloca órdenes constantemente en una "cuadrícula" alrededor del precio.
Cross-Exchange Market Making
Esta estrategia extiende el concepto de PMM, aplicándolo a dos exchanges diferentes. El objetivo es utilizar pequeñas discrepancias de precios entre los exchanges para obtener ganancias. El bot coloca órdenes de compra en un exchange y órdenes de venta en otro exchange para el mismo par de trading.
Principio de funcionamiento:
- El bot monitorea los precios en dos exchanges (por ejemplo, Binance y OKX) para el mismo par de trading (por ejemplo, BTC-USDT).
- Si el precio en un exchange es lo suficientemente bajo para comprar y lo suficientemente alto en el otro para vender, teniendo en cuenta las comisiones, el bot ejecuta ambas operaciones.
- Esto requiere tener capital en ambos exchanges y una latencia muy baja, lo que hace que el VPS sea críticamente importante.
Cross-Exchange Market Making requiere una configuración y gestión de riesgos más complejas, pero puede generar mayores ingresos en condiciones de mercado favorables.
Arbitrage
La estrategia de arbitraje se enfoca en el uso instantáneo de las discrepancias de precios entre diferentes exchanges para el mismo par de trading. A diferencia del Cross-Exchange Market Making, donde el bot coloca órdenes límite, un bot de arbitraje generalmente ejecuta órdenes de mercado para fijar la diferencia lo más rápido posible.
Principio de funcionamiento:
- El bot escanea constantemente los precios en varios exchanges.
- Tan pronto como se detecta una diferencia de precio suficientemente grande (que exceda las comisiones), el bot compra simultáneamente el activo en el exchange con el precio bajo y lo vende en el exchange con el precio alto.
- Esta es una estrategia de alta velocidad que requiere una latencia mínima y una alta fiabilidad de ejecución, lo que hace que la elección de un VPS potente con una conexión a internet rápida (por ejemplo, 1 Gbit/s) sea obligatoria.
El arbitraje puede ser muy rentable, pero conlleva riesgos como el deslizamiento (slippage), altas comisiones y la competencia con otros bots de arbitraje.
Ejemplo de P&L: ¿Cuánto se puede ganar con Hummingbot con un capital de $5k?
La estimación de la ganancia potencial (P&L) del funcionamiento de Hummingbot con un capital de $5,000 es una tarea que requiere considerar múltiples variables. Es importante entender que estos son solo cálculos aproximados, y los resultados reales pueden variar significativamente dependiendo de las condiciones del mercado, la estrategia elegida, el par de trading, la volatilidad y la liquidez.
Datos iniciales para el ejemplo:
- Capital: $5,000 (supongamos 50% en stablecoins, 50% en un activo de trading, por ejemplo, $2,500 USDT y $2,500 en BTC).
- Exchange: Binance (comisiones medias).
- Estrategia: Pure Market Making (PMM).
- Par de trading: BTC-USDT (u otro par líquido).
- Spread: 0.1% - 0.2% del precio medio.
- Tamaño de la orden: $25 - $50 (para ejecución activa).
- Comisiones: 0.075% para el maker, 0.075% para el taker (usando BNB, de lo contrario 0.1%).
- Ejecución de órdenes: Supongamos 100-200 operaciones al día (50-100 ciclos de compra/venta).
Cálculo de la ganancia potencial:
- Ganancia por un ciclo (compra + venta):
- Si el spread es del 0.1% y tu orden es de $50, la ganancia antes de comisiones por un ciclo es: $50 * 0.1% = $0.05.
- Comisiones por ciclo: $50 (compra) * 0.075% + $50 (venta) * 0.075% = $0.0375 + $0.0375 = $0.075.
- Ganancia neta por ciclo: $0.05 (ganancia del spread) - $0.075 (comisiones) = -$0.025.
Esto significa que con un spread del 0.1% y comisiones del 0.075%, estarás perdiendo dinero.
- Ajuste del spread para la rentabilidad:
- Para ser rentable, tu spread debe cubrir las comisiones. En este caso, el spread debe ser al menos 2 * 0.075% = 0.15%.
- Supongamos que establecemos un spread del 0.2%.
- Ganancia antes de comisiones por un ciclo: $50 * 0.2% = $0.10.
- Ganancia neta por ciclo: $0.10 (ganancia del spread) - $0.075 (comisiones) = $0.025.
- Ganancia diaria:
- Si el bot realiza 150 ciclos al día: 150 * $0.025 = $3.75.
- Ganancia mensual:
- $3.75 * 30 días = $112.5.
- Ganancia anual:
- $112.5 * 12 meses = $1,350.
Advertencias importantes y factores que afectan el P&L:
- Volatilidad del mercado: Cuanto mayor sea la volatilidad, más oportunidades habrá para la ejecución de órdenes y la obtención de ganancias. En un mercado tranquilo, el bot puede permanecer inactivo.
- Liquidez: Los pares altamente líquidos aseguran una ejecución rápida de las órdenes y minimizan el deslizamiento (slippage).
- Competencia: En pares populares, hay muchos otros market makers, lo que reduce el spread disponible.
- Configuración de la estrategia: Un spread agresivo (menor) puede aumentar los volúmenes, pero reducir la ganancia neta por operación. Un spread amplio (mayor) aumentará la ganancia por operación, pero disminuirá el número de operaciones.
- Comisiones del exchange: El uso de tokens del exchange (por ejemplo, BNB en Binance) para reducir las comisiones es críticamente importante.
- Deslizamiento (Slippage): En condiciones de alta volatilidad, las órdenes pueden ejecutarse a un precio peor de lo esperado.
- Pérdidas impermanentes (Impermanent Loss): Si mantienes parte del capital en un activo volátil, su precio puede caer, lo que anulará las ganancias del market making.
- Costos del VPS: No olvides deducir el costo del VPS (por ejemplo, $10-$20 al mes) de la ganancia total.
Con un capital de $5,000 y una estrategia PMM optimizada, la rentabilidad mensual realista puede oscilar entre el 1% y el 5% del capital, es decir, $50 - $250. Esta no es una cifra fija, sino solo una orientación que puede fluctuar dependiendo de todos los factores mencionados anteriormente.
¿Buscas un servidor que simplemente funcione?
Valebyte VPS — NVMe, soporte 24/7, despliegue en 60 segundos.
Optimización y seguridad del funcionamiento de Hummingbot en un VPS
Después de instalar y configurar Hummingbot en tu VPS, es importante prestar atención a la optimización de su funcionamiento y a la seguridad. Esto garantizará ganancias estables y la protección de tus activos.
Recomendaciones de optimización:
- Monitoreo de recursos del VPS:
- Verifica regularmente la carga de CPU, el uso de RAM y el espacio en disco. Usa los comandos
htop,free -h,df -h. - Si los recursos se acercan al límite, considera la posibilidad de actualizar tu VPS a un plan Valebyte más potente.
- Verifica regularmente la carga de CPU, el uso de RAM y el espacio en disco. Usa los comandos
- Uso de Screen o Tmux:
- Ejecuta Hummingbot dentro de una sesión
screenotmux. Esto permitirá que el bot continúe funcionando incluso después de desconectar tu sesión SSH. - Para
screen:screen -S hummingbot_session, luego ejecuta el comando Docker. Para desconectarte:Ctrl+A, D. Para volver a conectarte:screen -r hummingbot_session.
- Ejecuta Hummingbot dentro de una sesión
- Reinicio automático:
- Configura el contenedor Docker para que se reinicie automáticamente en caso de fallo usando la opción
--restart unless-stoppedal iniciar el contenedor:docker run -it --name hummingbot_instance --restart unless-stopped ... - Esto asegurará el funcionamiento continuo del bot después de un reinicio del VPS o errores inesperados.
- Configura el contenedor Docker para que se reinicie automáticamente en caso de fallo usando la opción
- Actualización de Hummingbot:
- Actualiza regularmente la imagen de Docker a la última versión para recibir correcciones de errores y nuevas funciones.
- Detén el contenedor:
docker stop hummingbot_instance - Elimina el contenedor antiguo:
docker rm hummingbot_instance - Descarga la nueva imagen:
docker pull coinalpha/hummingbot:latest - Inicia el nuevo contenedor con los mismos parámetros.
- Optimización de logs:
- Hummingbot genera muchos logs. Configura la rotación de logs para que no llenen todo el disco. Por defecto, Docker se encarga de esto, pero se puede configurar de forma más precisa.
Recomendaciones de seguridad:
- Firewall (UFW):
- Configura Uncomplicated Firewall (UFW) en tu VPS para permitir el acceso solo a los puertos necesarios (SSH, posiblemente el puerto de la interfaz web de Hummingbot, si lo usas).
- Ejemplo:
sudo ufw allow ssh
sudo ufw enable
- Claves SSH:
- Usa claves SSH en lugar de una contraseña para conectarte al VPS. Esto es mucho más seguro. Deshabilita el inicio de sesión con contraseña después de configurar las claves.
- Puedes leer más sobre esto en nuestras guías de configuración de servidores.
- Restricción de permisos de claves API:
- En los exchanges, otorga a las claves API solo los permisos necesarios para operar (lectura de saldo, colocación/cancelación de órdenes). Nunca otorgues permisos para retirar fondos.
- Copia de seguridad:
- Realiza copias de seguridad regularmente de las carpetas
hummingbot_files,hummingbot_logs,hummingbot_data. Esto permitirá restaurar rápidamente la configuración y el historial en caso de problemas con el VPS. - Valebyte ofrece la posibilidad de crear snapshots de VPS, lo que también es una excelente forma de copia de seguridad.
- Realiza copias de seguridad regularmente de las carpetas
- Actualización del SO:
- Actualiza regularmente el sistema operativo del VPS para recibir los últimos parches de seguridad.
sudo apt update && sudo apt upgrade -y
Conclusiones
La instalación y configuración de Hummingbot en un VPS Ubuntu de Valebyte es una forma eficaz de automatizar tus estrategias de trading, garantizando alta estabilidad, baja latencia y seguridad. Elegir el plan de VPS adecuado con recursos suficientes (2-4 vCPU, 4-8 GB de RAM, NVMe SSD) y seguir las instrucciones paso a paso para la instalación de Docker y la configuración del bot te permitirá comenzar rápidamente con el market making o el arbitraje en exchanges como Binance. Para una máxima eficiencia y protección de tus activos, presta siempre atención a la optimización y a las medidas de seguridad, como la configuración del firewall y la actualización regular del sistema.
¿Listo para elegir un servidor?
VPS y servidores dedicados en más de 72 países con activación instantánea y acceso root completo.
Empezar ahora →