Installing and Configuring LiteLLM Proxy on a VPS: A Unified API Interface for Managing All Your LLMs
TL;DR
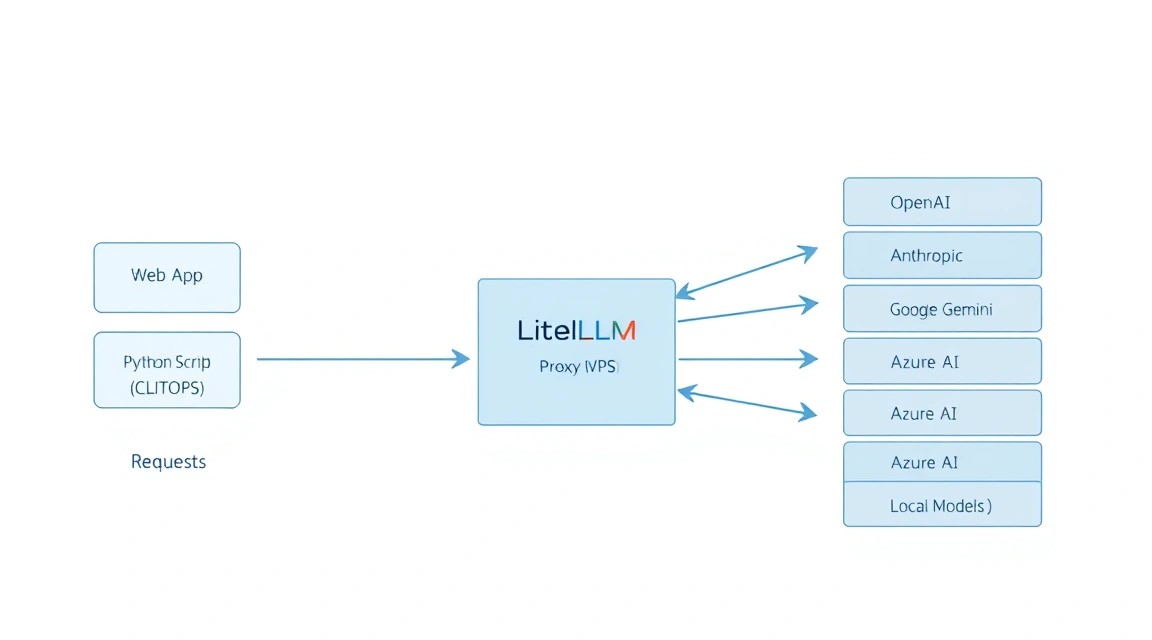
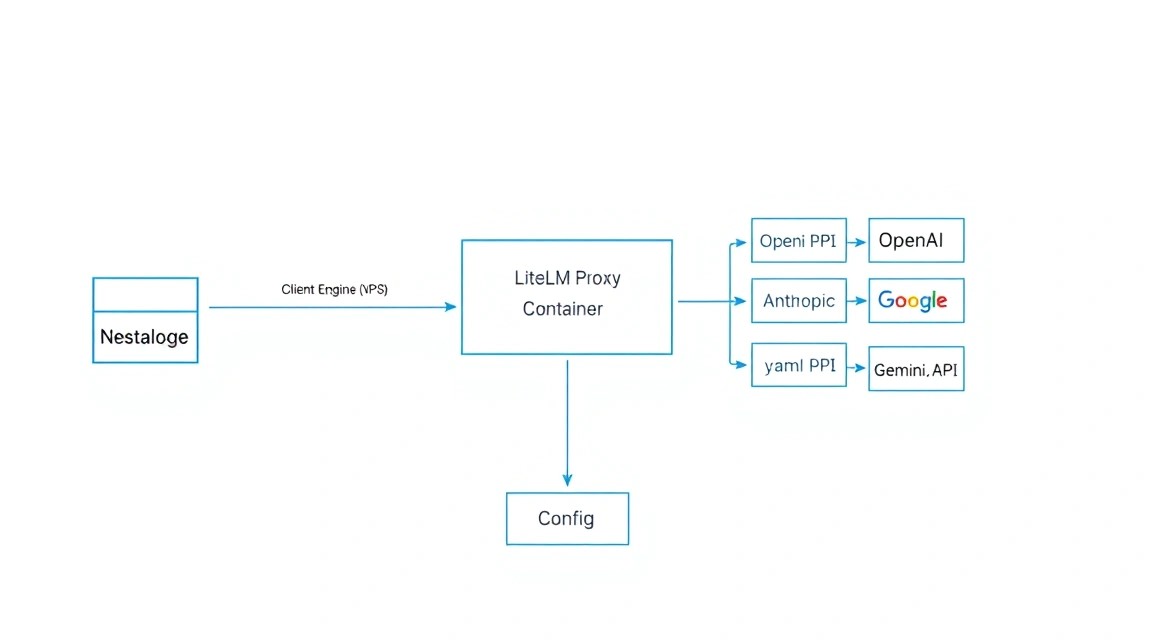
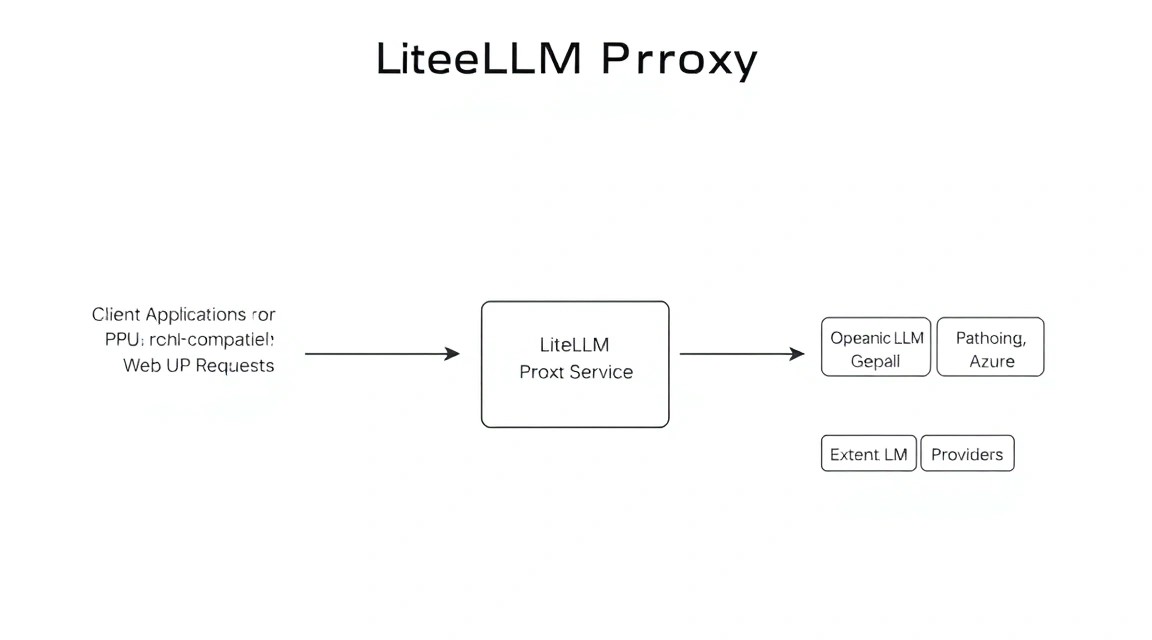
In this guide, we will explore the process of deploying LiteLLM Proxy on a virtual server—a powerful tool that unifies dozens of different AI providers (OpenAI, Anthropic, Google, Azure, Ollama) into a single unified API interface, fully compatible with the OpenAI format. This allows developers and companies to centrally manage keys, limits, logging, and fault tolerance for their AI services.
- Unification: One endpoint for all models (GPT-4, Claude 3.5, Gemini, Llama 3).
- Savings: Built-in request caching via Redis and detailed cost monitoring.
- Reliability: Automatic retries and fallback to backup models during provider outages.
- Security: Access management via virtual keys with token and budget limits.
- Self-hosted: Full control over data and logs on your own VPS.
1. What We Are Setting Up and Why: The Problem of AI Service Fragmentation
By 2026, the landscape of large language models (LLMs) has become extremely fragmented. Developers must integrate APIs from OpenAI for GPT-5, Anthropic for Claude 4, Google for Gemini 2.0, as well as local models via vLLM or Ollama to ensure privacy. Each provider has its own request formats, authentication methods, and limit systems.
LiteLLM Proxy solves this problem by acting as an intelligent gateway. It accepts requests in the standard OpenAI format and "translates" them into the language of the required provider. But it's not just a proxy server. It's a full-fledged management platform (Governance Layer) that allows you to:
- Create virtual keys for different departments or applications, limiting their budget (e.g., no more than $10 per day).
- Configure "smart" routing: if OpenAI returns a 500 error, the request is automatically sent to Anthropic.
- Log every request and response to a PostgreSQL database for subsequent quality and cost analysis.
- Use semantic caching to avoid paying twice for identical user questions.
Choosing a self-hosted solution on a VPS instead of using cloud aggregators (like OpenRouter) is driven by security requirements and the desire to avoid additional markups on tokens. By having your own proxy, you pay providers directly and maintain full control over where your data goes.
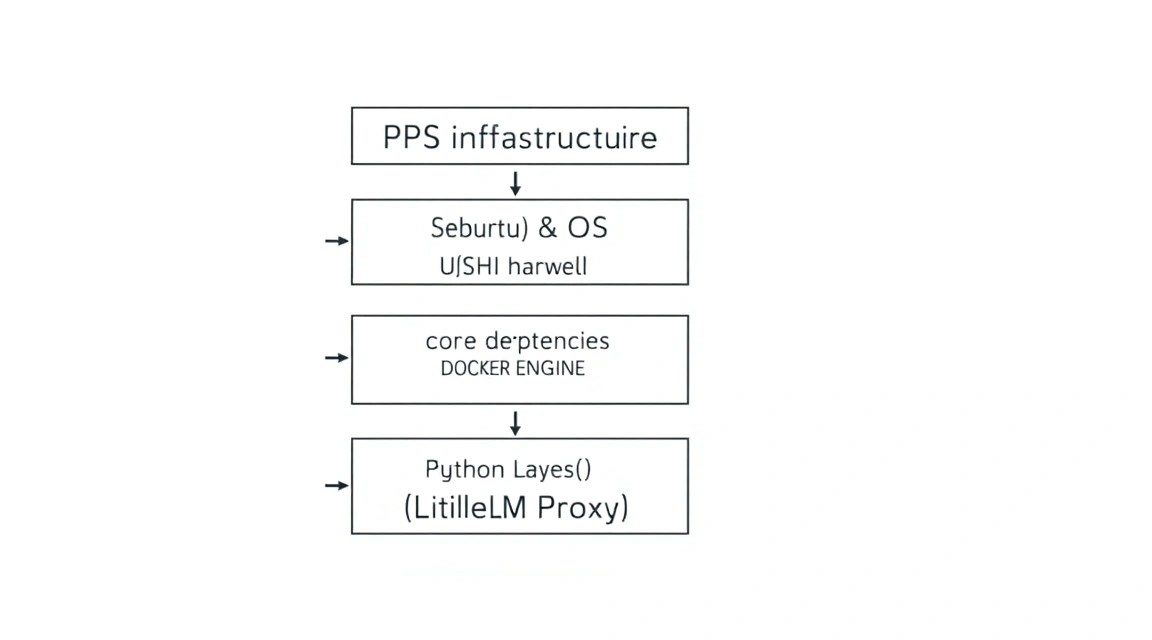
2. What VPS Configuration is Needed for This Task
LiteLLM Proxy itself is a lightweight Python application, but its requirements grow depending on traffic volume, the use of a database for logs, and caching in Redis.
| Component | Minimum (1-5 users) | Recommended (Production) |
|---|---|---|
| CPU | 1 Core (Shared) | 2-4 Cores (Dedicated) |
| RAM | 2 GB | 4-8 GB |
| Disk | 20 GB SSD | 50 GB NVMe (for DB logs) |
| OS | Ubuntu 24.04 LTS | Ubuntu 24.04 / 26.04 LTS |
For stable system operation, considering the PostgreSQL database and Redis cache, a suitable VPS with 4 GB of RAM is the optimal choice. This will provide a sufficient margin for processing parallel requests without delays.
When is a Dedicated server needed? If you plan to run local models (e.g., Llama 3 70B) directly on the same server via Ollama. In this case, you will need GPU power (NVIDIA A100/H100) or a huge amount of RAM for CPU inference. For the proxy layer itself, a regular VPS is more than enough.
Location: Choose a data center as close as possible to your main application servers or provider endpoints (usually the US or Europe) to minimize network latency (TTFT — Time To First Token).
3. Server Preparation: Security and Basic Software
Before installing LiteLLM, you must prepare the environment. Security is critical, as your API keys for paid services will pass through this server.
Update packages and install basic utilities:
sudo apt update && sudo apt upgrade -y
sudo apt install -y curl git wget build-essential software-properties-common
Create a separate user to run services so as not to use root:
sudo adduser litellm-admin
sudo usermod -aG sudo litellm-admin
# Переключаемся на нового пользователя
su - litellm-admin
Configure the basic UFW firewall. We will need ports 22 (SSH), 80 (HTTP), and 443 (HTTPS):
sudo ufw allow 22/tcp
sudo ufw allow 80/tcp
sudo ufw allow 443/tcp
sudo ufw enable
To protect against SSH brute force, install fail2ban:
sudo apt install -y fail2ban
sudo systemctl enable fail2ban
sudo systemctl start fail2ban
4. Installing Docker and Required Components
In 2026, the most reliable way to deploy LiteLLM Proxy remains Docker. This isolates Python dependencies and simplifies updates.
Install Docker Engine and Docker Compose:
# Добавляем официальный GPG ключ Docker
sudo install -m 0755 -d /etc/apt/keyrings
curl -fsSL https://download.docker.com/linux/ubuntu/gpg | sudo gpg --dearmor -o /etc/apt/keyrings/docker.gpg
sudo chmod a+r /etc/apt/keyrings/docker.gpg

# Добавляем репозиторий
echo "deb [arch=$(dpkg --print-architecture) signed-by=/etc/apt/keyrings/docker.gpg] https://download.docker.com/linux/ubuntu $(. /etc/os-release && echo "$VERSION_CODENAME") stable" | sudo tee /etc/apt/sources.list.d/docker.list > /dev/null

sudo apt update
sudo apt install -y docker-ce docker-ce-cli containerd.io docker-buildx-plugin docker-compose-plugin

# Добавляем пользователя в группу docker
sudo usermod -aG docker $USER
# Примените изменения групп без перезагрузки
newgrp docker
Verify the installation:
docker --version && docker compose version
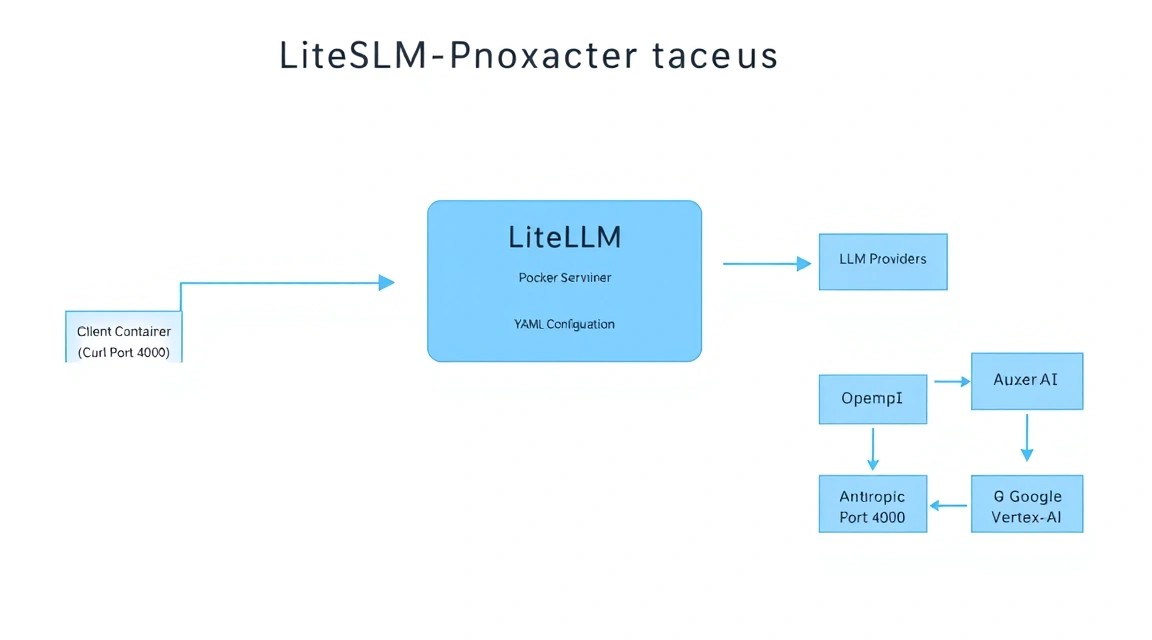
5. Step-by-Step LiteLLM Proxy Installation
We will use a combination of three containers: LiteLLM itself, PostgreSQL (for storing keys and logs), and Redis (for request caching and rate limiting).
Create a working directory:
mkdir ~/litellm-stack && cd ~/litellm-stack
Create the docker-compose.yaml file. This configuration is current for 2026 versions and includes automatic restarts and container health checks:
cat < docker-compose.yaml
services:
  db:
    image: postgres:16-alpine
    volumes:
      - ./postgres_data:/var/lib/postgresql/data
    environment:
      POSTGRES_DB: litellm
      POSTGRES_USER: litellm_user
      POSTGRES_PASSWORD: your_strong_password
    healthcheck:
      test: ["CMD-SHELL", "pg_isready -U litellm_user -d litellm"]
      interval: 5s
      timeout: 5s
      retries: 5

  redis:
    image: redis:7-alpine
    command: redis-server --appendonly yes
    volumes:
      - ./redis_data:/data
    healthcheck:
      test: ["CMD", "redis-cli", "ping"]
      interval: 5s
      timeout: 5s
      retries: 5

  litellm:
    image: ghcr.io/berriai/litellm:main-latest
    ports:
      - "4000:4000"
    volumes:
      - ./config.yaml:/app/config.yaml
    environment:
      - DATABASE_URL=postgresql://litellm_user:your_strong_password@db:5432/litellm
      - REDIS_HOST=redis
      - REDIS_PORT=6379
      - LITELLM_MASTER_KEY=sk-master-key-2026-very-secret
      - UI_USERNAME=admin
      - UI_PASSWORD=admin-password-change-me
    depends_on:
      db:
        condition: service_healthy
      redis:
        condition: service_healthy
    command: ["--config", "/app/config.yaml", "--port", "4000", "--detailed_debug"]
EOF
Note: Be sure to replaceyour_strong_passwordandLITELLM_MASTER_KEYwith your own unique values. The master key will be used for initial access to the admin panel and for creating virtual keys.
6. Configuration Deep Dive: Models, Secrets, and Routing
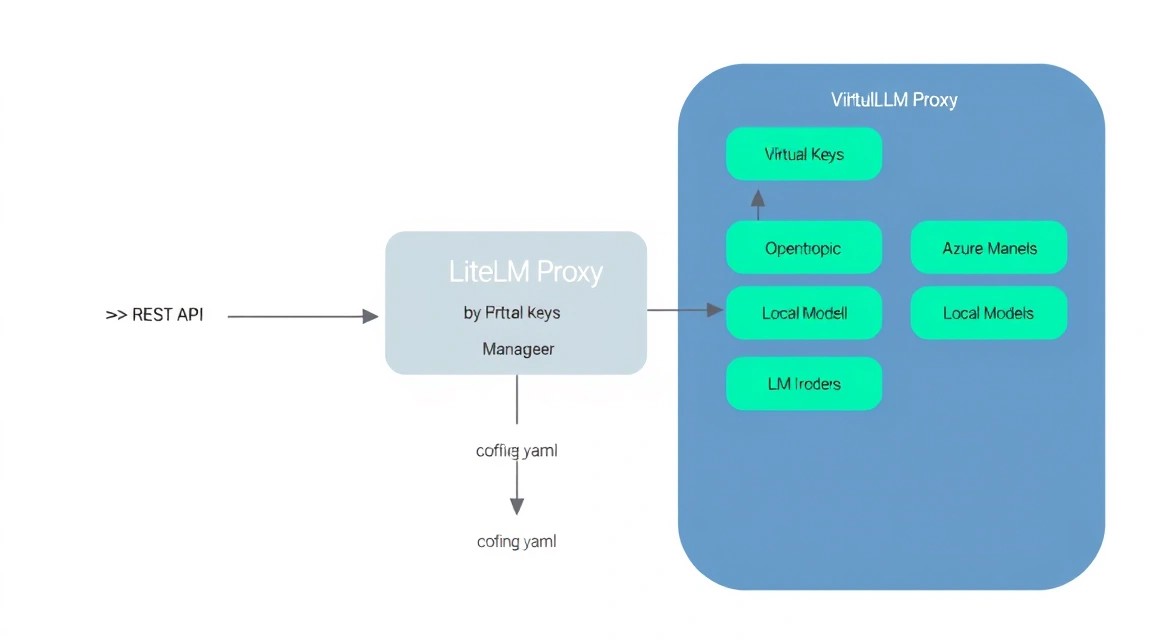
The heart of LiteLLM is the config.yaml file. Here, we define the list of models and the rules for their operation.
Let's create a configuration example:
cat < config.yaml
model_list:
  - model_name: gpt-4
    litellm_params:
      model: openai/gpt-4-turbo
      api_key: "os.environ/OPENAI_API_KEY"

  - model_name: claude-3-5
    litellm_params:
      model: anthropic/claude-3-5-sonnet-20240620
      api_key: "os.environ/ANTHROPIC_API_KEY"

  - model_name: global-llm
    model_info:
      base_model: gpt-4
    litellm_params:
      model: openai/gpt-4
      api_key: "os.environ/OPENAI_API_KEY"
      tpm: 10000
      rpm: 500

  - model_name: global-llm
    model_info:
      base_model: claude-3-5
    litellm_params:
      model: anthropic/claude-3-5-sonnet
      api_key: "os.environ/ANTHROPIC_API_KEY"

router_settings:
  routing_strategy: usage-based-routing-v2
  enable_pre_call_checks: true

litellm_settings:
  drop_params: true
  set_verbose: false
  cache: true
  cache_type: redis
  success_callback: ["database"]
  failure_callback: ["database"]
EOF
In this example, we have configured:
- Direct models: Accessing specific GPT-4 or Claude instances.
- Model group (Load Balancing): When requesting
global-llm, the proxy will automatically select the less loaded model or switch to an alternative in case of failure. - Redis Caching: Repeated requests will not be sent to the provider, saving money.
- Database Logging: All successful and failed calls are saved in PostgreSQL.
To pass API keys, let's create a .env file:
cat < .env
OPENAI_API_KEY=sk-proj-xxxx...
ANTHROPIC_API_KEY=sk-ant-xxxx...
EOF
Now update docker-compose.yaml so that it picks up environment variables from .env (add the env_file: .env section to the litellm service).
Launch the stack:
docker compose up -d
7. Setting up HTTPS via Caddy to Protect the API

Opening port 4000 directly to the internet is unsafe. We need a reverse proxy with automatic SSL certificate acquisition. Caddy is the ideal choice for 2026 due to its ease of configuration.
sudo apt install -y debian-keyring debian-archive-keyring apt-transport-https
curl -1sLf 'https://dl.cloudsmith.io/public/caddy/stable/gpg.key' | sudo gpg --dearmor -o /usr/share/keyrings/caddy-stable-archive-keyring.gpg
curl -1sLf 'https://dl.cloudsmith.io/public/caddy/stable/debian.deb.txt' | sudo tee /etc/apt/sources.list.d/caddy-stable.list
sudo apt update
sudo apt install caddy
Let's configure the Caddyfile (replace api.yourdomain.com with your actual domain pointing to the server's IP):
sudo nano /etc/caddy/Caddyfile
File content:
api.yourdomain.com {
    reverse_proxy localhost:4000

    header {
        # Basic protection
        Strict-Transport-Security "max-age=31536000;"
        X-Content-Type-Options nosniff
        X-Frame-Options DENY
        Referrer-Policy no-referrer-when-downgrade
    }
}
Restart Caddy:
sudo systemctl restart caddy
8. Backups, Monitoring, and Maintenance
Your proxy now stores critical data: virtual user keys and cost history. Losing the PostgreSQL database would be painful.
Backup Automation
Let's create a simple script for a daily database dump to an S3-compatible storage or another server:
#!/bin/bash
# backup-db.sh
BACKUP_DIR="/home/litellm-admin/backups"
TIMESTAMP=$(date +"%Y%m%d_%H%M%S")
mkdir -p $BACKUP_DIR

docker exec litellm-stack-db-1 pg_dump -U litellm_user litellm > $BACKUP_DIR/litellm_backup_$TIMESTAMP.sql

# Delete backups older than 30 days
find $BACKUP_DIR -type f -mtime +30 -name "*.sql" -delete
Add it to cron (crontab -e):
0 3 * * * /bin/bash /home/litellm-admin/backup-db.shUpdating LiteLLM
LiteLLM developers release updates almost daily. To update without losing data:
cd ~/litellm-stack
docker compose pull
docker compose up -d
Monitoring
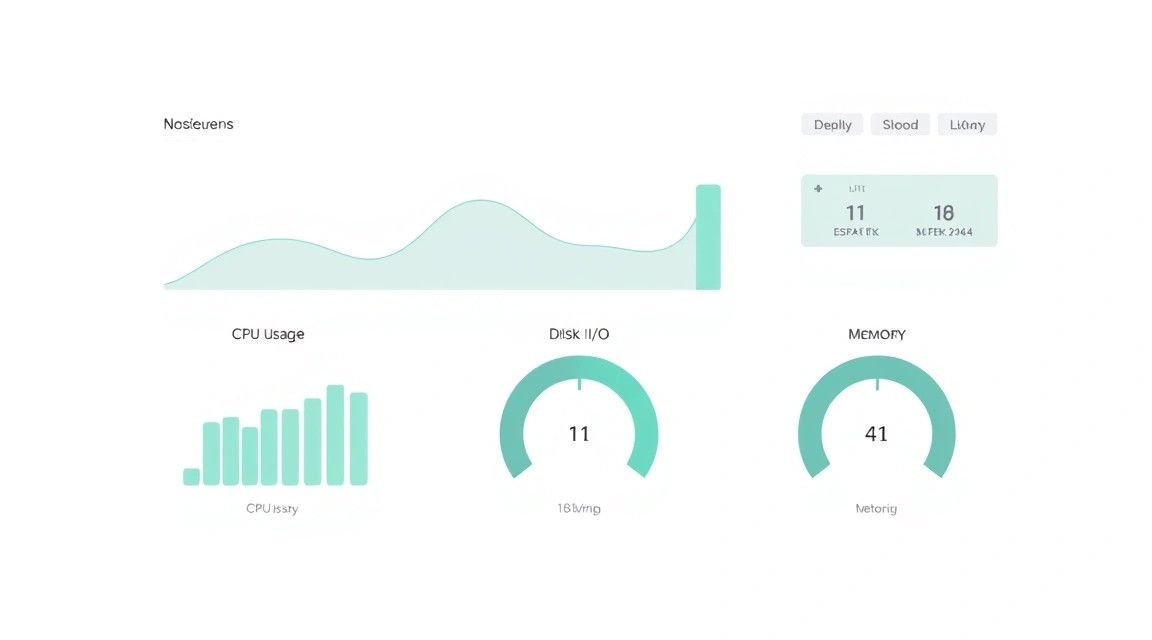
LiteLLM provides a built-in dashboard. After installation, it is available at https://api.yourdomain.com/ui. Use the login and password specified in docker-compose.yaml. There you will see usage graphs, active keys, and provider errors in real-time.
9. Troubleshooting + FAQ
1. "Connection refused" error when trying to access the API?
Check if the containers are running: docker compose ps. If the litellm container keeps restarting, check the logs: docker compose logs litellm. Most often, the problem is an incorrect config.yaml format or a missing DATABASE_URL.
2. How to add a new model without restarting the entire stack?
LiteLLM supports hot configuration reloading. Edit config.yaml and send a SIGHUP signal to the container or simply run docker compose up -d — Docker will only restart the changed service with minimal downtime.
3. What is the minimum VPS configuration suitable for personal use?
For a single user, 1 vCPU and 2 GB RAM are sufficient. However, if you enable detailed logging in PostgreSQL and start actively using the UI panel, the system may start swapping. 4 GB is the "gold standard" for comfortable operation.
4. What to choose — VPS or dedicated for this task?
In 95% of cases, a VPS is the best choice. A dedicated server is only needed in two scenarios: 1) You have massive traffic (millions of requests per day) requiring guaranteed CPU resources. 2) You want to run open-source models locally (Llama, Mistral) on the same hardware.
5. How to limit the budget for a specific API key?
This is done via the Admin UI or API. When creating a key, you can specify the max_budget and budget_duration parameters (e.g., $50 per month). LiteLLM will automatically block the key when the limit is reached.
6. Does LiteLLM support streaming?
Yes, LiteLLM fully supports stream: true. This is critical for chatbots so that the user sees the text as it is generated. The proxy correctly forwards data chunks from the provider to the client.
10. Conclusions and Next Steps
We have deployed a fault-tolerant, scalable, and secure gateway for working with artificial intelligence. Now you have a single entry point for all LLMs, protected by HTTPS and controlled via a database.
What to do next:
- Integration: Redirect your applications (LangChain, AutoGPT, or custom scripts) to the new endpoint
https://api.yourdomain.com/v1. - Optimization: Configure
fallbacksinconfig.yamlso that your services don't go down when OpenAI undergoes maintenance. - Analytics: After a week of operation, study the LiteLLM dashboard to understand which models are costing you the most and where you can save by switching to cheaper alternatives (e.g., from GPT-4 to Claude Haiku for simple tasks).
Using your own proxy server is an important step toward a mature AI infrastructure, providing independence from a single provider's policy and full control over costs.