
Hey friend! If you’ve been dreaming of running ZennoPoster on your Windows VPS for a while, but couldn’t decide on the right VPS or the correct sequence for installation and optimization, then this article is for you. Here, I’ll share my personal experience, and tell you all the subtleties and nuances, so you can quickly and painlessly set up and run ZennoPoster on a Windows VPS. We will analyze in detail how to choose the right VPS, what steps to take for installation and configuration, and how to optimize the program for maximum performance.

Table of Contents
- Choosing a VPS
- Installation and Configuration
- Work Optimization
- Comparative table of tools
- Conclusions
Choosing a VPS
The first step on our path to successful ZennoPoster operation is choosing the right VPS. It’s important to consider several key factors:
- Operating system: ZennoPoster runs on Windows, so make sure your VPS provides a licensed Windows environment.
- Hardware resources: For comfortable program operation, you will need sufficient RAM (at least 2 GB is recommended, but better 4 GB or more), a powerful processor, and a fast SSD for data storage.
- Connection speed: A reliable and fast internet connection is crucial, especially if you plan to automate complex scenarios.
- Provider reliability: Choose a VPS from trusted providers to minimize the risk of interruptions and technical failures.
Some popular providers that offer high-quality Windows VPSs include Valebyte, Hetzner, Vultr, Amazon AWS, and Microsoft Azure. Each of them has its own advantages and features, so I recommend studying the terms, testing, and choosing the one that suits your tasks best.
If you want to check the VPS parameters, you can use utilities like SpeedTest or Ping to assess the connection quality.

Installation and Configuration of ZennoPoster
After choosing a VPS and gaining access to it, we proceed to install ZennoPoster. Below is a detailed step-by-step guide:
1. Downloading the installation file
The first thing to do is download the ZennoPoster installation file from the official Zennolab website. You can do this using a browser directly on the VPS or download the file to your local computer and transfer it via remote connection.
Example command to download the installer using PowerShell:
Invoke-WebRequest -Uri "https://zennolab.com/zenno/installer.exe" -OutFile "C:\Users\Public\Downloads\ZennoPosterInstaller.exe"
Note: the link is given as an example, check the current address on the official website.
2. Starting the installation
After downloading, run the installer. A standard installation wizard will appear on the screen. Follow the instructions, choosing the type of installation (standard installation is recommended). If you have questions during the process, remember — you can always stop and find detailed information in the official ZennoPoster forum.
If you prefer to start the installation via the command line, you can use the following script:
cd "C:\Users\Public\Downloads"
start /wait ZennoPosterInstaller.exe /silent
The /silent parameter allows you to install the program in silent mode, which is especially convenient for mass deployments.
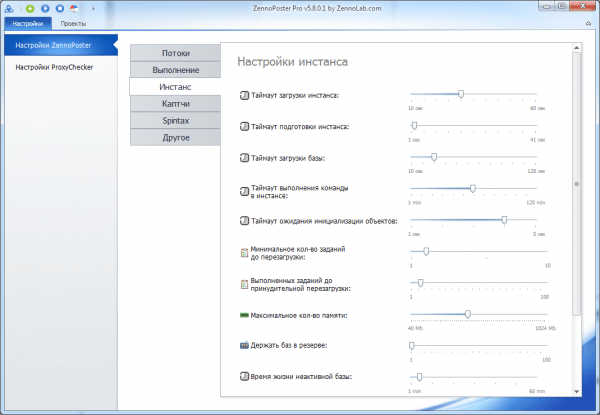
3. Initial program setup
After completing the installation, launch ZennoPoster. On the first launch, the program will prompt you to go through the initial setup. Here it is important:
- Activate the license (if you already have a key, enter it in the appropriate field; if not, purchase it on the official ZennoPoster website).
- Configure internet connection settings to ensure stable operation.
- Define the main directories for storing projects and logs.
During installation, it is recommended to change the standard paths for storing files, so that it will be easier to organize backups and monitor the system status in the future.
4. Checking operability
After installation and initial setup, reboot and run the program again to check. Make sure all functions are working correctly and updates are being downloaded without errors.
Optimizing ZennoPoster on Windows VPS
Optimizing ZennoPoster will help you make the most efficient use of VPS resources and avoid possible failures when performing automated tasks. Here are a few recommendations:
- Disabling unnecessary Windows services: Many services running by default can consume VPS resources that you’d better use for ZennoPoster. Disable unnecessary processes via
msconfigor PowerShell. - Configuring program startup: Add ZennoPoster to startup so that the program starts automatically when the VPS is rebooted. This can be done through the Windows Task Scheduler.
- Regular updates: Keep track of updates for both Windows and ZennoPoster. Updates often contain bug fixes and performance optimizations.
- Resource monitoring: Use built-in Windows tools (Task Manager, Performance Monitor) or third-party solutions to monitor CPU, memory, and disk usage.
- Optimizing network settings: If your scenarios require a stable internet connection, configure TCP/IP settings using optimization scripts.
Example of disabling unnecessary services via PowerShell
To temporarily disable unnecessary services, you can use the following command:
Get-Service | Where-Object { $_.Status -eq "Running" -and $_.Name -like "*SampleService*" } | ForEach-Object { Stop-Service $_.Name }
Be sure to check which services are safe to disable so as not to disrupt the system.
Another useful tip: configure the Windows Task Scheduler to automatically restart ZennoPoster in case of failures. For example, add a task with parameters that check the process status every 5 minutes.
«Automation applied to an inefficient operation will magnify the inefficiency.» – Bill Gates
What you will need
| Tool/Platform | Advantages | Disadvantages | Download/Resource |
|---|---|---|---|
| ZennoPoster |
|
| Official website |
| Windows VPS (Hetzner/Vultr/AWS/Azure) |
|
| Vultr / AWS |
| PowerShell |
|
| Documentation |
Conclusions
We have gone all the way from choosing a VPS to fine-tuning and optimizing ZennoPoster on a Windows VPS. Here’s what we’ve learned:
- VPS selection: Choosing the right provider and VPS configuration is crucial for stable ZennoPoster operation. Carefully analyze resources, choose a licensed Windows environment, and monitor the quality of the internet connection.
- Installation and configuration: Downloading the installation file from the official website, running the installation wizard, and performing the initial program setup allow you to quickly launch ZennoPoster. Using the command line and PowerShell greatly simplifies routine tasks.
- Work optimization: Disabling unnecessary services, configuring autorun, and regularly updating the system will help you get the most out of your VPS resources and ensure the stability of automated scenarios.
By following these recommendations, you can set up and run ZennoPoster on a Windows VPS as efficiently as possible, saving time and nerves. I hope my article was helpful and understandable to you.
If you have any questions or want to share your experience, be sure to leave comments below. Good luck with automation and new achievements!