How to Install Windows Server 2019 on VPS?
In this article, we will take a detailed look at the process of installing Windows Server 2019 on a Virtual Private Server (VPS hosting). You will learn about the key steps of preparation, selecting a suitable image, configuring the network, and performing the initial configuration of the operating system. Step-by-step instructions and practical examples will help you successfully complete the installation and configure your server for further work. We will also discuss common errors and how to resolve them.Table of Contents:
- Choosing a VPS Provider and Preparation
- Obtaining the Windows Server 2019 ISO Image
- Installing Windows Server 2019 via VNC or KVM
- Initial Configuration of Windows Server 2019
- Activation and Updates
Choosing a VPS Provider and Preparation

- Cost: Compare prices from different providers, considering included traffic, RAM, disk space, and CPU resources.
- Reputation: Read customer reviews about the reliability and quality of the provider’s support.
- VNC/KVM Access: Make sure that the provider provides convenient access to the server console.
- ISO Upload Capability: Some providers allow you to upload your own operating system ISO images.
- Server Location: Choose a server located geographically close to your users to ensure minimal latency.
- Processor: 1.4 GHz 64-bit processor
- RAM: 2 GB RAM
- Disk Space: 32 GB
- Network Adapter: Gigabit Ethernet
| Provider | Cost (per month) | RAM | Disk | Traffic | VNC/KVM |
|---|---|---|---|---|---|
| DigitalOcean | $20 | 4 GB | 80 GB | 4 TB | Yes |
| Vultr | $20 | 4 GB | 80 GB | 3 TB | Yes |
| Linode | $20 | 4 GB | 80 GB | 4 TB | Yes |
- Register on the website of the chosen VPS provider.
- Create a new VPS with the selected configuration. (Do not select a pre-installed OS).
- Get access to the VNC/KVM console of the server. This information is usually available in the VPS control panel.
- Prepare the Windows Server 2019 ISO image. (The next section describes in detail how to do this).
Obtaining the Windows Server 2019 ISO Image

- Official Microsoft Website: The most reliable way is to download a trial version from the Microsoft website. It allows you to use Windows Server 2019 for 180 days for familiarization and testing. To continue using it, you will need to purchase a license.
- MSDN Subscription (Visual Studio Subscription): If you have an MSDN subscription, you can download licensed Windows Server 2019 ISO images.
- Microsoft Partner Programs: Special ISO image download channels are available for Microsoft partners.
- Go to the Windows Server 2019 trial version download page: https://www.microsoft.com/ru-ru/evalcenter/evaluate-windows-server-2019
- Fill out the form with the necessary information.
- Select the ISO image to download. Pay attention to the language and edition (Standard or Datacenter).
- Wait for the download to complete. The ISO image size can be several gigabytes.
# PowerShell (Windows)
Get-FileHash -Algorithm SHA256 -Path "C:\path\to\your\WindowsServer2019.iso"

# Linux
sha256sum /path/to/your/WindowsServer2019.iso
# Linux (on VPS)
wget https://example.com/WindowsServer2019.iso
Installing Windows Server 2019 via VNC or KVM
After uploading the ISO image to your VPS, you need to boot the server from this image. The process may vary slightly depending on your VPS provider, but usually looks like this:- Open the VNC/KVM console of your VPS.
- Reboot the VPS. (Sometimes you need to stop and start the VPS).
- During boot, enter the BIOS/UEFI. Usually, you need to press the `Delete`, `F2`, `F12`, or `Esc` key. Information about the key to press is displayed on the screen during boot.
- Change the Boot Order in BIOS/UEFI. Specify that the first device to boot should be CD-ROM/DVD-ROM, which will emulate your ISO image.
- Save the changes and exit the BIOS/UEFI. The VPS will reboot and try to boot from the ISO image.
- Select the language, time format, and keyboard layout.
- Click «Next».
- Click «Install».
- Enter the product key. If you do not have a product key, you can select the «I don’t have a product key» option and continue the installation in trial mode.
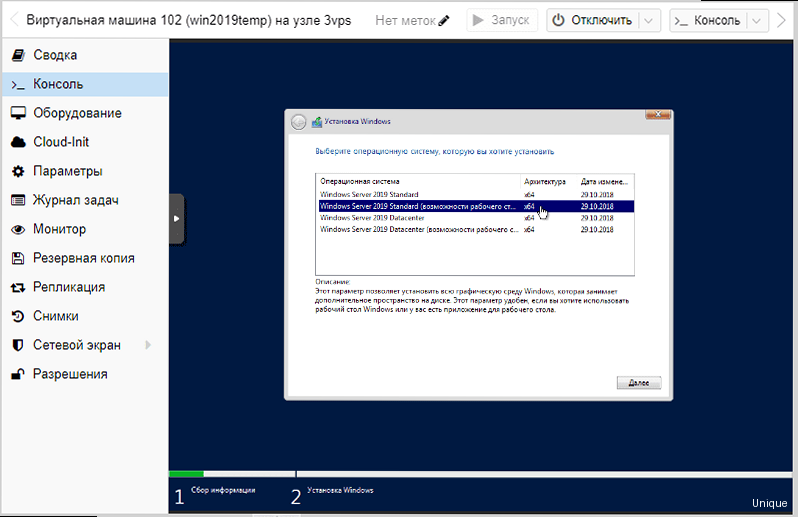
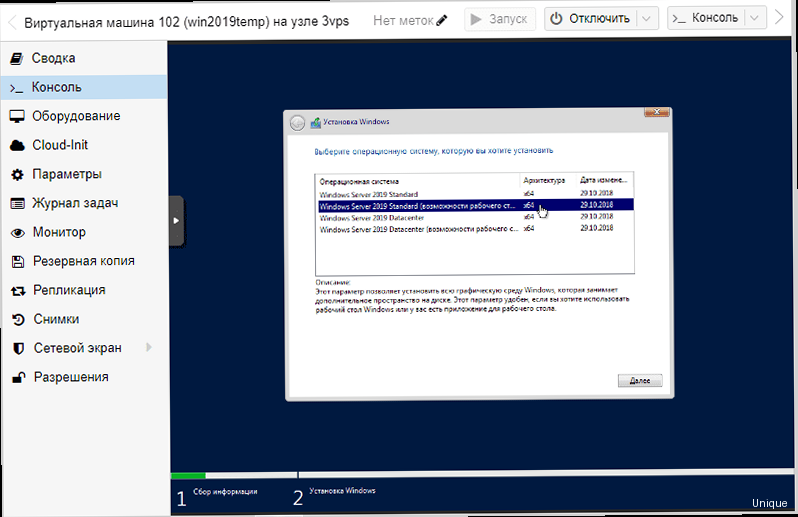
- Select the Windows Server 2019 edition. It is recommended to choose «Windows Server 2019 Standard (Desktop Experience)» or «Windows Server 2019 Datacenter (Desktop Experience)» for ease of use. «Desktop Experience» means that a graphical user interface (GUI) will be installed.
- Accept the terms of the license agreement.
- Select the installation type: «Custom: Install Windows only (advanced)».
- Select the disk to install Windows on. If the disk is clean, it needs to be formatted.
- Wait for the installation to complete. The VPS will reboot several times.
- Enter the BIOS (press Delete during boot).
- Go to the «Boot» tab.
- Find the «Boot Device Priority» or «Boot Order» option.
- Use the «+» and «-» keys or the up and down arrows to move CD-ROM/DVD-ROM (or the device that emulates the ISO image) to the first place in the list.
- Go to the «Exit» tab.
- Select «Save Changes and Exit».
Initial Configuration of Windows Server 2019
After the installation of Windows Server 2019 is complete and you boot for the first time, you will be prompted to set a password for the administrator account. Be sure to use a strong password consisting of upper and lower case letters, numbers, and special characters. Next, you need to perform the initial server configuration:- Network Configuration: Configure the servers with IP addresses, subnet mask, gateway, and DNS servers. This information is usually provided by your VPS provider.
- Installing Updates: Install the latest Windows updates to ensure the security and stability of the server.
- Firewall Configuration: Configure the Windows firewall to allow access only to the necessary ports and services.
- Installing the necessary software: Install the necessary software for your tasks (e.g., web server, database, etc.).
- Open «Network and Sharing Center».
- Click «Change adapter settings».
- Right-click on your network adapter and select «Properties».
- Select «Internet Protocol Version 4 (TCP/IPv4)» and click «Properties».
- Select «Use the following IP address».
- Enter the IP address, subnet mask, gateway, and DNS servers provided by your VPS provider.
- Click «OK».
- Open «Settings».
- Select «Update & Security».
- Click «Check for updates».
- Wait for the search and installation of updates to complete.
- Reboot the server if required.
- Open «Windows Defender Firewall with Advanced Security».
- In the left pane, select «Inbound Rules».
- Click «New Rule…» in the right pane.
- Select «Port» and click «Next».
- Select «TCP» or «UDP» (depending on the protocol you want to allow).
- Enter the port number (e.g., 80 for HTTP or 443 for HTTPS).
- Select «Allow the connection» and click «Next».
- Select the profiles for which you want to apply the rule (usually «Domain», «Private», and «Public»).
- Enter a name for the rule and click «Finish».
Activation and Updates
After completing the initial configuration, you need to activate Windows Server 2019. Activation confirms the legality of using the operating system and provides access to all functions and updates. Activating Windows Server 2019- Using the Graphical Interface:
- Open «Settings».
- Go to «Update & Security».
- Select «Activation».
- If Windows is not activated, click «Change product key» and enter your product key.
- Using the Command Line:
- Open the command prompt as an administrator.
- Enter the command:
slmgr /ipk <your_product_key>(replace <your_product_key> with your actual key). - Enter the command:
slmgr /ato
- Using the Graphical Interface:
- Open «Settings».
- Go to «Update & Security».
- In the «Windows Update» section, click «Advanced options».
- Turn on the «Automatically download and install updates» option.
- Using Group Policy:
- Open the Local Group Policy Editor (
gpedit.msc). - Go to «Computer Configuration» -> «Administrative Templates» -> «Windows Components» -> «Windows Update».
- Find the «Configure Automatic Updates» setting and enable it.
- Configure automatic update settings according to your needs.
- Open the Local Group Policy Editor (
# Command line (as administrator)
slmgr /xpr
- Open the Local Group Policy Editor (
gpedit.msc). - Go to «Computer Configuration» -> «Administrative Templates» -> «Windows Components» -> «Windows Update».
- Find the «Configure Automatic Updates» setting and enable it.
- Select the option «4 — Auto download and schedule the install».
- Specify the day and time to install updates.


