How to Install VMware vSphere? A Comprehensive Guide
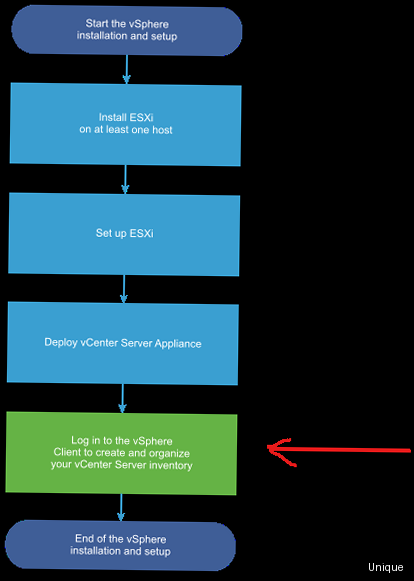
VMware vSphere is a leading virtualization platform that allows organizations to efficiently manage their resources, increase fault tolerance, and reduce costs. In this article, we will comprehensively examine the process of installing VMware vSphere, from preparing the environment to configuring virtual machines. This guide is intended for system administrators who want to deploy vSphere in their infrastructure. We will detail the installation of ESXi, configuration of the vCenter Server Appliance (vCSA), as well as the basic steps for creating and managing virtual machines. Be prepared, it will require attention and patience, but the result is a powerful and flexible platform for virtualization.
Table of Contents:
- Preparing for Installation
- Installing ESXi
- Deploying vCenter Server Appliance (vCSA)
- Initial Configuration of vCenter Server Appliance
- Creating and Configuring a Virtual Machine
- Diagnostics and Troubleshooting
Preparing for Installation

Before you begin installing VMware vSphere, you need to ensure that your hardware and software meet the minimum requirements. Failure to meet these requirements may lead to problems during installation or unstable system operation.
System Requirements for ESXi
ESXi is a hypervisor that installs directly on a physical server. The following minimum requirements are necessary for its successful installation and operation:
- Processor: 64-bit Intel or AMD processor with two or more cores. Intel VT-x or AMD-V support is recommended.
- RAM: Minimum of 4 GB of RAM. 8 GB or more is recommended for optimal performance.
- Hard Disk: Minimum of 4 GB of free disk space for ESXi installation. More is recommended for logs and swap files.
- Network Card: One or more Gigabit Ethernet network cards.
- BIOS: Support for booting from USB or DVD.
Example of checking VT-x support in Linux:
grep -E 'vmx|svm' /proc/cpuinfoIf the command outputs something, then VT-x or AMD-V is supported.
System Requirements for vCenter Server Appliance (vCSA)
vCenter Server Appliance (vCSA) is a virtual machine that centrally manages ESXi hosts. The following minimum requirements are necessary for its deployment:
- ESXi Host: ESXi host where vCSA will be deployed. The ESXi version must be compatible with the vCSA version.
- RAM: Minimum of 10 GB of RAM for Tiny deployment. 24 GB or more is recommended for Medium deployment.
- Hard Disk: Depends on the size of the deployment. Tiny – 415 GB, Small – 445 GB, Medium – 675 GB, Large – 940 GB, X-Large – 1415 GB.
- Processor: Minimum of 2 vCPUs for Tiny deployment. 4 vCPUs or more is recommended for Medium deployment.
It is important to choose the correct deployment size depending on the number of ESXi hosts and virtual machines you plan to manage.
Preparing ISO Images
Before starting the installation, you need to download the ESXi and vCenter Server Appliance ISO images from the official VMware website. You will need a VMware account to download them.
After downloading, make sure that the ISO images are not corrupted. This can be done using checksums, which are provided on the VMware website. For example, in Linux you can use the command `md5sum` or `sha256sum`:
md5sum VMware-VMvisor-Installer-7.0U3-xxxxxxxx-xxxxxxxxx.isoCompare the resulting checksum with the checksum specified on the VMware website.
Configuring DNS
For vSphere to work correctly, you need to configure a DNS server. You will need to create A and PTR records for ESXi hosts and vCenter Server Appliance.
Example record in the DNS zone file (bind):
; A record for ESXi host
esxi01.example.com.  IN  A  192.168.1.10

; PTR record for ESXi host
10.1.168.192.in-addr.arpa. IN PTR esxi01.example.com.

; A record for vCenter Server Appliance
vcsa.example.com.  IN  A  192.168.1.20

; PTR record for vCenter Server Appliance
20.1.168.192.in-addr.arpa. IN PTR vcsa.example.com.
Replace `esxi01.example.com`, `vcsa.example.com`, `192.168.1.10` and `192.168.1.20` with your actual hostnames and IP addresses.
Make sure the DNS server is accessible and configured correctly. You can check this using the `nslookup` command:
nslookup esxi01.example.com«Proper preparation is half the battle. Take enough time to check system requirements and configure DNS. This will help avoid many problems in the future.»
Ivan Petrov, Certified VMware Specialist
Installing ESXi

Installing ESXi is a process that requires attention to detail. Follow the instructions below to install ESXi on a physical server.
Booting from the ISO Image
The first step is to boot the server from the ESXi ISO image. This can be done using a USB drive or DVD. Make sure that the server BIOS is configured to boot from the selected media.
After booting, the ESXi installation menu will appear. Select the «ESXi Installer» option and press Enter.
Installation Process
The ESXi installation consists of several stages:
- Welcome: Press Enter to continue.
- License Agreement: Accept the license agreement (F11).
- Select a Disk: Select the disk on which ESXi will be installed. Be careful, as all data on the selected disk will be deleted.
- Select Keyboard Layout: Select the keyboard layout.
- Set Password: Set a password for the root user. The password must be complex and contain at least 7 characters.
- Confirm Installation: Confirm the installation (F11).
After the installation is complete, the server will be rebooted.
Configuring ESXi
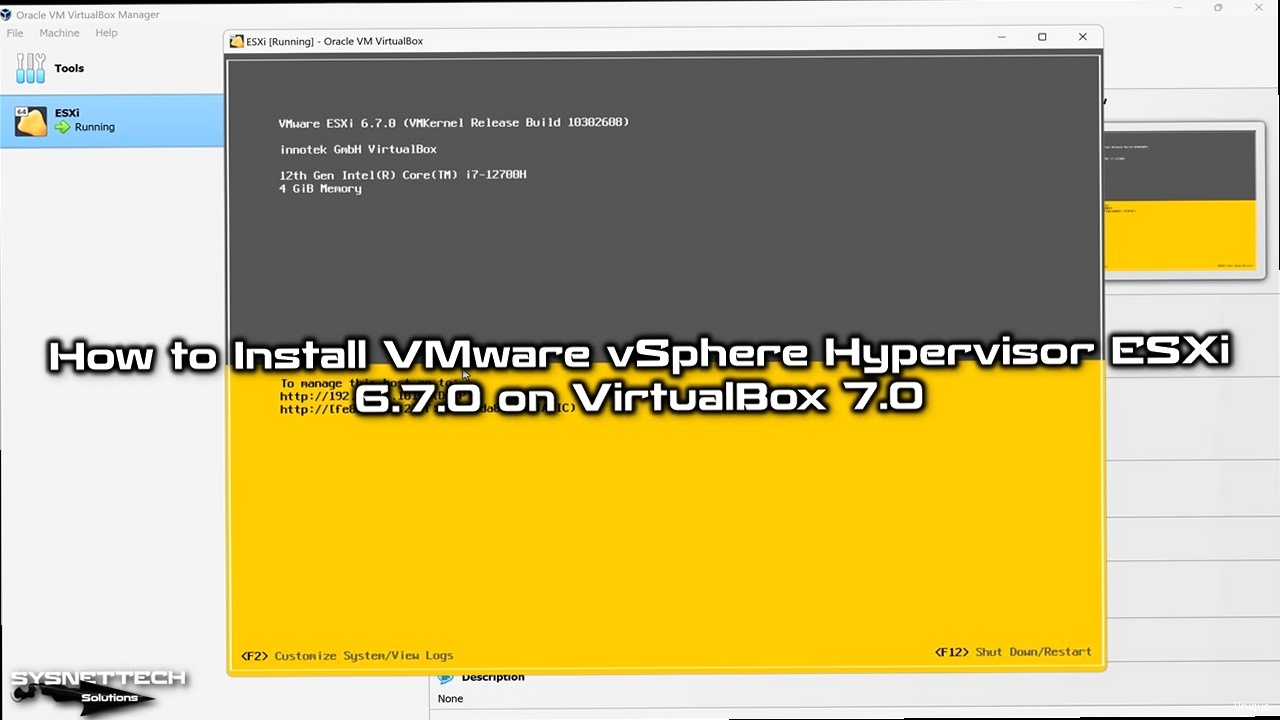
After the server reboots, the Direct Console User Interface (DCUI) console will appear. With the DCUI, you can configure the basic ESXi parameters, such as IP address, DNS server, and hostname.
To configure the network, select the «Configure Management Network» option and configure the following parameters:
- IP Address: Static IP address or DHCP. It is recommended to use a static IP address. For example, 192.168.1.10.
- Subnet Mask: Subnet mask for your network. For example, 255.255.255.0.
- Default Gateway: IP address of the default gateway. For example, 192.168.1.1.
- DNS Server: IP address of the DNS server. For example, 8.8.8.8.
- Hostname: ESXi hostname. For example, esxi01.example.com.
After configuring the network, you will be able to access ESXi through the web interface using the IP address you specified. Open a browser and enter the ESXi IP address (e.g., https://192.168.1.10).
Log in with the root user and the password you set during installation.
Configuring SSH
To manage ESXi from the command line, you can use SSH. By default, SSH is disabled. To enable SSH, follow these steps:
- In the DCUI, select «Troubleshooting Options».
- Select «Enable SSH».
After enabling SSH, you will be able to connect to ESXi using an SSH client, such as PuTTY (Windows) or OpenSSH (Linux/macOS). For example:
ssh root@192.168.1.10You will need to enter the root user password.
Updating ESXi
After installation, it is recommended to update ESXi to the latest version. This can be done using vSphere Lifecycle Manager (VUM) in vCenter Server or using the command line.
To update ESXi using the command line, follow these steps:
- Download the ZIP file with the update from the VMware website.
- Upload the ZIP file to the ESXi host, for example, to the /tmp directory.
- Put the ESXi host into maintenance mode:
esxcli system maintenanceMode set --enable true - Install the update:
esxcli software vib install -d /tmp/ESXi70U3-xxxxxxxx.zip - Reboot the ESXi host:
reboot - After reboot, take the ESXi host out of maintenance mode:
esxcli system maintenanceMode set --enable false
Make sure that after the update the ESXi version matches the expected one.
«Don’t forget to check hardware compatibility with the ESXi version. This can avoid problems with drivers and performance.»
Elena Smirnova, Independent Virtualization Consultant
Deploying vCenter Server Appliance (vCSA)
vCenter Server Appliance (vCSA) is a centralized management tool for your virtual infrastructure. Deploying vCSA consists of two stages: deploying the OVA/OVF file and configuring vCSA.
Deploying OVA/OVF
vCSA comes as an OVA/OVF file. To deploy the OVA/OVF file, you can use the vSphere Client, which connects to the ESXi host.
- Log in to the vSphere Client (via web browser).
- In the vSphere Client navigator, right-click on the ESXi host and select «Deploy OVF Template».
- Select the vCSA OVA/OVF file.
- Follow the instructions in the deployment wizard.
- Choose a name for the virtual machine.
- Select the storage location for the virtual machine (datastore).
- Select the disk format (Thin Provisioned or Thick Provisioned). Thin Provisioned saves disk space but can affect performance.
- Configure the network.
- Specify the password for the root user.
- Specify the IP address, default gateway, and DNS server. It is recommended to use a static IP address.
- Review the settings and click «Finish».
Deploying the OVA/OVF file may take some time. After the deployment is complete, the vCSA virtual machine will be started.
Configuring vCSA (Stage 1)
After starting vCSA, you need to perform the initial configuration. To do this, open a web browser and enter the vCSA IP address with port 5480 (e.g., https://192.168.1.20:5480).
- Log in with the root user and the password you specified during the OVA/OVF file deployment.
- Select «Set up vCenter Server».
- Follow the instructions in the configuration wizard.
- Choose the deployment type (Embedded Platform Services Controller or External Platform Services Controller). For small environments, Embedded Platform Services Controller is recommended.
- Configure the NTP server. Specify one or more NTP servers for time synchronization. For example, `pool.ntp.org`.
- Create a new vCenter Single Sign-On (SSO) domain or join an existing one. For a new installation, create a new SSO domain. Specify the domain name (e.g., `vsphere.local`), username (e.g., `administrator`), and password.
- Review the settings and click «Finish».
Configuring vCSA may take some time. After the configuration is complete, vCSA will be rebooted.
Checking vCSA Deployment
After the vCSA reboots, open a web browser and enter the vCSA IP address (e.g., https://192.168.1.20).
Log in with the user administrator@vsphere.local and the password you specified when configuring the SSO domain.
If you successfully logged in, then vCSA has been deployed and configured correctly.
Example of checking the status of vCSA services from the command line:
service-control --status --allMake sure all services are running.
Troubleshooting vCSA Deployment
Common problems when deploying vCSA:
- DNS Error: Make sure the DNS server is configured correctly and vCSA can resolve ESXi hostnames.
- Time Error: Make sure the time on the ESXi host and vCSA is synchronized. Use an NTP server.
- Insufficient Resources: Make sure the ESXi host has enough resources (CPU, memory, disk) for vCSA.
- Network Error: Make sure the network is configured correctly and vCSA can communicate with the ESXi host and other devices on the network.
You can use the following commands to diagnose problems:
ping <ESXi hostname>
nslookup <ESXi hostname>
timedatectl status
Initial Configuration of vCenter Server Appliance
After successfully deploying the vCenter Server Appliance, you need to perform the initial configuration to start managing your virtual infrastructure. This includes adding ESXi hosts, creating data centers, and configuring network settings.
Adding ESXi Hosts
To add an ESXi host to vCenter Server, follow these steps:
- Log in to the vSphere Client (via web browser).
- In the vSphere Client navigator, right-click on vCenter Server and select «Add Host».
- Enter the IP address or hostname of the ESXi host.
- Enter the username (root) and password.
- Verify the certificate.
- Select a license.
- Select the location of the host (e.g., data center).
- Review the settings and click «Finish».
After adding the ESXi host, you will be able to manage it through vCenter Server.
Creating Data Centers and Clusters
To organize the virtual infrastructure, it is recommended to create data centers and clusters. A data center is a logical group of ESXi hosts. A cluster is a group of ESXi hosts that work together to provide high availability and load balancing.
To create a data center, follow these steps:
- In the vSphere Client navigator, right-click on vCenter Server and select «New Datacenter».
- Enter the name of the data center.
To create a cluster, follow these steps:
- In the vSphere Client navigator, right-click on the data center and select «New Cluster».
- Enter the name of the cluster.
- Enable vSphere HA (High Availability) and vSphere DRS (Distributed Resource Scheduler), if necessary.
- Configure vSphere HA and vSphere DRS settings.
- Review the settings and click «Finish».
After creating the cluster, move the ESXi hosts to the cluster. To do this, drag the ESXi hosts from the inventory to the cluster.
Configuring Datastores
A datastore is a place where virtual machine files are stored. vSphere supports various types of datastores, such as VMFS, NFS, and vSAN.
To create a datastore, follow these steps:
- In the vSphere Client navigator, right-click on the ESXi host or cluster and select «Storage» -> «New Datastore».
- Select the type of datastore (VMFS, NFS, or vSAN).
- Follow the instructions in the datastore creation wizard.
- Enter the name of the datastore.
- Select the disk or LUN for the datastore.
- Configure datastore settings.
- Review the settings and click «Finish».
After creating the datastore, you will be able to use it to store virtual machine files.
Configuring the Network
vSphere supports various types of virtual networks, such as vSphere Standard Switch (VSS) and vSphere Distributed Switch (VDS).
vSphere Distributed Switch provides more network management capabilities than vSphere Standard Switch. It allows you to centrally manage the network for all ESXi hosts in the cluster.
To create a vSphere Distributed Switch, follow these steps:
- In the vSphere Client navigator, right-click on the data center and select «Distributed Switch» -> «New Distributed Switch».
- Select the vSphere Distributed Switch version.
- Enter the name of the vSphere Distributed Switch.
- Configure the number of uplink port groups.
- Configure uplink port group settings.
- Review the settings and click «Finish».
After creating the vSphere Distributed Switch, add the ESXi hosts to the vSphere Distributed Switch. To do this, drag the ESXi hosts from the inventory to the vSphere Distributed Switch.
Create distributed port groups for virtual machines. Distributed port groups define the network parameters for virtual machines connected to the vSphere Distributed Switch.
Example of configuring an ESXi network interface from the command line:
esxcli network ip interface listThis command shows a list of all network interfaces on the ESXi host.
esxcli network ip interface ipv4 set -i vmk0 -t static -g 192.168.1.1 -s 192.168.1.10 -n 255.255.255.0This command sets a static IP address for the vmk0 interface.
| Function | vSphere Standard Switch | vSphere Distributed Switch |
|---|---|---|
| Centralized Management | No | Yes |
| Number of Ports | Limited | More |
| Advanced Network Features | Limited | Extensive Capabilities |
Creating and Configuring a Virtual Machine
Creating a virtual machine (VM) is one of the main steps in working with vSphere. Virtual machines allow you to run multiple operating systems on one physical server, which increases resource utilization and simplifies infrastructure management.
Creating a Virtual Machine
To create a virtual machine, follow these steps:
- Log in to the vSphere Client (via web browser).
- In the vSphere Client navigator, right-click on the ESXi host, cluster, or data center and select «New Virtual Machine».
- Select the virtual machine creation type (Create a new virtual machine).
- Enter the name of the virtual machine.
- Select the location of the virtual machine (data center or cluster).
- Select the ESXi host on which the virtual machine will be run.
- Select the datastore on which the virtual machine files will be stored.
- Select the virtual machine compatibility version.
- Select the guest operating system (e.g., Windows Server 2019, Ubuntu Server 20.04).
- Configure hardware settings (CPU, memory, disk, network).
- Select the option «Power on virtual machine after creation» if necessary.
- Review the settings and click «Finish».
Configuring Virtual Machine Hardware
When creating a virtual machine, you need to configure hardware settings such as CPU, memory, disk, and network.
- CPU: Specify the number of virtual processors (vCPU) for the virtual machine. It is recommended to allocate as many vCPUs as needed for the normal operation of applications running on the virtual machine.
- Memory: Specify the amount of RAM for the virtual machine. It is recommended to allocate enough memory for the normal operation of the operating system and applications.
- Disk: Create a virtual disk for the virtual machine. Select the disk type (Thin Provisioned or Thick Provisioned). Thin Provisioned saves disk space but can affect performance. Specify the disk size.
- Network: Select a network adapter for the virtual machine. Connect the network adapter to an existing virtual network (vSphere Standard Switch or vSphere Distributed Switch).
Installing the Operating System
After creating the virtual machine, you need to install the operating system. This can be done using an ISO image or using a network installation.
- Installation from an ISO image: Upload the operating system ISO image to the datastore. In the virtual machine settings, specify the ISO image as the boot device. Start the virtual machine and follow the instructions in the operating system installation wizard.
- Network Installation: Configure network installation (e.g., PXE boot) on the ESXi host. Start the virtual machine and select network boot. Follow the instructions in the operating system installation wizard.
Installing VMware Tools
After installing the operating system, you need to install VMware Tools. VMware Tools is a set of drivers and utilities that improve the performance and manageability of the virtual machine.
To install VMware Tools, follow these steps:
- Log in to the virtual machine operating system.
- In the vSphere Client, select «Virtual Machine» -> «Guest OS» -> «Install VMware Tools».
- Follow the instructions in the VMware Tools installation wizard.
- Reboot the virtual machine after installing VMware Tools.
Example of a virtual machine configuration file (.vmx):
.encoding = "UTF-8"
config.version = "8"
virtualHW.version = "17"
nvram = "Ubuntu-20.04-x64.nvram"
deploymentPackage.flags = "installed"
virtualHW.productCompatibility = "hosted"
powerType.powerOff = "soft"
powerType.powerOn = "soft"
powerType.suspend = "soft"
powerType.reset = "soft"
displayName = "Ubuntu-20.04-x64"
extendedConfigFile = "Ubuntu-20.04-x64.vmxf"
annotation = ""
uuid.bios = "42 30 76 9e 57 87 45 12-b4 0c 1f


