How to Connect to an RDP Server?
Remote Desktop Protocol (RDP) is a technology that allows you to connect to a remote computer over a network. This is incredibly useful for those who want to access their files and programs while away from their own computer. In this article, we’ll show you how to properly connect to an RDP server.
Step 1: Obtain the RDP Server Address
The first step to connecting to an RDP server is to obtain its address. This address should be provided by the server administrator or by yourself if you have your own RDP server.
Typically, the address looks like this: xxx.xxx.xxx.xxx, where xxx is a set of numbers from 0 to 255. Remember or write down this address, you will need it in the following steps.
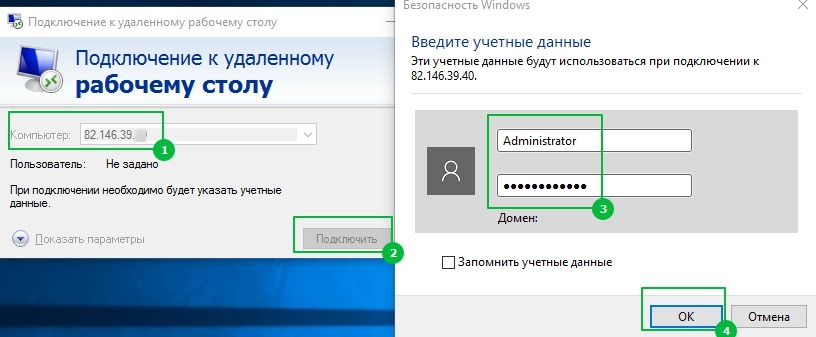
Step 2: Open the RDP Connection Program
To connect to a remote desktop, you’ll need a program called «Remote Desktop Connection» (or another program if you’re not using a Windows operating system).
Open this program and enter the RDP server address in the appropriate field. Click the «Connect» button.
Step 3: Enter Your Credentials
After clicking the «Connect» button, you may need to enter credentials for this server. This may be a username and password, which should be provided by the server administrator.
Make sure you enter the correct information and click the «OK» button. If everything is entered correctly, you will be connected to the remote desktop.
Step 4: Use the Remote Desktop
Now that you have successfully connected to the RDP server, you can start using the remote desktop as usual. Run programs, open files, and do whatever you need to do.
Don’t forget to properly end the session when you’re done to avoid potential security issues. You may need to click the «Disconnect» or «Log Off» button.
That was all! Now you know how to connect to an RDP server. We hope this information was helpful for you.


