How to Configure Network Settings for a Virtual Machine?
Virtual Machines (VMs) have become an integral part of modern IT infrastructure. They allow you to run multiple operating systems on a single physical server, saving resources and simplifying management. One of the key aspects of working with virtual machines is configuring their network settings. The availability of VMs, their interaction with other systems, and data security depend on the correct network configuration. In this article, we will thoroughly examine various ways to configure network parameters for virtual machines, providing you with practical examples and recommendations.
Table of Contents
- Basic Concepts of VM Networking
- Configuring VM Networking via the Graphical Interface
- Configuring VM Networking via the Command Line
- Troubleshooting Common VM Network Issues
Basic Concepts of VM Networking

| Mode | Accessibility from Outside | Internet Access | Isolation | Application |
|---|---|---|---|---|
| Bridged | Yes | Yes | No | When the VM should be accessible from the outside and have full access to the network. |
| NAT | No (via port forwarding) | Yes | Partial | When the VM requires internet access, but does not require direct access from the external network. |
| Host-Only | No | No | Full | When you need to create an isolated environment for testing or development. |
Configuring VM Networking via the Graphical Interface

- Select the virtual machine from the list.
- Click «Edit virtual machine settings».
- Go to the «Network Adapter» tab.
- Select the desired network mode: «Bridged», «NAT», or «Host-only».
- If necessary, configure additional parameters, such as the MAC address or VLAN.
- Select the virtual machine from the list.
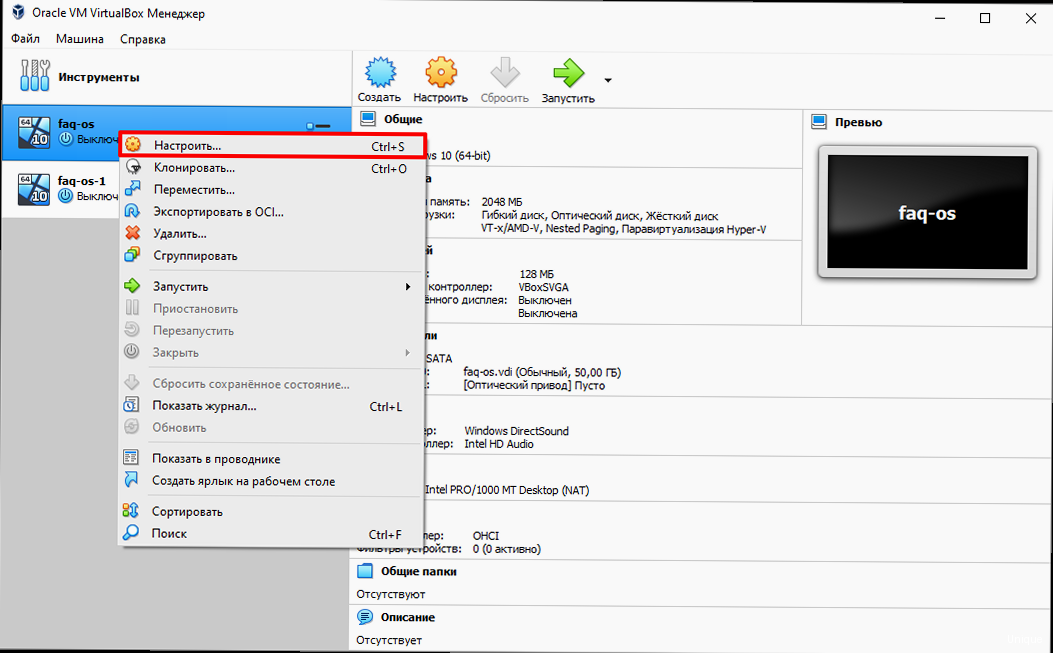
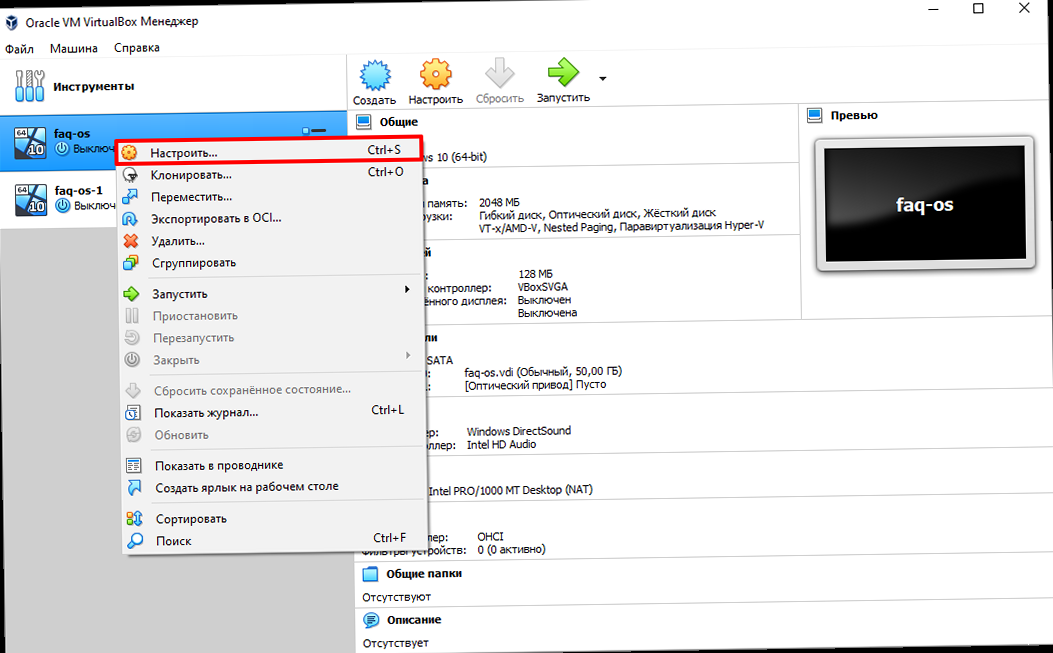
- Click «Settings».
- Go to the «Network» tab.
- Select the adapter (Adapter 1, Adapter 2, etc.).
- In the «Attached to» field, select the desired network mode: «Bridged Adapter», «NAT», «Host-only Adapter».
- If necessary, configure additional parameters, such as the MAC address or adapter type.
- Open «Settings» -> «Network».
- Select the connection (e.g., «Wired»).
- Click on the gear icon.
- Go to the «IPv4» tab.
- Select «Manual» in the «Method» field.
- Enter the IP address, subnet mask, gateway, and DNS servers.
- Click «Apply».
- Open «Control Panel» -> «Network and Internet» -> «Network and Sharing Center».
- Click on the connection name (e.g., «Ethernet»).
- Click «Properties».
- Select «Internet Protocol Version 4 (TCP/IPv4)» and click «Properties».
- Select «Use the following IP address» and enter the IP address, subnet mask, gateway, and DNS servers.
- Click «OK».
Configuring VM Networking via the Command Line
Configuring the network of a virtual machine via the command line provides a more flexible and powerful way to manage network settings. This method is especially useful for automation, working with servers without a graphical interface, or when using scripts. Configuring the network via the command line depends on the operating system installed on the virtual machine. Configuring Networking in Linux In most Linux distributions, the utilitiesifconfig, ip, route and configuration files located in the directory /etc/network/interfaces (Debian/Ubuntu) or /etc/sysconfig/network-scripts/ (CentOS/RHEL) are used to configure the network.
Example (Debian/Ubuntu):
To configure a static IP address for the eth0 interface, edit the file /etc/network/interfaces:
# /etc/network/interfaces
auto eth0
iface eth0 inet static
    address 192.168.1.101
    netmask 255.255.255.0
    gateway 192.168.1.1
    dns-nameservers 8.8.8.8 8.8.4.4
sudo ifdown eth0 && sudo ifup eth0
eth0 interface, edit the file /etc/sysconfig/network-scripts/ifcfg-eth0:
# /etc/sysconfig/network-scripts/ifcfg-eth0
TYPE=Ethernet
DEVICE=eth0
ONBOOT=yes
BOOTPROTO=static
IPADDR=192.168.1.101
NETMASK=255.255.255.0
GATEWAY=192.168.1.1
DNS1=8.8.8.8
DNS2=8.8.4.4
sudo systemctl restart network
ip utility:
The ip utility is a more modern alternative to ifconfig and provides more options for configuring the network.
Example: Assigning an IP address and subnet mask:
sudo ip addr add 192.168.1.101/24 dev eth0
sudo ip route add default via 192.168.1.1
ip utility are not saved after the system reboots. To make the changes permanent, you need to edit the network configuration files.
Configuring Networking in Windows
In Windows, the netsh utility is used to configure the network via the command line.
Example:
To configure a static IP address for the «Ethernet» interface, run the following commands in the command prompt with administrator privileges:
netsh interface ipv4 set address name="Ethernet" static 192.168.1.101 255.255.255.0 192.168.1.1
netsh interface ipv4 set dns name="Ethernet" static 8.8.8.8 primary
netsh interface ipv4 add dns name="Ethernet" 8.8.4.4 index=2
#!/bin/bash

INTERFACE="eth0"
IP_ADDRESS="192.168.1.101"
NETMASK="255.255.255.0"
GATEWAY="192.168.1.1"
DNS1="8.8.8.8"
DNS2="8.8.4.4"

echo "Configuring network for interface $INTERFACE"

sudo ip addr add $IP_ADDRESS/$NETMASK dev $INTERFACE
sudo ip route add default via $GATEWAY

echo "Adding DNS servers to /etc/resolv.conf"
echo "nameserver $DNS1" | sudo tee /etc/resolv.conf
echo "nameserver $DNS2" | sudo tee -a /etc/resolv.conf

echo "Network configuration completed"
Troubleshooting Common VM Network Issues
When working with virtual machines, network problems often arise. Some of the most common issues include a lack of internet access, the inability to connect to the VM from the outside, or the inability of the VM and host machine to interact. In this section, we will look at the most common problems and how to solve them. Lack of Internet Access If the virtual machine does not have internet access, check the following:- Network Mode: Make sure that «Bridged» or «NAT» mode is selected for the VM. If «Host-only» mode is selected, the VM will not have internet access.
- IP address, subnet mask, gateway, and DNS server settings: Check that these parameters are configured correctly in the guest operating system. Make sure that the gateway points to the IP address of the router providing internet access and that the DNS servers are set to working DNS servers (e.g., 8.8.8.8 and 8.8.4.4).
- DNS issues: Try pinging the IP address of a website (e.g., 8.8.8.8). If the ping is successful, the problem is most likely related to DNS. Check the DNS settings and make sure they are correct.
- Firewall: Check that the firewall on the host machine or in the guest operating system is not blocking internet access for the VM.
- Network Mode: If «NAT» mode is selected for the VM, you need to configure port forwarding on the host machine.
- Port Forwarding: Configure port forwarding on the host machine so that traffic arriving at a specific port on the host machine is forwarded to the corresponding port on the VM.
- Firewall: Check that the firewall on the host machine or in the guest operating system is not blocking access to the ports to which forwarding is configured.
- Network Mode: If «Host-only» mode is selected for the VM, make sure that the host machine is connected to the same «host-only» network.
- IP Addresses: Make sure that the IP addresses of the VM and the host machine are on the same subnet.
- Firewall: Check that the firewall on the host machine or in the guest operating system is not blocking traffic between the VM and the host machine.


