How to Enable Windows Defender Firewall?
Windows Defender Firewall is an important tool to protect your computer from malware and unauthorized connections. A properly configured firewall will help ensure the security of your operating system. In this guide, we’ll show you how to enable Windows Defender Firewall and configure it to suit your needs.
1. Windows Security Settings
Open the Start menu and go to «Settings». Then select «Update & Security», and then «Windows Security». On the «Windows Security» page, find the «Firewall & network protection» section.
2. Enabling Windows Defender Firewall
To enable Windows Defender Firewall, click the «Turn on Windows Defender Firewall» button under the «Private networks» and «Public networks» sections. After that, the firewall will be activated and protect your computer from malicious attacks.
3. Configuring Firewall Rules
To configure firewall rules, go to the «Advanced settings» section of the firewall. Here you can create new rules, block or allow connections for individual programs or services.
4. Checking Firewall Status
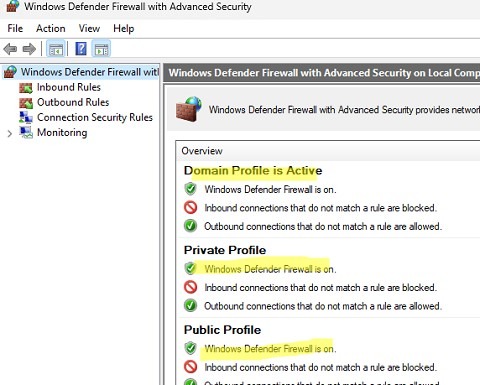
To check the firewall status, return to the «Firewall & network protection» section in «Windows Security Settings». Here you will see the firewall status and be able to perform additional settings if necessary.
Now you have all the necessary knowledge to enable Windows Defender Firewall and ensure the security of your computer. Remember to regularly update your software and watch out for potential threats. The security of your system is in your hands!
«`