How to Create a System Restore Point on a Windows VPS?
A system restore point is a crucial tool on a Windows VPS, allowing you to save your system’s state and restore it in case of errors or problems. This article will guide you through creating a restore point on your Windows VPS.
1. Start by opening the Control Panel on your Windows VPS. Click the «Start» button in the bottom-left corner of the screen and select «Control Panel».
2. Navigate to «System and Security» and select «System».
3. In the left-hand menu, select «System Protection».
4. Click the «Create» button under the «System Restore» heading.
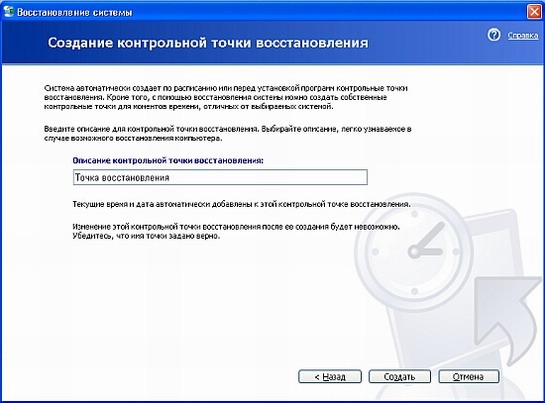
5. In the window that appears, enter a description for the new restore point and click «Create».
6. Wait for the restore point creation process to complete. This may take some time, depending on the amount of data on your Windows VPS.
7. Once the restore point creation process is finished, you will see a success message.
Your Windows VPS is now protected with a restore point that can be used if necessary. Regularly create new restore points to ensure the security of your system.
We hope this article was helpful. If you have any questions or problems, feel free to contact our support team for assistance.