
Optimizing Nginx for High-Load Web Applications on VPS: Caching, Security, Performance
TL;DR
- Use Nginx as a reverse proxy for caching static content (Proxy Cache) and dynamic content (FastCGI/Microcaching) to significantly reduce backend load and accelerate response times.
- Implement TLS 1.3 with modern ciphers, HSTS, and OCSP Stapling for maximum security and encryption performance.
- Configure rate limiting and DDoS protection at the Nginx level, using
limit_reqandlimit_connmodules to prevent server overload. - Optimize Nginx parameters (
worker_processes,worker_connections, buffers) and operating system settings (TCP stack, file descriptor limits) for efficient VPS resource utilization. - Transitioning to HTTP/2 (and in perspective, HTTP/3) is critical for modern web applications, ensuring multiplexing and reduced latency.
- Regularly monitor Nginx (NGINX Amplify, Prometheus/Grafana) and log only essential information to promptly identify and resolve bottlenecks.
- Investments in deep Nginx optimization on a VPS pay off by reducing infrastructure costs and improving user experience.
Introduction
In the rapidly evolving world of web technologies in 2026, where user expectations for speed and reliability are constantly growing, and competition for user attention is intensifying, web application performance is no longer just an advantage, but a critically important requirement. This is especially true for projects deployed on Virtual Private Servers (VPS), where every megabyte of RAM and every CPU cycle counts. Nginx, thanks to its lightweight nature, high performance, and flexibility, has long established itself as the de facto standard for serving web traffic, whether it's static content, a reverse proxy, or a load balancer.
However, simply installing Nginx is not enough. For high-load web applications on a VPS, deep and thoughtful optimization is necessary. Without it, even a powerful VPS can become overwhelmed by traffic, and resources will be used inefficiently, directly impacting costs and user experience. In the context of limited VPS resources, every percentage increase in performance and every byte saved in traffic matters. An unoptimized Nginx can become a bottleneck, blocking application scaling, even if the backend is capable of handling thousands of requests per second.
This article aims to be a comprehensive guide to Nginx optimization, covering three key aspects: caching, security, and performance. We will explore how to properly configure Nginx to make it most efficiently use available VPS resources, protect your application from threats, and ensure lightning-fast response times. The material is aimed at DevOps engineers, backend developers (Python, Node.js, Go, PHP), SaaS project founders, system administrators, and technical directors of startups who strive to get the most out of their infrastructure and build reliable, scalable web services. We will delve into specific configurations, practical tips, and real-world case studies relevant to 2026, so you can apply the knowledge gained immediately.
Key Criteria and Factors for Nginx Optimization
Before diving into configuration details, it's important to understand which metrics and factors determine the effectiveness of Nginx and the web application as a whole. Optimization is not just a set of disparate settings, but a systematic approach aimed at improving specific indicators.
Latency
Latency is the time elapsed from when a user sends a request until the first byte of the response is received. For modern web applications, this metric is critical. Users expect instant loading, and even small delays can lead to abandonment of the service. On a VPS, where network latencies and resource limitations can be more pronounced, minimizing latency becomes a priority. Nginx influences latency through efficient caching, fast connection establishment (Keepalive), the use of HTTP/2 (and HTTP/3), and optimized request processing. It is evaluated using tools such as WebPageTest, Lighthouse, or third-party monitoring services.
Throughput
Throughput characterizes the volume of data or the number of requests that a server can process per unit of time. For high-load systems, this is one of the key indicators. Nginx, being a high-performance reverse proxy, is capable of handling a huge number of simultaneous connections and requests. Nginx optimization aims to increase throughput by efficiently utilizing CPU and memory, minimizing blockages, data compression (gzip/Brotli), and intelligent load distribution. On a VPS with limited network channels and processor resources, maximizing throughput without overloading the system requires fine-tuning. Monitoring RPS (Requests Per Second) and Mbps (Megabits per Second) through tools like Prometheus/Grafana or NGINX Amplify will help evaluate this criterion.
Resource Utilization
On a VPS, where resources (CPU, RAM, disk I/O) are limited and often paid for by volume, their efficient use is key to economic viability and stability. Nginx optimization reduces CPU and RAM consumption, especially through effective caching, which lowers the load on the backend. Lower resource consumption means the ability to serve more users on the same VPS, postpone the need for a plan upgrade, or even switch to a cheaper one. Monitoring CPU, RAM, I/O, and network traffic utilization through htop, top, iostat, netdata, or cloud provider metrics is fundamental for evaluating this factor.
Resilience & Security Posture
A high-load application must not only work quickly but also be resilient to peak loads, failures, and attacks. Nginx plays a key role in ensuring security and fault tolerance. Rate limiting mechanisms, DDoS protection, strict SSL/TLS settings, integration with WAF (Web Application Firewall) – all these allow Nginx to act as the first line of defense. On a VPS, where it is not possible to deploy complex hardware solutions, Nginx becomes a critically important tool for protection. It is evaluated by conducting load testing (k6, JMeter, Gatling), security audits (SSL Labs, Nessus), and analyzing logs for anomalies and attack attempts.
Comparison Table: Caching Strategies in Nginx

Caching is arguably the most powerful tool for optimizing web application performance, especially on a VPS. Properly configured caching allows Nginx to respond to requests without contacting the backend, significantly reducing the load on the application and database, and shortening response times. In 2026, various caching strategies are available, each with its own characteristics.
| Criterion | Static Caching (Browser/Nginx) | Nginx Proxy Cache | Nginx FastCGI Cache | Microcaching (Nginx) | Edge Caching (CDN, for comparison) |
|---|---|---|---|---|---|
| Content Type | Static (CSS, JS, images, fonts) | Any HTTP content (HTML, JSON, API responses) | Dynamic content PHP/Python/Ruby/Go | Dynamic content with short lifespan | Static and dynamic (globally) |
| Configuration Complexity | Low (expires, add_header Cache-Control) |
Medium (proxy_cache_path, proxy_cache_key) |
Medium (fastcgi_cache_path, fastcgi_cache_key) |
Medium (proxy_cache_valid 1s, proxy_cache_bypass) |
Medium/High (depends on CDN) |
| Backend Load Reduction Efficiency | High (for static) | Very High (for repetitive requests) | Very High (for repetitive requests) | High (smooths peaks) | Extremely High (globally) |
| Impact on Latency | Significant (for repeat visits) | Significant (for cached responses) | Significant (for cached responses) | Moderate (reduces generation time) | Maximum (proximity to user) |
| VPS Disk Space Requirements | Minimal (for Nginx) | Medium/High (depends on cache size) | Medium/High (depends on cache size) | Low/Medium (short lifespan) | Not applicable to VPS |
| Data Freshness | High (file versioning) | Depends on proxy_cache_valid and proxy_cache_bypass |
Depends on fastcgi_cache_valid and fastcgi_cache_bypass |
High (updates every second) | Depends on CDN settings and Cache-Control |
| Approximate Cost (2026, on VPS) | Free (included in Nginx) | Free (included in Nginx), requires disk | Free (included in Nginx), requires disk | Free (included in Nginx), requires disk | From $5 to $500+/month (depends on traffic and features) |
| When to Use | Always for static | For APIs, pages, frequently requested data | For PHP applications (WordPress, Laravel) | For dynamic pages with frequent updates | For global reach and large traffic volumes |
As seen from the table, the choice of caching strategy depends on the content type, data freshness requirements, and available resources. In most cases for a VPS, it is optimal to combine several approaches: cache static content at the Nginx and browser level, use Proxy Cache for APIs and pages, and FastCGI Cache for PHP applications, supplementing this with microcaching to reduce peak loads.
Detailed Overview of Each Optimization Point/Option
Let's take a detailed look at the key aspects of Nginx optimization that will help you get the most out of your VPS.
Caching: The Foundation of Performance
Caching is the most effective way to reduce backend load and speed up response times. Nginx offers powerful mechanisms for this.
Nginx Proxy Cache
Nginx Proxy Cache allows caching responses from upstream servers (backend). This is an ideal solution for caching HTML pages, JSON API responses, images, CSS, and JS that are dynamically generated but do not change frequently. On the first request, Nginx forwards it to the backend, saves the response to disk (or memory), and delivers it to the user. Subsequent requests for the same resource will be served directly from the cache, which is significantly faster. This substantially reduces the CPU and RAM load on the backend, as well as on the database. On a VPS with limited resources, this allows processing many more requests. Key directives include proxy_cache_path to define the cache path and its parameters, proxy_cache to activate caching in a specific location, proxy_cache_key to define a unique cache key (usually $scheme$proxy_host$request_uri), and proxy_cache_valid to set the cache lifespan for responses depending on the HTTP status. It is also important to configure proxy_cache_bypass and proxy_no_cache for specific conditions (e.g., for authenticated users or POST requests) to prevent caching of personalized content. Using proxy_cache_revalidate allows Nginx to check cache freshness using If-Modified-Since or If-None-Match headers, minimizing traffic to the backend.
Nginx FastCGI Cache
FastCGI Cache is similar to Proxy Cache but is specifically designed for caching responses from FastCGI servers, such as PHP-FPM, Python Gunicorn/uWSGI, or Go applications. This type of caching is indispensable for high-load PHP applications (WordPress, Laravel, Symfony) where each page might be generated with a database query. Nginx caches the fully generated HTML or JSON response from the FastCGI backend, and for subsequent requests, it serves it directly, completely bypassing the PHP interpreter and the database. This provides a colossal performance boost and significantly reduces resource consumption. Directives are similar to Proxy Cache: fastcgi_cache_path, fastcgi_cache, fastcgi_cache_key, fastcgi_cache_valid. Also important are fastcgi_cache_bypass and fastcgi_no_cache to exclude certain requests from the cache (e.g., for admin panels or shopping cart pages). Correctly configuring Cache-Control headers on the backend is also critical for effective interaction with FastCGI Cache.
Microcaching
Microcaching is a variant of Proxy/FastCGI caching with a very short cache lifespan, typically from 1 to 10 seconds. It is ideal for dynamic pages that update frequently, but not so frequently that every request needs to be processed by the backend. For example, for news sites, blogs, or e-commerce platforms where content changes every few seconds or minutes. Microcaching helps to "smooth out" peak loads when many requests for the same page arrive at the server simultaneously. Instead of overloading the backend, Nginx will serve the same cached version for a short interval, significantly reducing the number of application calls. This provides near-instant response for most users while maintaining a high degree of content freshness. It is configured using proxy_cache_valid 1s or fastcgi_cache_valid 1s, supplemented by proxy_cache_bypass rules for cases where guaranteed fresh content is required.
Static Caching and Expires/Cache-Control Headers
This is a basic but extremely important type of caching. Static files (images, CSS, JavaScript, fonts, videos) should be cached for the maximum possible duration both at the Nginx level and in the user's browser. Nginx can serve these files directly without contacting the backend. The expires directive in Nginx sets the Cache-Control and Expires headers, telling the browser how long it can store the resource in its local cache. For example, expires 365d for images or expires 7d for CSS/JS. To ensure freshness when files change, it is recommended to use versioning (e.g., style.css?v=1.2.3 or style.12345.css). This allows the browser to use the cached version until the URL changes. Proper static caching reduces traffic, speeds up page loading for repeat visitors, and frees up Nginx resources to handle more complex dynamic requests.
Security: Protecting Your Application
In 2026, as cyberattacks become increasingly sophisticated, web application security on a VPS cannot be a secondary concern. Nginx is the first line of defense.
SSL/TLS Best Practices (TLS 1.3, HSTS, OCSP Stapling)
Using HTTPS has long been the standard. But it's important not just to enable HTTPS, but to configure it correctly. In 2026, using TLS 1.3 is mandatory – it's the fastest and most secure version of the protocol, which reduces the number of handshakes and uses modern cryptographic algorithms. Nginx should be compiled with OpenSSL 1.1.1 or newer. It's important to choose strong ciphers, excluding outdated and vulnerable ones (e.g., RC4, 3DES, CBC modes). The ssl_protocols TLSv1.2 TLSv1.3; and ssl_ciphers directives allow this. The HTTP Strict Transport Security (HSTS) header (add_header Strict-Transport-Security "max-age=31536000; includeSubDomains; preload" always;) forces browsers to always use HTTPS for your domain, preventing SSL stripping attacks. OCSP Stapling (ssl_stapling on; ssl_stapling_verify on;) speeds up SSL certificate status checks and enhances privacy, as the browser doesn't need to contact the issuer's OCSP server. Proper SSL/TLS configuration not only protects user data but also improves SEO metrics and increases trust in your service.
Rate Limiting and DDoS Protection
The limit_req and limit_conn Nginx modules are powerful tools for protecting against brute-force attacks, vulnerability scanning, and certain types of DDoS attacks, as well as preventing backend overload. limit_req restricts the frequency of requests from a single IP address, while limit_conn limits the number of simultaneous connections. For example, you can allow no more than 5 requests per second with a burst of up to 10 for an API endpoint and no more than 20 simultaneous connections per user. This prevents situations where one or more attackers can exhaust your VPS resources by sending a huge number of requests. On a VPS, where resources are limited, this is critically important. The configuration must be fine-tuned to avoid blocking legitimate users. For more advanced DDoS protection, Nginx can be integrated with external WAF solutions or cloud services, but basic measures at the Nginx level already provide a significant effect.
Security Headers and WAF
Nginx allows adding various HTTP headers that improve user browser security. For example, X-Frame-Options "DENY" prevents clickjacking, X-Content-Type-Options "nosniff" prevents MIME sniffing, and Content-Security-Policy (CSP) allows controlling which resources the browser can load, reducing the risk of XSS attacks. In 2026, CSP is becoming increasingly complex, but its implementation is critical. For deeper protection, Nginx can be integrated with a Web Application Firewall (WAF), such as ModSecurity. ModSecurity in Nginx module mode allows filtering requests and blocking known attack vectors (SQL injection, XSS, etc.) before they reach the backend. This is especially valuable on a VPS where it is not possible to deploy a hardware WAF. WAF configuration requires careful attention to avoid false positives but provides a powerful level of protection.
Performance: Maximum Efficiency
Fine-tuning Nginx's internal mechanisms and the operating system allows for maximum performance.
Optimizing Worker Processes and Connections
Nginx operates on an asynchronous, event-driven model, using a small number of worker processes to handle many connections. The number of worker_processes is usually set equal to the number of CPU cores on your VPS (or auto). Each worker_process can handle thousands of simultaneous connections thanks to non-blocking I/O. The worker_connections directive defines the maximum number of connections that each worker process can handle. The total number of connections Nginx can handle is worker_processes * worker_connections. For a VPS with 2-4 cores and 2-4 GB RAM, a reasonable worker_connections value might be 4096-8192. It is also important to increase the file descriptor limits at the operating system level (ulimit -n) to a corresponding value, otherwise Nginx will not be able to open so many connections. Correct configuration of these parameters allows Nginx to efficiently use available CPU and RAM resources, preventing their overflow and ensuring stable operation under high load.
Keepalive Connections
Keepalive connections allow using a single TCP connection for multiple HTTP requests, instead of establishing a new connection for each request. This significantly reduces the overhead of connection establishment (TCP handshake, SSL/TLS handshake) and speeds up page loading for pages containing many resources (images, CSS, JS). The keepalive_timeout directive determines how long Nginx will keep a connection open after the last request. It is usually set to 15-75 seconds. Too short a timeout leads to frequent connection re-establishments, too long to inefficient resource usage. The keepalive_requests directive limits the number of requests that can be performed over a single keepalive connection. Optimal values depend on the nature of the traffic, but for most web applications, keepalive is essential for performance improvement.
Gzip/Brotli Compression
Compressing HTTP responses reduces the size of transmitted data, which shortens page loading times for users and saves bandwidth. Nginx supports Gzip compression "out of the box" and Brotli (via a module) - a more modern and efficient compression algorithm from Google. Brotli provides a better compression ratio at comparable speed. In 2026, it is recommended to use Brotli for all supported browsers and Gzip as a fallback. Directives gzip on;, gzip_types, gzip_min_length, gzip_comp_level control compression parameters. It is important to compress only text files (HTML, CSS, JS, JSON, XML) and avoid compressing already compressed files (JPG/PNG images, video, PDF), as this will only increase CPU load without a size benefit. On-the-fly compression requires CPU resources, so for static content, it is better to use pre-compressed versions.
HTTP/2 and HTTP/3 (QUIC)
HTTP/2 has become the de facto standard, significantly improving performance compared to HTTP/1.1 through multiplexing (multiple requests over a single connection), Server Push, and header compression. Nginx supports HTTP/2 (listen 443 ssl http2;). In 2026, HTTP/3, based on the QUIC protocol, which operates over UDP and solves the head-of-line blocking problem at the TCP level, is being actively implemented, further reducing latency, especially in unstable networks. Nginx already has experimental HTTP/3 support (via Nginx QUIC). Transitioning to HTTP/2 and HTTP/3 is one of the most powerful ways to speed up page loading, especially for sites with many resources. This requires SSL/TLS, as HTTP/2 and HTTP/3 work exclusively over encrypted connections.
Buffer Optimization
Nginx uses buffers to temporarily store data when interacting with clients and the backend. Correctly configuring buffer sizes prevents undesirable disk write operations (which are slow) and ensures a smooth data flow. Key directives: client_body_buffer_size (for client request body), client_header_buffer_size (for client request headers), proxy_buffer_size, proxy_buffers, proxy_busy_buffers_size (for buffering responses from the backend). Too small buffers can lead to data being written to disk, which slows down operations. Too large can lead to inefficient RAM usage. Optimal values depend on the size of typical requests and responses of your application, but values in the range of 4k-128k are often used for buffers. On a VPS, where RAM is limited, a balance must be found between performance and memory consumption.
Practical Tips and Recommendations for Nginx Configuration
Let's move on to specific configuration files and commands that will help you apply the methods described above in practice. All examples are relevant for Nginx 1.20+ and OpenSSL 1.1.1+.
Basic Installation and System Preparation
Before you begin, make sure your system is ready. Use an up-to-date distribution (e.g., Ubuntu Server 22.04 LTS) and Nginx.
# System update
sudo apt update && sudo apt upgrade -y

# Install Nginx (if not already installed)
sudo apt install nginx -y

# Check Nginx and OpenSSL version
nginx -V
# Make sure Nginx is compiled with OpenSSL 1.1.1 or newer and Brotli, HTTP/2 modules.
# Example output: built with OpenSSL 1.1.1w... --with-http_v2_module --add-module=/path/to/ngx_brotli

# Configure file descriptor limits (for worker_connections)
# Edit /etc/security/limits.conf
echo "nginx - nofile 65535" | sudo tee -a /etc/security/limits.conf
echo "nginx - nproc 65535" | sudo tee -a /etc/security/limits.conf
# Edit /etc/sysctl.conf to increase ephemeral ports and other TCP parameters
echo "net.core.somaxconn = 65535" | sudo tee -a /etc/sysctl.conf
echo "net.ipv4.ip_local_port_range = 1024 65535" | sudo tee -a /etc/sysctl.conf
echo "net.ipv4.tcp_tw_reuse = 1" | sudo tee -a /etc/sysctl.conf
echo "net.ipv4.tcp_fin_timeout = 30" | sudo tee -a /etc/sysctl.conf
echo "net.ipv4.tcp_keepalive_time = 600" | sudo tee -a /etc/sysctl.conf
echo "net.ipv4.tcp_max_syn_backlog = 8192" | sudo tee -a /etc/sysctl.conf
sudo sysctl -p # Apply sysctl changes
Main Nginx Configuration (/etc/nginx/nginx.conf)
These settings affect the operation of all virtual hosts.
user www-data;
worker_processes auto; # Number of CPU cores
pid /run/nginx.pid;
include /etc/nginx/modules-enabled/*.conf;

events {
    worker_connections 8192; # Maximum number of connections per process
    multi_accept on; # Allow worker_process to accept multiple connections simultaneously
    use epoll; # Optimal event processing method for Linux
}

http {
    ## Core performance settings
    sendfile on;
    tcp_nopush on;
    tcp_nodelay on;
    keepalive_timeout 65; # Timeout for keepalive connections
    keepalive_requests 1000; # Maximum number of requests per keepalive connection
    types_hash_max_size 2048;
    server_tokens off; # Hide Nginx version for security

    ## MIME types
    include /etc/nginx/mime.types;
    default_type application/octet-stream;

    ## SSL/TLS settings (global, if applicable)
    ssl_protocols TLSv1.2 TLSv1.3;
    ssl_prefer_server_ciphers on;
    ssl_ciphers "TLS_AES_128_GCM_SHA256:TLS_AES_256_GCM_SHA384:TLS_CHACHA20_POLY1305_SHA256:ECDHE-RSA-AES128-GCM-SHA256:ECDHE-RSA-AES256-GCM-SHA384";
    ssl_ecdh_curve secp384r1; # For TLS 1.2
    ssl_session_timeout 1d;
    ssl_session_cache shared:SSL:10m;
    ssl_session_tickets off;
    ssl_stapling on;
    ssl_stapling_verify on;
    resolver 8.8.8.8 8.8.4.4 valid=300s; # DNS servers for OCSP
    resolver_timeout 5s;

    ## Gzip / Brotli compression
    gzip on;
    gzip_vary on;
    gzip_proxied any;
    gzip_comp_level 6;
    gzip_buffers 16 8k;
    gzip_http_version 1.1;
    gzip_types text/plain text/css application/json application/javascript text/xml application/xml application/xml+rss text/javascript;
    gzip_min_length 1000; # Minimum response size for compression

    # If Brotli module is installed:
    # brotli on;
    # brotli_comp_level 6;
    # brotli_static on; # Serve pre-compressed .br files
    # brotli_types text/plain text/css application/json application/javascript text/xml application/xml application/xml+rss text/javascript image/svg+xml;

    ## Logging (access and errors)
    access_log /var/log/nginx/access.log;
    error_log /var/log/nginx/error.log warn;

    ## Buffers
    client_body_buffer_size 128k;
    client_header_buffer_size 128k;
    client_max_body_size 100m; # Maximum client request body size
    large_client_header_buffers 4 256k; # Increase for large headers

    include /etc/nginx/conf.d/*.conf; # For additional configs
    include /etc/nginx/sites-enabled/*; # For virtual hosts
}
Configuring Proxy Cache and FastCGI Cache
Create directories for the cache and set permissions:
sudo mkdir -p /var/cache/nginx/proxy_cache
sudo mkdir -p /var/cache/nginx/fastcgi_cache
sudo chown -R www-data:www-data /var/cache/nginx
Add to the http block of nginx.conf or to a separate file (e.g., /etc/nginx/conf.d/cache.conf):
# Proxy Cache Zone
proxy_cache_path /var/cache/nginx/proxy_cache levels=1:2 keys_zone=my_proxy_cache:100m inactive=60m max_size=10g;

# FastCGI Cache Zone
fastcgi_cache_path /var/cache/nginx/fastcgi_cache levels=1:2 keys_zone=my_fastcgi_cache:100m inactive=60m max_size=10g;
Example usage in a virtual host (/etc/nginx/sites-available/your_app.conf):
server {
    listen 80;
    listen [::]:80;
    server_name example.com www.example.com;
    return 301 https://$host$request_uri; # Redirect to HTTPS
}

server {
    listen 443 ssl http2; # Enable HTTP/2
    listen [::]:443 ssl http2;
    server_name example.com www.example.com;

    ssl_certificate /etc/letsencrypt/live/example.com/fullchain.pem;
    ssl_certificate_key /etc/letsencrypt/live/example.com/privkey.pem;
    ssl_trusted_certificate /etc/letsencrypt/live/example.com/chain.pem;

    # HSTS
    add_header Strict-Transport-Security "max-age=31536000; includeSubDomains; preload" always;
    add_header X-Frame-Options "DENY";
    add_header X-Content-Type-Options "nosniff";
    add_header X-XSS-Protection "1; mode=block";
    add_header Referrer-Policy "no-referrer-when-downgrade";

    root /var/www/your_app/public;
    index index.php index.html index.htm;

    # Static caching on Nginx and in the browser
    location ~* \.(jpg|jpeg|gif|png|webp|svg|ico|css|js|woff|woff2|ttf|eot|otf)$ {
        expires 365d;
        add_header Cache-Control "public, no-transform";
        try_files $uri =404;
    }

    # Proxy Cache for API (if any)
    location /api/v1/data {
        proxy_pass http://backend_api_server;
        proxy_cache my_proxy_cache;
        proxy_cache_valid 200 302 10m; # Cache 200 and 302 responses for 10 minutes
        proxy_cache_valid 404 1m;     # Cache 404 for 1 minute
        proxy_cache_key "$scheme$proxy_host$request_uri";
        proxy_cache_bypass $cookie_nocache $http_pragma $http_authorization; # Do not cache for specific conditions
        proxy_no_cache $cookie_nocache $http_pragma $http_authorization;
        add_header X-Proxy-Cache $upstream_cache_status; # Show cache status
    }

    # FastCGI Cache for PHP applications
    location ~ \.php$ {
        try_files $uri =404;
        fastcgi_split_path_info ^(.+\.php)(/.+)$;
        fastcgi_pass unix:/run/php/php8.2-fpm.sock; # Path to PHP-FPM socket
        fastcgi_index index.php;
        fastcgi_param SCRIPT_FILENAME $document_root$fastcgi_script_name;
        include fastcgi_params;

        fastcgi_cache my_fastcgi_cache;
        fastcgi_cache_valid 200 302 1h; # Cache successful responses for 1 hour
        fastcgi_cache_valid 404 1m;
        fastcgi_cache_key "$scheme$request_method$host$request_uri";
        fastcgi_cache_bypass $cookie_nocache $http_pragma $arg_nocache; # Bypass cache
        fastcgi_no_cache $cookie_nocache $http_pragma $arg_nocache;
        add_header X-FastCGI-Cache $upstream_cache_status;
    }

    # Microcaching for all HTML pages (example)
    location / {
        proxy_pass http://backend_app_server; # Or fastcgi_pass
        proxy_cache my_proxy_cache; # Or my_fastcgi_cache
        proxy_cache_valid 200 1s; # Cache for 1 second
        proxy_cache_valid 404 1m;
        proxy_cache_key "$scheme$request_method$host$request_uri";
        proxy_cache_bypass $cookie_nocache $http_pragma $http_authorization;
        proxy_no_cache $cookie_nocache $http_pragma $http_authorization;
        add_header X-Micro-Cache $upstream_cache_status;
    }
}
Rate Limiting and DDoS Protection
Add to the http block of nginx.conf:
# Request limit: 5 requests/sec, burst 10 (10 requests can be processed at peak, then delay)
limit_req_zone $binary_remote_addr zone=mylimit:10m rate=5r/s;

# Connection limit: 20 simultaneous connections from one IP
limit_conn_zone $binary_remote_addr zone=per_ip:10m;
Use in the server or location block:
server {
    # ...
    limit_conn per_ip 20; # Apply to the server as a whole

    location /login {
        limit_req zone=mylimit burst=10 nodelay; # Apply to /login, do not delay burst
        # ...
    }

    location /api/v1/sensitive {
        limit_req zone=mylimit burst=5; # Apply to sensitive API, delay burst
        # ...
    }
}
Backend Buffer Optimization
If Nginx acts as a reverse proxy for a backend (e.g., Node.js, Python Gunicorn), these settings in the location or server block are critical:
location / {
    proxy_pass http://your_backend;
    proxy_set_header Host $host;
    proxy_set_header X-Real-IP $remote_addr;
    proxy_set_header X-Forwarded-For $proxy_add_x_forwarded_for;
    proxy_set_header X-Forwarded-Proto $scheme;

    proxy_buffers 32 4k; # 32 buffers of 4KB each
    proxy_buffer_size 8k; # Size of the first buffer
    proxy_busy_buffers_size 16k; # Maximum size of buffers that can be busy sending
    proxy_temp_file_write_size 32k; # Size of data written to a temporary file
    proxy_max_temp_file_size 0; # Disable writing to temporary files on disk if enough RAM is available
    proxy_connect_timeout 60s;
    proxy_send_timeout 60s;
    proxy_read_timeout 60s;
}
After any Nginx configuration changes, always check the syntax and reload the service:
sudo nginx -t
sudo systemctl reload nginx
Common Mistakes When Optimizing Nginx on VPS
Even experienced engineers can make mistakes, especially when working with high-load systems and limited VPS resources. Knowing these pitfalls will help you avoid them.
Insufficient File Descriptor Limits
Mistake: Setting worker_connections in Nginx to a high value (e.g., 8192) but ignoring file descriptor (FD) limits at the operating system level. By default in Linux, the FD limit for processes can be low (e.g., 1024). Nginx uses FDs for each connection, as well as for log files, configuration, and cache. If the OS limit is lower than the total number of connections Nginx tries to open, you will get "too many open files" errors in Nginx logs, and the server will not be able to accept new connections, despite correct worker_connections settings.
How to avoid: Increase the FD limit for the Nginx user (usually www-data or nginx) in /etc/security/limits.conf and/or globally via /etc/sysctl.conf. Ensure that ulimit -n for the user running Nginx matches or exceeds the desired worker_connections. After changing limits.conf, a session or server restart may be required.
# In /etc/security/limits.conf
# Add or modify:
# www-data    soft    nofile    65535
# www-data    hard    nofile    65535

# Restart Nginx after changing limits (VPS reboot may be required)
sudo systemctl restart nginx
Excessive or Incorrect Caching
Mistake: Caching personalized content (e.g., pages after login, shopping carts) or overly aggressive caching of dynamically changing data. This can lead to users seeing someone else's or outdated content, which is a serious security and user experience issue.
How to avoid: Use proxy_cache_bypass and fastcgi_cache_bypass directives to exclude requests with authorization cookies, unique tokens, or POST requests from the cache. Carefully consider proxy_cache_key to account for all parameters affecting content uniqueness. For very dynamic content, use microcaching with a short lifespan (1-5 seconds) or completely forgo Nginx caching for such pages if the application itself caches effectively.
Ignoring Logging or Overly Verbose Logging
Mistake: Completely disabling Nginx logs (access_log off) in an attempt to save resources, or conversely, overly verbose logging of every request, including static content, leading to huge log files, high I/O, and rapid exhaustion of disk space on the VPS.
How to avoid: Do not disable logs completely; they are critically important for debugging, monitoring, and security analysis. Instead, optimize the log format (log_format) to include only necessary data. Disable logging for static files (images, CSS, JS) that are successfully served from cache, as they create a lot of noise. Use access_log off; inside the location block for static content. Configure log rotation (logrotate) for automatic compression and deletion of old logs.
# In nginx.conf in the http block
log_format custom_log '$remote_addr - $remote_user [$time_local] "$request" '
                      '$status $body_bytes_sent "$http_referer" "$http_user_agent" '
                      '"$http_x_forwarded_for" "$upstream_response_time" "$request_time"';
access_log /var/log/nginx/access.log custom_log;

# In the server block for static content
location ~* \.(jpg|jpeg|gif|png|webp|svg|ico|css|js|woff|woff2|ttf|eot|otf)$ {
    expires 365d;
    add_header Cache-Control "public, no-transform";
    access_log off; # Disable logging for static content
    try_files $uri =404;
}
Unoptimized SSL/TLS Settings
Mistake: Using outdated TLS versions (1.0, 1.1), weak ciphers, or lacking HSTS. This not only makes your application vulnerable but also slows down the TLS handshake, increasing latency.
How to avoid: Always use TLS 1.2 and TLS 1.3 (if Nginx is compiled with OpenSSL 1.1.1+). Choose only strong, modern ciphers. Enable HSTS and OCSP Stapling. Regularly check your SSL/TLS configuration using services like SSL Labs. Update Nginx and OpenSSL for the latest security and performance improvements.
Ignoring Monitoring and Load Testing
Mistake: Applying optimizations "blindly" without measuring before and after, and without regularly monitoring Nginx's performance under real or simulated load. This leads to problems going unnoticed or new optimizations causing regressions.
How to avoid: Implement a monitoring system (NGINX Amplify, Prometheus/Grafana, Netdata) to track key Nginx metrics (RPS, Latency, CPU/RAM usage, cache hits/misses, errors). Regularly conduct load testing (k6, JMeter, Gatling) on test or staging environments to identify bottlenecks and verify the effectiveness of optimizations before deploying them to production. Analyze Nginx logs for errors, warnings, and anomalies.
Excessive Use of Nginx Modules or Features
Mistake: Enabling many optional modules or using complex configurations that do not provide tangible benefits but increase memory and CPU consumption. For example, using ModSecurity without real necessity or overly complex rewrite rules.
How to avoid: The "simpler is better" principle is especially relevant for VPS. Enable only the modules and features you truly need. Every additional directive or module adds overhead. Conduct benchmarking with various configurations to understand which changes truly yield performance gains and which merely complicate the system.
Checklist for Practical Nginx Optimization
This step-by-step algorithm will help you systematically approach Nginx optimization on your VPS.
-
Audit of Current State
Conduct an audit of your current Nginx configuration, VPS resources (CPU, RAM, Disk I/O, Network), and web application performance (Latency, RPS, Error Rate). Use
top,htop,free -h,iostat, as well as tools like Lighthouse, WebPageTest to collect baseline metrics. -
Nginx and OpenSSL Update
Ensure you have the latest stable versions of Nginx and OpenSSL installed (minimum OpenSSL 1.1.1 for TLS 1.3). If necessary, update them or recompile Nginx with the required modules (Brotli, HTTP/3).
-
System Limits Configuration
Increase file descriptor limits (
ulimit -n) for the Nginx user and configure TCP stack parameters in/etc/sysctl.conf(net.core.somaxconn,net.ipv4.ip_local_port_range,net.ipv4.tcp_tw_reuse). -
Worker Processes and Connections Optimization
Set
worker_processes auto;andworker_connectionsto an adequate value (e.g., 4096-8192) innginx.conf, corresponding to system limits. -
HTTP/2 Enablement and Configuration
Add
http2to thelisten 443 ssl;directive in theserverblock for your HTTPS host. Consider implementing HTTP/3 (QUIC) if supported. -
SSL/TLS Best Practices Configuration
Use
ssl_protocols TLSv1.2 TLSv1.3;, modernssl_ciphers, enablessl_stapling on;and add the HSTS header (Strict-Transport-Security). -
Static Caching Configuration
Enable
expires 365d;andadd_header Cache-Control "public";for static files. Disableaccess_logfor static files in the correspondinglocationblock. -
Nginx Proxy/FastCGI Cache Implementation
Define
proxy_cache_pathandfastcgi_cache_pathin thehttpblock. Useproxy_cache/fastcgi_cacheinlocationblocks to cache responses from the backend. Don't forget_bypassand_no_cachefor personalized content. -
Microcaching Configuration
For dynamic but frequently requested pages, configure
proxy_cache_valid 1s;orfastcgi_cache_valid 1s;. -
Gzip/Brotli Compression Enablement
Activate
gzip on;and configuregzip_types. If the Brotli module is available, use it for better compression (brotli on;). -
Rate Limiting Configuration
Define
limit_req_zoneandlimit_conn_zonein thehttpblock and applylimit_req/limit_connto the appropriateserverorlocationblocks for protection against overloads and attacks. -
Buffer Optimization
Configure
client_body_buffer_size,client_header_buffer_size,proxy_buffers, andproxy_buffer_sizefor optimal client and backend interaction, minimizing disk writes. -
Security Headers Configuration
Add
X-Frame-Options,X-Content-Type-Options,X-XSS-Protectionheaders and consider implementingContent-Security-Policy. -
Testing and Monitoring
After each stage of changes, check the configuration (
sudo nginx -t), reload Nginx (sudo systemctl reload nginx), and conduct load testing. Set up continuous monitoring of performance and errors. -
Iterative Optimization
Optimization is a continuous process. Analyze monitoring data, identify new bottlenecks, and continue to improve your Nginx and application configuration.
Cost Calculation and Economics of Nginx Optimization
Investing in Nginx optimization on a VPS is not just a technical exercise, but a strategic decision that directly impacts operational expenses (OpEx) and the scalability of your project. In 2026, the cost of VPS continues to decrease, but at the same time, performance requirements are increasing. Proper optimization allows you to postpone upgrading your VPS to a more expensive plan or even switch to a cheaper one, while serving the same or even larger traffic volume.
Calculation Examples for Different Scenarios
Scenario 1: Saving on VPS Upgrade
Imagine your web application on a VPS with 2 vCPU, 4GB RAM, and 80GB NVMe ($20/month in 2026) starts experiencing performance issues at a peak load of 500 RPS. Without optimization, the logical step seems to be an upgrade to a VPS with 4 vCPU, 8GB RAM, and 160GB NVMe ($40/month). This would double your infrastructure costs.
However, deep Nginx optimization (caching, HTTP/2, Brotli, system settings) can reduce the load on the backend and Nginx by 30-50%. If, thanks to Nginx Proxy Cache, 60% of requests are served without contacting the backend, and HTTP/2 and Brotli reduce loading time and traffic volume, then your current VPS can easily handle 700-800 RPS. This means you have postponed the upgrade for several months or even a year, saving $20/month * X months. Over a year, this amounts to up to $240 in savings.
Scenario 2: Increasing Throughput Without Increasing Costs
Suppose your SaaS project on a VPS ($30/month) serves 1000 active users and generates 1000 RPS. You want to increase the number of users to 2000, which would potentially double the RPS. Without optimization, this would lead to the need to double VPS resources (and costs up to $60/month).
With an optimized Nginx (e.g., 70% cache hits for static and 40% for dynamic, effective rate limiting), your current VPS can withstand up to 1500-1800 RPS without significant performance degradation. This allows you to scale to 1500-1800 users without increasing your monthly VPS costs. You get a 50-80% increase in throughput for the same money, which directly impacts the profitability of your SaaS.
Hidden Costs and How to Optimize Them
- Engineer Time: The most significant "hidden" cost is the time of a highly qualified DevOps engineer or developer. However, this is an investment. Hours spent configuring Nginx will pay off by reducing future infrastructure costs and decreasing the number of incidents. Automating Nginx deployment with Ansible, Terraform, or Docker/Kubernetes reduces these costs in the long run.
- Monitoring: Monitoring systems (Prometheus, Grafana, NGINX Amplify) require installation, configuration, and sometimes a paid subscription. This is not an expense but a necessary investment that helps to promptly identify problems and evaluate the effectiveness of optimizations.
-
Disk Space for Cache: Disk caching requires additional space. On a VPS with NVMe drives, this can be more expensive than on HDDs. However, the cost of disk space is usually lower than the cost of additional CPU or RAM. Effective cache management (
inactive,max_size) helps control its size. - SSL Certificates: In 2026, Let's Encrypt provides free SSL certificates, eliminating this expense. However, for Enterprise-level, paid EV or Wildcard certificates may be required.
Table with Calculation Examples
Approximate economics for an average SaaS project on a VPS in 2026:
| Parameter | Before Optimization | After Nginx Optimization | Difference/Savings |
|---|---|---|---|
| VPS Type | 4 vCPU, 8GB RAM, 160GB NVMe | 2 vCPU, 4GB RAM, 80GB NVMe | Transition to a cheaper plan |
| VPS Cost/Month (2026) | $40 | $20 | -$20/month |
| Maximum RPS (Web App) | 1000 RPS | 1500 RPS (on a cheaper VPS) | +500 RPS |
| Latency | 200-300 ms | 50-100 ms | -150-200 ms |
| Nginx Cache Hit Ratio | 0% | 60% (for static), 40% (for dynamic) | Significant reduction in backend load |
| Backend CPU Consumption | 80-90% at peak | 40-50% at peak | -40-50% |
| Backend RAM Consumption | 70-80% at peak | 50-60% at peak | -20-30% |
| Annual VPS Savings | - | - | Up to $240/year |
| Capacity Increase (users) | 1000 | 1500-1800 | +50-80% without additional costs |
As can be seen, investments in Nginx optimization pay off many times over. In addition to direct hardware savings, you get a faster and more stable service, which improves user experience, reduces customer churn, and contributes to the growth of your business.
Case Studies and Real-World Examples
Theory is important, but real-world examples demonstrate the true power of Nginx optimization. Here are a few case studies based on typical scenarios.
Case 1: Saving a Startup from Collapse Due to the "Habr Effect"
Problem
A young SaaS startup launched its product — an online tool for designers. The VPS server cost $35/month (4 vCPU, 8GB RAM) and ran on a Node.js backend with PostgreSQL. One fine day, an article about the product appeared on a popular tech portal, causing the "Habr effect" — an explosive growth in traffic. RPS soared from 50 to 1500. The server started responding with 502/504 errors, response time increased to 5-10 seconds, and the database was constantly "choking." Users couldn't register, sessions were interrupted. The startup was losing potential customers at the most crucial moment.
Solution
The team urgently contacted a DevOps specialist. First, Nginx was configured as a reverse proxy with deep caching. The following steps were taken:
- Nginx Proxy Cache was configured for all static resources (CSS, JS, images), as well as for some API endpoints that returned common data (e.g., tariff list, public templates).
proxy_cache_valid 200 302 1h;was set. - Microcaching (
proxy_cache_valid 200 1s;) was implemented for the main page and product description pages, which were updated no more frequently than once every few minutes. This allowed Nginx to serve fresh content while handling peak loads. worker_connectionswere increased to 8192 and corresponding system file descriptor limits were set.- HTTP/2 and Brotli compression were enabled.
limit_req_zonewas configured to protect against scanning and bots that also attacked the site.
Result
After implementing these changes, Nginx began serving up to 70% of requests from cache. The load on the Node.js backend and PostgreSQL dropped by 3-4 times. Response time stabilized at 150-250 ms. The server was able to withstand peaks of up to 2000 RPS without performance degradation, using the same VPS for $35/month. The startup not only survived the "Habr effect" but also effectively converted a significant portion of new traffic into registrations, avoiding costly and emergency infrastructure upgrades.
Case 2: Optimizing a WordPress Blog on VPS for SEO and Speed
Problem
A popular WordPress blog, hosted on a VPS for $25/month (2 vCPU, 4GB RAM), was experiencing slow loading times. Core Web Vitals scores were low (CLS, LCP, FID), which negatively affected its SEO ranking. During peak loads (e.g., after publishing a new article), the server would "freeze," and PHP-FPM processes consumed all available RAM.
Solution
To solve the problem, a comprehensive approach was applied with an emphasis on FastCGI Cache and static optimization:
- Nginx FastCGI Cache was configured to cache all blog pages. The cache lifespan was set to 10 minutes (
fastcgi_cache_valid 200 10m;). For authenticated users (admins), the cache was bypassed (fastcgi_cache_bypass $cookie_wordpress_logged_in;). - Aggressive static caching (images, CSS, JS, fonts) was configured with
expires 365d;and logging disabled for them. - HTTP/2 and Gzip compression were enabled (Brotli was not available in the current Nginx build).
- PHP-FPM parameters (
pm.max_children,pm.start_servers) were optimized to better match the available RAM on the VPS. - Security headers (HSTS, X-Frame-Options) were configured to improve the overall security rating.
Result
After implementing the changes, Nginx began serving up to 95% of static content and up to 80% of dynamic pages from cache. The main page loading time was reduced from 3-4 seconds to less than 1 second. Core Web Vitals scores significantly improved, leading to an increase in the blog's search engine rankings. PHP-FPM processes now consumed significantly less RAM, and the server became stable even under peak loads, using the same VPS for $25/month. This allowed the blog owner to focus on content creation rather than server issues.
Tools and Resources for Nginx Monitoring and Debugging

Effective optimization is impossible without continuous monitoring and the right debugging tools. In 2026, many mature solutions exist to help you maintain Nginx in optimal condition.
Utilities for Nginx and System Management
-
nginx -t: Always use this command after any changes to your Nginx configuration to check syntax. This will prevent errors when reloading the service. -
nginx -s reloadorsudo systemctl reload nginx: For safely reloading the configuration without stopping the service. -
nginx -V: Shows the Nginx version, compilation parameters, and enabled modules. Useful for checking HTTP/2, Brotli, or other module support. -
top/htop: Standard utilities for real-time monitoring of CPU, RAM, and process usage. Help quickly identify Nginx processes consuming many resources. -
iostat/iotop: For monitoring disk I/O. Critical for caching servers to ensure the cache does not cause disk bottlenecks. -
netstat -tulnp/ss -tulnp: Shows open ports and active network connections. Useful for verifying that Nginx is listening on the correct ports. -
tail -f /var/log/nginx/access.log/error.log: Real-time log viewing. Indispensable for debugging problems and monitoring requests.
Monitoring and Testing
- NGINX Amplify: Official monitoring tool from NGINX Inc. Provides detailed information on Nginx performance, including RPS, Latency, cache hits/misses, and worker process status. Offers a free tier for one server.
-
Prometheus + Grafana: A powerful combination for collecting, storing, and visualizing metrics. Nginx Exporter allows collecting data from
nginx_status. Enables creating custom dashboards and alerts, ideal for deep performance analysis. - Netdata: Lightweight but highly functional real-time monitoring. Installs with a single command and provides rich interactive dashboards for the entire system, including Nginx.
- k6: A modern load testing tool written in Go. Allows writing test scripts in JavaScript, easily integrates into CI/CD. Excellent for testing Nginx under high load.
- JMeter / Gatling: More heavyweight but very powerful load testing tools, especially for complex scenarios with authentication, sessions, and multiple steps.
- SSL Labs Server Test: An online service for deep analysis of your server's SSL/TLS configuration. Helps ensure you are using strong ciphers, TLS 1.3, and HSTS.
- WebPageTest / Google Lighthouse: Tools for analyzing page load performance from a user's perspective. Help evaluate the impact of caching, HTTP/2, and compression on real speed.
Useful Links and Documentation
- Official Nginx Documentation: Always up-to-date and comprehensive source of information on all directives.
- Nginx Blog: Publishes articles on new features, performance, and best practices.
- Mozilla SSL Configuration Generator: Helps generate secure and up-to-date SSL/TLS settings for Nginx.
- SSL Labs Server Test: Check your SSL/TLS configuration.
- Google PageSpeed Insights: Web page performance analyzer from Google.
Troubleshooting: Solving Common Nginx Problems
Even with the most careful configuration, problems can arise. The ability to quickly diagnose and resolve them is critically important. Here are some common problems and approaches to solving them.
502 Bad Gateway / 504 Gateway Timeout
Description: These errors indicate that Nginx could not get a timely or correct response from the upstream (backend) server. 502 usually means the backend returned an invalid response or crashed, 504 means the backend did not respond within the set timeout.
Diagnosis:
- Check Nginx error logs (
/var/log/nginx/error.log). Details such as "connect() failed (111: Connection refused)" or "upstream timed out" will be listed there. - Check the status of the backend application (PHP-FPM, Node.js, Gunicorn, etc.). Use
sudo systemctl status php8.2-fpmor similar commands. - Check the backend application's own logs.
- Ensure that the backend application is listening on the correct port/socket, and Nginx is configured to connect to it (
proxy_passorfastcgi_pass). - Check network connectivity between Nginx and the backend (
ping,telnetto the backend port).
Solution:
- Increase Nginx timeouts (
proxy_connect_timeout,proxy_send_timeout,proxy_read_timeout) and backend application timeouts if requests are indeed long. - Optimize the backend application to respond faster.
- Increase the number of worker processes or threads in the backend so it can handle more parallel requests.
- Check if VPS resources (CPU, RAM) are being exhausted by the backend.
High Nginx CPU Usage
Description: Nginx itself is usually very efficient and rarely causes high CPU load unless it is performing intensive operations (e.g., SSL encryption on old hardware, compressing large amounts of data on the fly).
Diagnosis:
- Use
htopto see which Nginx processes are consuming CPU. - Check
nginx -Vto ensure Nginx is compiled with an up-to-date OpenSSL version. - Check access logs for an unusually large number of requests (DDoS attack, bots).
- Estimate the volume of data Nginx is compressing on the fly (if gzip/Brotli is enabled).
Solution:
- Ensure
worker_processesis set to the number of CPU cores. - Use TLS 1.3 and modern ciphers; they are more efficient.
- Configure rate limiting to cut off excessive requests.
- For static content, use pre-compressed files (
gzip_static on;orbrotli_static on;) so Nginx doesn't spend CPU on on-the-fly compression. - Check if active cache writing is happening on a slow disk, which can cause delays and indirectly affect CPU.
Out of Memory
Description: Nginx or the backend application consumes too much RAM, leading to slowdowns, swap usage, or even application crashes due to the OOM Killer.
Diagnosis:
- Use
free -handhtopto monitor RAM usage. - Check Nginx and backend logs for memory-related errors.
- Evaluate the size of the Nginx cache (
keys_zone,max_size) and buffers (proxy_buffers) if they are too large for your VPS. - Check PHP-FPM settings (
pm.max_children,php_memory_limit) or similar for other backends.
Solution:
- Decrease
worker_connectionsif each worker consumes too much memory. - Decrease
max_sizefor Nginx cache orkeys_zone. - Optimize Nginx buffers so they are not excessively large.
- Optimize the backend application for memory leaks or inefficient RAM usage.
- Decrease the number of backend worker processes or the memory limit for each process.
- If nothing helps, your VPS may simply not be able to handle the current load, and an upgrade is required.
SSL/TLS Problems
Description: Browsers report SSL certificate errors, the site is unavailable via HTTPS, or slow SSL handshake.
Diagnosis:
- Check Nginx error logs.
- Use the online service SSL Labs Server Test for a deep analysis of your configuration.
- Ensure that the paths to
ssl_certificateandssl_certificate_keyin Nginx are correct and the files exist. - Check that the certificate has not expired.
- Ensure Nginx is listening on port 443 (
listen 443 ssl;).
Solution:
- Update or re-issue the expired certificate.
- Correct paths in the Nginx configuration.
- Ensure the firewall (ufw, firewalld) allows incoming connections on port 443.
- Use SSL Labs recommendations to configure strong ciphers and protocols.
- Enable OCSP Stapling to speed up certificate validation.
When to Contact VPS Provider Support
If you have exhausted all Nginx and backend optimization possibilities, and performance or stability issues persist, the cause may lie beyond your control:
- Network issues: Unexplained packet loss, high pings to your VPS, low bandwidth that does not match the advertised speed.
- Hardware issues: Slow disk I/O, unstable CPU operation, sudden VPS reboots.
- Virtualization issues: "Noisy neighbor" effect, where neighboring VPSs on the same physical host consume too many resources, affecting your VPS.
In these cases, provide the provider with as detailed logs, metrics, and diagnostic results as possible to expedite problem resolution.
FAQ: Frequently Asked Questions on Nginx Optimization
What is the optimal Nginx cache size for a VPS with 4GB RAM?
For a VPS with 4GB RAM, it's reasonable to allocate up to 5-10GB of disk space for Nginx Proxy/FastCGI cache, while the keys_zone size (storing cache metadata in RAM) should not exceed 100-200MB. If you have plenty of RAM and a fast SSD/NVMe, you can increase keys_zone up to 500MB and max_size of the cache up to 20-30GB. It's important to monitor Nginx RAM usage and disk I/O. If the cache is actively being flushed to disk, it may indicate insufficient RAM for keys_zone or overly intensive cache usage.
Should Nginx be used as a load balancer on a single VPS?
On a single VPS, Nginx can be used as a load balancer if you have multiple backend application instances (e.g., several Node.js or Gunicorn processes) listening on different ports, or if you use a microservices architecture. This allows Nginx to efficiently distribute requests among them, increasing fault tolerance and evenly utilizing the CPU. However, this will not provide server-level fault tolerance. In the event of a VPS failure, the entire service will become unavailable.
How often should Nginx be updated?
It is recommended to keep an eye on stable Nginx releases (e.g., 1.20.x, 1.22.x, 1.24.x) and update when new versions with important security or performance fixes are released. Typically, updating every few months or when new LTS versions of your distribution are released is sufficient. Always test updates in a staging environment before deploying to production.
Is it necessary to use a separate VPS for Nginx and the backend?
For small and medium-sized projects on a VPS, there is usually no need to separate Nginx and the backend onto different VPSs. Nginx is very lightweight and can efficiently run on the same server as the backend. Separation makes sense for very high loads, when Nginx itself becomes a bottleneck, or to enhance security, but for most VPS projects, this is overkill and leads to increased costs.
How does Nginx affect SEO?
Nginx directly impacts SEO through page load speed and availability. Fast page loading (thanks to caching, HTTP/2, compression) improves user experience and is an important ranking factor in Google (Core Web Vitals). Correct SSL/TLS configuration ensures a secure connection, which is also an SEO factor. Load resilience ensures that search engine crawlers can always access your content.
What is "Server Tokens off" and why is it important?
The server_tokens off; directive in nginx.conf disables the display of the Nginx version in HTTP response headers and on error pages. This is a security measure, as hiding the server version makes it harder for attackers to identify potential vulnerabilities specific to a particular Nginx version. While not a panacea, it is a good practice of "security through obscurity."
How to deal with DDoS attacks if Nginx rate limiting is insufficient?
If Nginx's built-in capabilities (limit_req, limit_conn) cannot handle a DDoS attack, it means the attack is powerful enough to overload even Nginx. In this case, it is necessary to use external DDoS protection services such as Cloudflare, Sucuri, Akamai, or solutions from your VPS provider. They operate at the DNS level or proxy traffic through their networks, filtering malicious requests before they reach your VPS.
Can Redis or Memcached be used for caching in Nginx?
Nginx itself does not directly support caching in Redis or Memcached. Its built-in caching mechanisms work with the file system and RAM (for metadata). However, you can use Nginx in conjunction with a backend application that uses Redis/Memcached for its own caching. For example, your PHP application can cache data in Redis, and Nginx can then cache responses from that PHP application.
How does Nginx interact with a CDN?
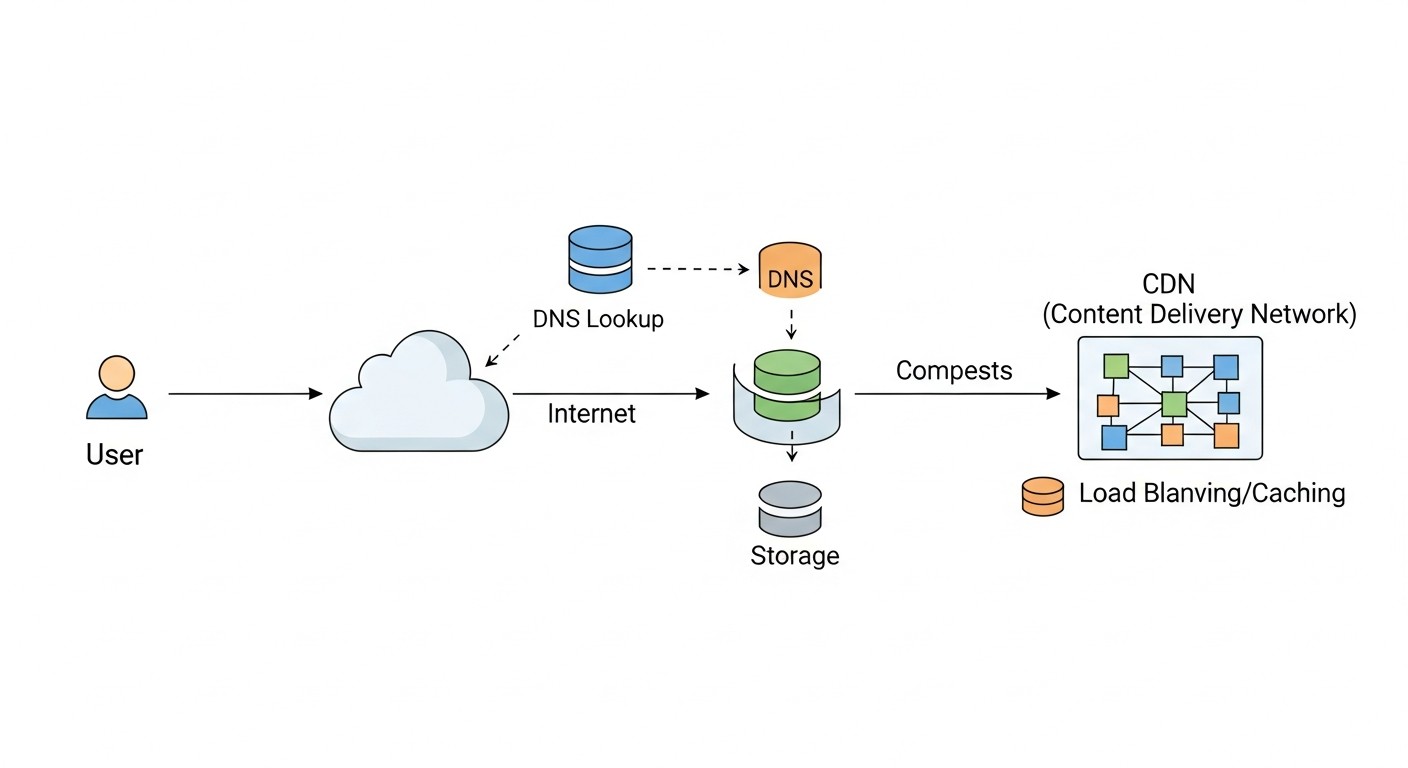
Nginx on your VPS can act as an "origin server" for a CDN. The CDN caches your content on its edge servers worldwide, significantly speeding up delivery to users and offloading your VPS. Nginx should be configured to work correctly with the CDN: pass correct Cache-Control, Expires, ETag headers, and handle requests from the CDN. Often, Nginx is also used to serve static content directly from its cache if a CDN was not used for some reason or did not cache a specific resource.
Which Nginx parameters are most critical for a VPS with limited RAM?
For a VPS with limited RAM, the following parameters are most critical:
worker_processes: Set toautoor equal to the number of cores, but no more, to avoid creating an excessive number of processes.worker_connections: A moderate value (2048-4096) for each process to avoid exhausting RAM for connections.keys_zonesize for cache: Keep it small (e.g., 50-100MB), as this is RAM.proxy_buffersandproxy_buffer_size: Set them to reasonable values (e.g., 4 8k), avoiding excessively large buffers that can consume a lot of RAM per connection.- Disabling temporary file writes to disk (
proxy_max_temp_file_size 0;), but only if you have enough RAM to buffer large responses. Otherwise, it's better to write to disk.
Conclusion
Optimizing Nginx for high-load web applications on a VPS in 2026 is not just a set of technical configurations, but a fundamental approach to building an efficient, secure, and cost-effective infrastructure. We have covered the three pillars of this optimization: caching, security, and performance, and provided concrete examples, recommendations, and tools.
Caching, from static content to microcaching dynamic content, is your most powerful ally in the fight for speed and reduced backend load. Properly configured SSL/TLS, rate limiting, and security headers will turn Nginx into a reliable shield against threats. And fine-tuning worker processes, buffers, and transitioning to HTTP/2 (and HTTP/3) will allow you to extract maximum performance from every vCPU and megabyte of RAM on your VPS.
Remember that optimization is an iterative process. Start with basic settings, then gradually implement more complex ones, constantly monitoring results and analyzing data. Don't be afraid to experiment in test environments and learn from real-world cases. The investment of time and effort in deep Nginx optimization will pay off many times over: your service will become faster, more stable, more secure, and you will be able to serve more users with the same resources, postponing costly upgrades.
Next steps for the reader:
- Analyze your current Nginx configuration and VPS performance metrics.
- Select 2-3 most relevant items from the checklist for your project and start implementing them.
- Set up a monitoring system (if you don't have one yet) to track the impact of your changes.
- Conduct load testing before and after implementing optimizations.
- Continuously learn and keep up with new Nginx features and web technologies.
Good luck in creating lightning-fast and reliable web applications!