How to Use Veeam for VPS Data Backup?
Data backup is one of the most crucial aspects of information security. Regularly backing up data on Virtual Private Servers (VPS hosting) is especially important to protect your information from loss or corruption. This article will discuss how to use the popular Veeam software for backing up data on a VPS.Step 1: Install Veeam on your VPS
The first step is to install Veeam software on your virtual server. You can download and install Veeam Backup & Replication from the official developer website. Follow the installation instructions to complete the process.
Step 2: Configure Data Backup
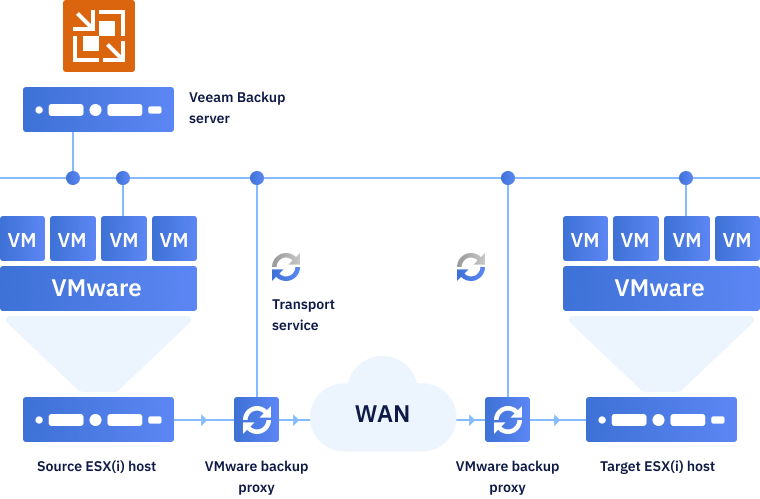
After installing the software, you need to configure the data backup settings. Open the Veeam Backup & Replication application and follow the setup wizard instructions. Select your data sources and backup schedule, and specify the storage location for your backups.
Step 3: Run the Backup Process
After configuring the data backup settings on your VPS, you can start the backup process. Click the “Start Backup” button and wait for the process to complete. Depending on the amount of data, this may take some time.
Step 4: Check Backup Results
After the data backup process is complete, it’s important to check the results and ensure everything went successfully. Open the Veeam Backup & Replication application and review the status of the last backup.
Step 5: Set Up Regular Backups
To ensure reliable data protection on your VPS, it’s recommended to set up regular backups. Configure a backup schedule in the Veeam Backup & Replication application to automatically create data copies at a specified interval.
In conclusion, using Veeam software for data backup on Virtual Private Servers is a reliable and efficient way to ensure the security of your information. By following the steps above, you can easily set up and perform regular data backups on your VPS.
