How to Configure an NTP Server on a VPS?
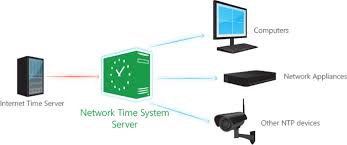
Today, we’ll show you how to set up an NTP server on your VPS hosting. NTP (Network Time Protocol) is a protocol that allows you to synchronize your server’s time with accurate time from dedicated sources. This is crucial for server operation, as accurate time is necessary for many processes, such as data backups, event logging, and more.Let’s get started!
Step 1: Installing the NTP Server
The first step is to install the NTP server on your VPS. To do this, run the following command:
sudo apt-get install ntp
This command will install the ntp package on your server.
Step 2: Configuring the NTP Server
Now you need to configure the NTP server. Open the ntp.conf configuration file using a text editor:
sudo nano /etc/ntp.conf
In this file, you can specify the time servers from which your server will synchronize its time. For example, let’s add servers from the NTP Pool Project:
- server 0.pool.ntp.org
- server 1.pool.ntp.org
- server 2.pool.ntp.org
Save the changes and restart the NTP service to apply the settings:
sudo service ntp restart
Step 3: Verifying the NTP Server
To verify that the NTP server is working correctly, run the following command:
ntpq -p
This command will show the current connection status with the time servers. If everything is correct, you will see a list of servers and their status.
Done! You now have an NTP server configured on your VPS. Congratulations!