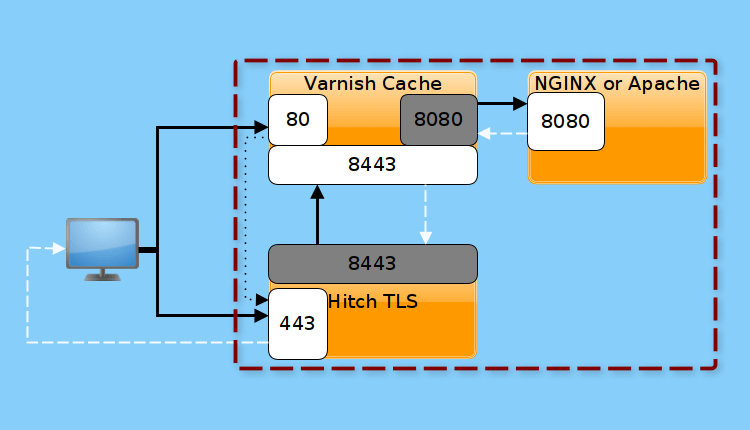
Setting up Varnish Cache on a VPS Server
If you want to improve your website’s performance, setting up Varnish Cache on your VPS hosting server is a great way to do it. Varnish Cache is a tool that caches your website’s content, speeding up loading times for your users. This article will guide you through setting up Varnish Cache on your VPS server.Installing Varnish on the Server
The first step is to install Varnish on your server. Use the following commands:
sudo apt update
sudo apt install varnish
After installing Varnish, you need to configure it properly.
Configuring Varnish
After installation, you need to edit the Varnish configuration file. Execute this command:
sudo nano /etc/default/varnish
Modify the VARNISH_LISTEN_PORT and VARNISH_STORAGE_SIZE parameters to your desired values.
Configuring Apache
For Varnish to interact with your web server, you need to configure Apache. Edit the /etc/apache2/ports.conf file and change the port to 8080.
Starting Varnish
After all the configurations are complete, you can start Varnish using this command:
sudo service varnish start
Varnish is now running on your server and will speed up your website’s loading time by caching requests. Remember to restart Apache after making these changes.
Setting up Varnish Cache on your VPS server will significantly improve your website’s performance and make it more responsive for users. Follow our recommendations and configure Varnish now!


