Installing phpMyAdmin on a Debian VPS
phpMyAdmin is a popular tool for managing MySQL databases via a web interface. This article will guide you through installing phpMyAdmin on a Debian Virtual Private Server (VPS hosting).Step 1: Connect to your VPS via SSH.
ssh username@your_server_ip
Step 2: Install phpMyAdmin using apt-get.
sudo apt-get update
sudo apt-get install phpmyadmin
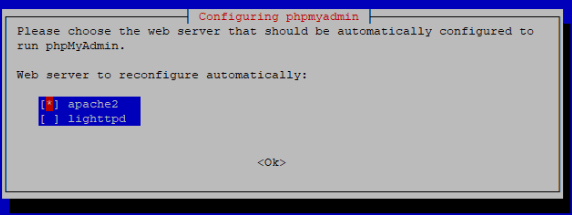
During installation, you’ll be prompted to select your web server. Choose Apache2 and press Enter.
You will also be asked to enter a password for the MySQL root user. Specify a password and confirm it.
Step 3: Configure phpMyAdmin to work with Apache.
sudo phpenmod mbstring
sudo systemctl restart apache2
Step 4: Access phpMyAdmin through a web browser.
Open your browser and enter http://your_server_ip/phpmyadmin in the address bar. Enter the root username and the password you set during installation.
You now have phpMyAdmin installed on your Debian VPS. You can manage your MySQL databases through its convenient web interface. Good luck!


