How to Configure Backups on ISPmanager VPS?
Data backup is a key aspect of securing your Virtual Private Server (VPS hosting). ISPmanager VPS provides convenient tools for creating and configuring regular backups to protect your information from loss or damage. This article will guide you through setting up backups on ISPmanager VPS.Step 1: Authentication
The first step in configuring backups on ISPmanager VPS is authenticating to the control panel. Log in to your ISPmanager VPS account using your credentials. To do this, enter your server’s servers with IP addresses in your browser’s address bar, then enter your username and password.Step 2: Creating a Backup Job
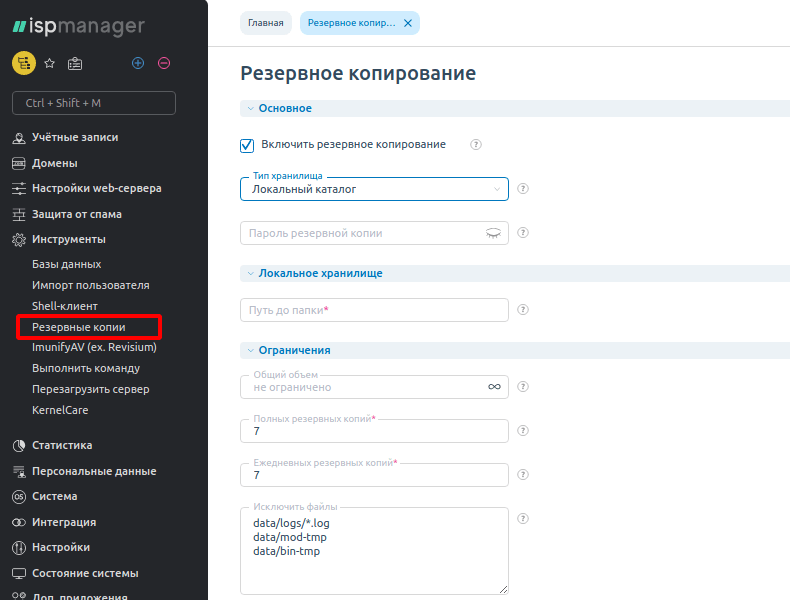
After successful authentication, you will see the main ISPmanager VPS menu. To create a new backup job, go to the “Backup” section and click the “Create Job” button. Select the data type for backup (files, database, or directories), set the job schedule, and specify the backup storage location.
Step 3: Configuring Backup Options
ISPmanager VPS offers various options for configuring the backup job. You can specify the backup frequency, additional parameters such as data compression or excluding specific files, and notifications about job completion.
Step 4: Starting the Job
After configuring all backup options, click the “Start Job” button to begin creating the backup. ISPmanager VPS will automatically execute the job according to the specified schedule and notify you of successful completion or any errors that may occur.
Step 5: Monitoring Job Execution
After starting the backup job, you can track its progress in the “Job Logs” section. There you will find information about the job status, start and end times, and any possible errors or warnings that may occur.
Conclusion
Setting up regular backups on ISPmanager VPS is a crucial part of ensuring your data security. By following the simple steps in this guide, you can create a reliable backup system that will help you avoid data loss and ensure its safety if needed.