Setting up HAProxy on a Dedicated Server
HAProxy (High Availability Proxy) is a robust and flexible solution for load balancing and traffic routing in your infrastructure. This article will guide you through setting up HAProxy on a dedicated servers.Before you begin, ensure you have a dedicated server with a Linux operating system installed. HAProxy supports many different operating systems, including Ubuntu, CentOS, Debian, and others.
Step 1: Installing HAProxy
First, let’s install HAProxy on your server. Execute the following commands in your terminal:
sudo apt update
sudo apt install haproxy
After installing HAProxy, you need to configure its configuration file.
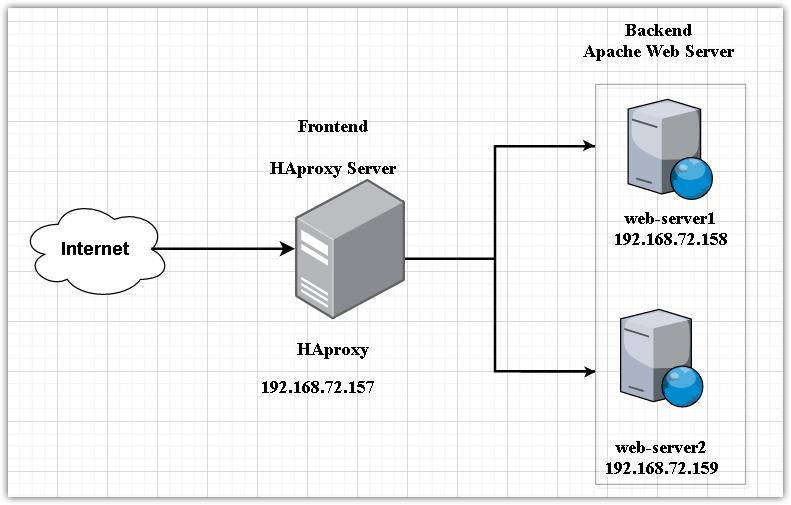
Step 2: Configuring the Configuration File
The HAProxy configuration file is located at /etc/haproxy/haproxy.cfg. Open this file using any text editor and configure it according to your needs.
You can specify load balancing across multiple servers, configure SSL termination, set up Access Control Lists (ACLs), and much more.
Step 3: Restarting HAProxy
After making changes to the HAProxy configuration file, you need to restart the service. Execute the following command:
sudo systemctl restart haproxy
HAProxy should now restart successfully and apply all your settings.
Step 4: Checking Functionality
To verify that HAProxy is working correctly, go to your server’s URL and the HAProxy port (usually 80 or 443) and ensure that you see a welcome page or other content.
You have successfully configured and launched HAProxy on your dedicated server! Now you can enjoy load distribution and high availability for your web application.