How to Configure Veeam for File Backup on a Dedicated Server?
In today’s world, information is one of the most valuable assets. Therefore, it’s crucial to ensure its safety and integrity. Many organizations use specialized software solutions like Veeam for data backup. This article will guide you through configuring Veeam for file backups on a dedicated servers.Before configuring Veeam, ensure you have the latest version installed. Also, verify you have access to the dedicated server where file backups will be stored. Follow our instructions below.
Step 1: Installing and Configuring Veeam Backup & Replication
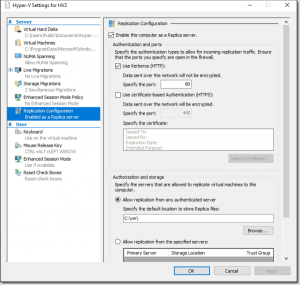
Download and install Veeam Backup & Replication on your dedicated server. After installation, open the program and complete the initial setup, specifying the path for storing file backups. Remember to set a backup schedule to automate the process.
Step 2: Configuring the Server Connection
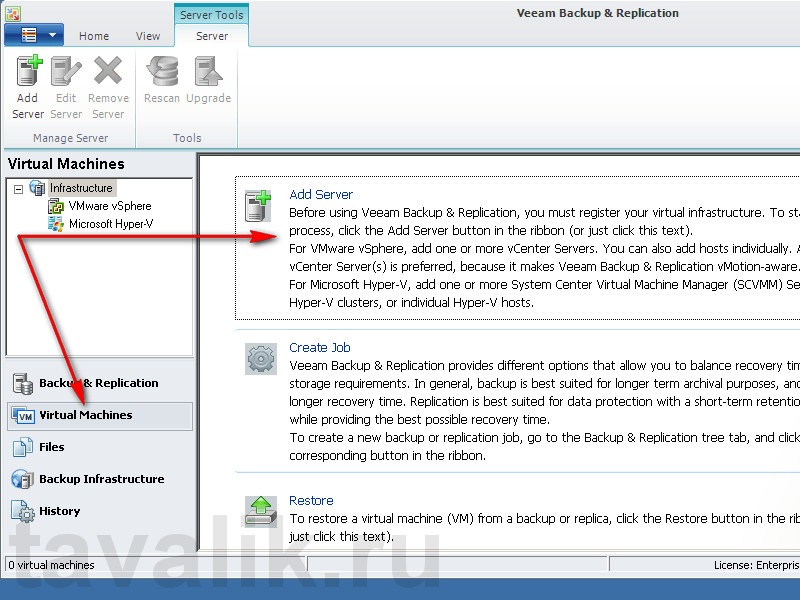
For Veeam to work with your dedicated server, you need to configure the connection. In the program, select the “Servers” section and add the server, specifying its servers with IP addresses and access credentials.Step 3: Creating a File Backup Job
After configuring the server connection, create a new file backup job. Enter the necessary parameters, such as the folders for backup and the job schedule. Save the job after completing the configuration.
Step 4: Starting the Backup and Monitoring the Process
Now that all settings are complete, start the file backup job. In the Veeam program, you can track the backup process and ensure that the data is successfully saved to the dedicated server.
By following these steps, you can configure Veeam for file backups on a dedicated server and ensure the safety and security of your data. Remember to regularly check the backups and update the software to improve the backup process.