How to Create a Virtual Machine Snapshot?
A virtual machine snapshot is an extremely convenient feature that allows you to save the state of your virtual machine at a specific point in time. This is especially useful if you need to quickly restore the system after it has been damaged or after erroneous changes. In this article, we will look at how to create a virtual machine snapshot.
Step 1: Open the Virtual Machine
The first step is to open the management interface of your virtual machine. To do this, launch a management program such as VirtualBox or VMware, and select the desired virtual machine from the list.
If you are using the command line, execute the following command:
VBoxManage snapshot "virtual_machine_name" take "snapshot_name"
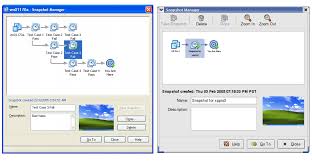
Step 2: Create the Snapshot
Now that you have opened your virtual machine, you can create a snapshot. To do this, click the «Create Snapshot» button or execute the following command in the command line:
VBoxManage snapshot "virtual_machine_name" take "snapshot_name"
After performing this action, your snapshot will be created, and the state of your virtual machine will be saved in it.
Step 3: Restore from Snapshot
If you need to restore your virtual machine from a snapshot, execute the following command in the command line:
VBoxManage snapshot "virtual_machine_name" restore "snapshot_name"
After that, your virtual machine will be restored to the state it was in when the snapshot was created.
Creating a virtual machine snapshot is a simple and effective way to ensure the security and stability of your system. Follow the steps above, and you can easily manage the state of your virtual machine.


