How to Enable VT-x Support in BIOS?
Virtualization is a powerful tool that allows you to run multiple virtual machines on a single physical hardware. However, for virtualization to work effectively, you need to enable hardware virtualization support in your computer’s BIOS. One of the important parameters in the BIOS that is responsible for activating virtualization is VT-x (or AMD-V for AMD processors).
If you get an error message when trying to run a virtual machine that virtualization is not enabled, then you need to activate the VT-x parameter in the BIOS settings. Below are the steps to help you enable VT-x support in BIOS.
Step 1: Start your computer and enter BIOS
Restart your computer and press the appropriate key (e.g., Delete, F2, F12) to enter the BIOS. This information is usually displayed on the screen when the computer starts.
Step 2: Find the «Processor» or «Security» section
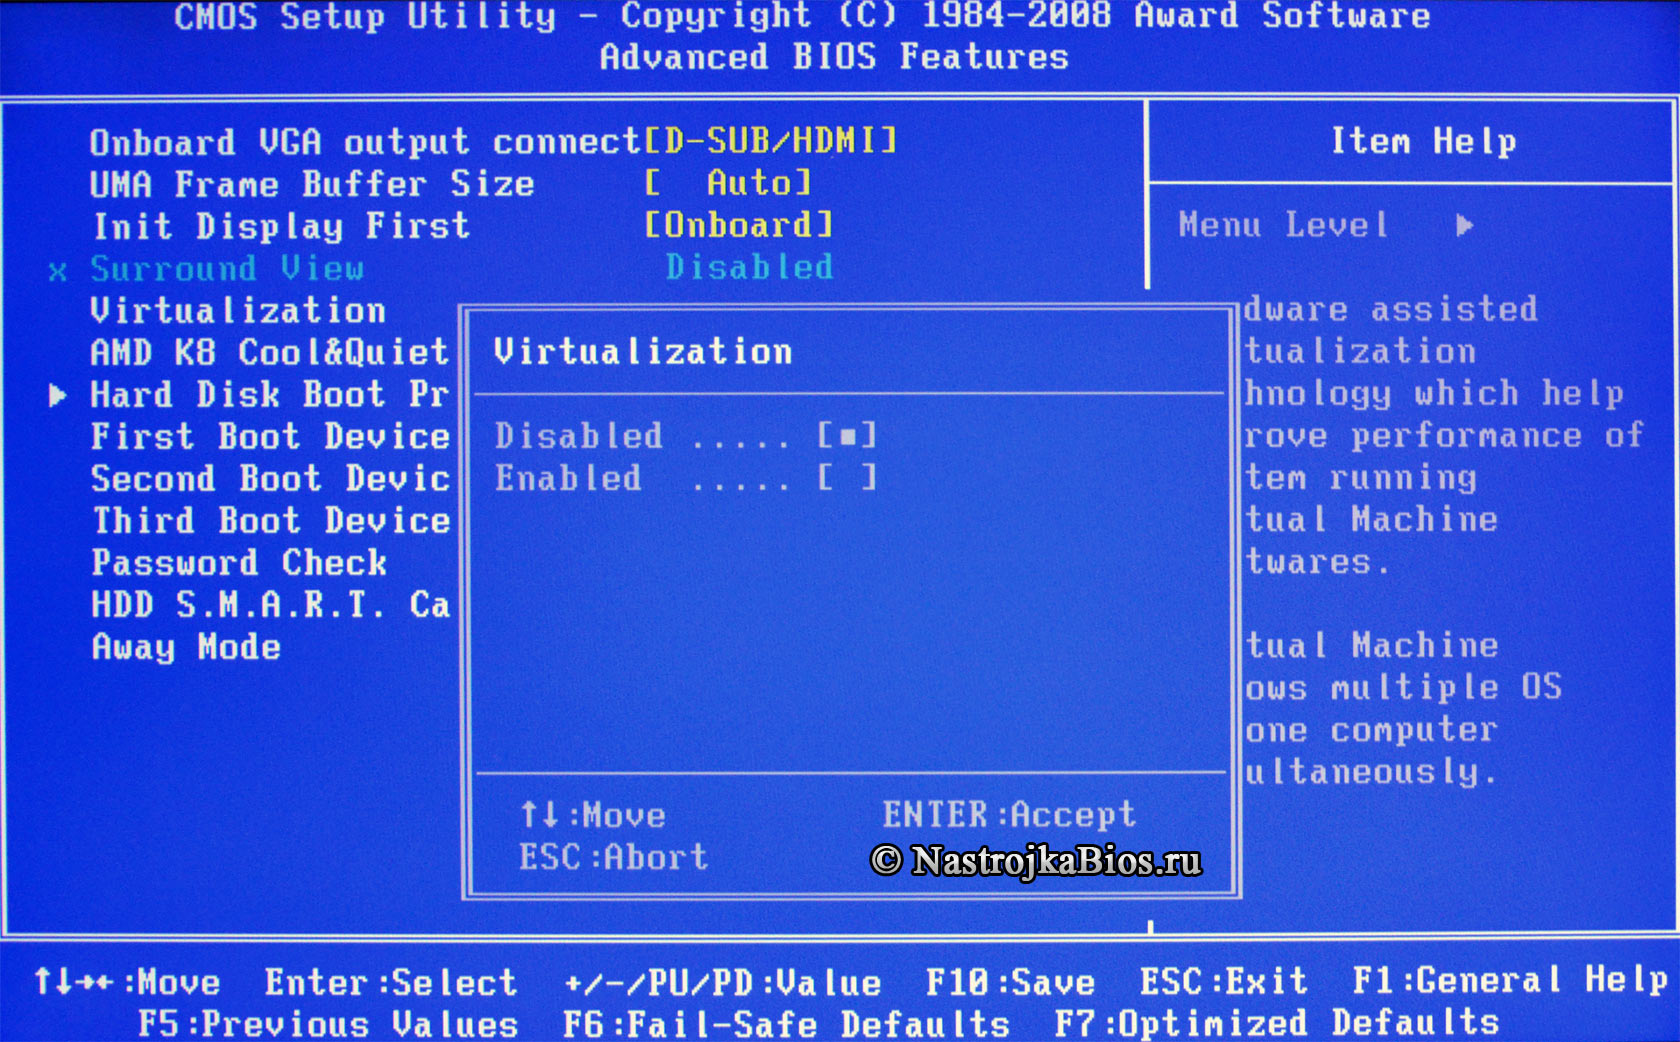
Once you have entered the BIOS, find the section that is responsible for processor settings or security. You need to find the parameter that is responsible for virtualization (VT-x or AMD-V).
Step 3: Enable the VT-x or AMD-V parameter
Select the VT-x or AMD-V parameter and enable it. This is usually done using the arrow keys on the keyboard to select the parameter and the Enter key to activate it.
Step 4: Save changes and exit BIOS
After enabling the VT-x or AMD-V parameter, be sure to save the changes in the BIOS. To do this, you usually need to select the appropriate menu item and confirm saving the changes.
Now you have enabled hardware virtualization support VT-x or AMD-V in the BIOS. Restart your computer and try running the virtual machine. Now it should work without errors related to the lack of virtualization support.
We hope these steps helped you enable VT-x support in BIOS and use virtualization without any problems.


